Cutest Dog Birthday Cake!

2016-03-06 12.58.27

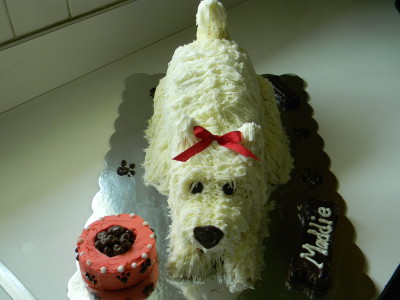
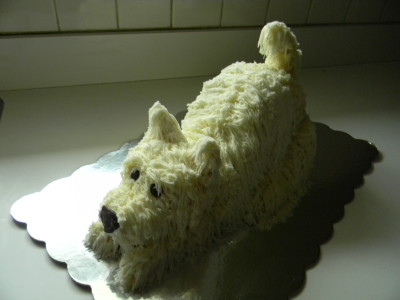
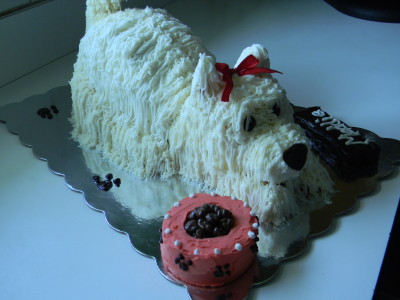
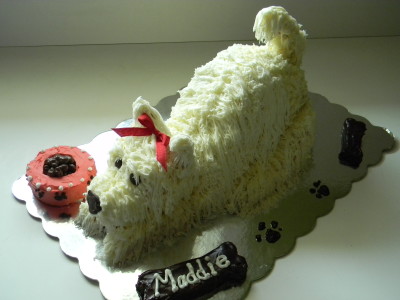
Yes, this is a cake.  Isn’t she sweet?  I made it for my dear friend’s daughter Maddie as you can see.  I used a special tip, it’s got tiny holes in it and was actually quite hard to squeeze the frosting out.  It was called a fur and grass tip, I found it on Etsy quite easily.  As always, I ONLY make real butter cream so I had to add a little more milk to make it come out of the tip more easily.  Unlike frosting made with shortening, butter cream frosting gets very soft by the warmth of your hands on the piping bag.  I piped the cake in sections, putting it into the refrigerator to allow the butter cream to set up.  I left the piping bag on the counter, if you were to refrigerate it, it would be impossible to squeeze the frosting out.  Best to use a heavy duty piping bag, the heat transfer is far less than using a plastic or disposable one.

2016-03-06 12.57.55

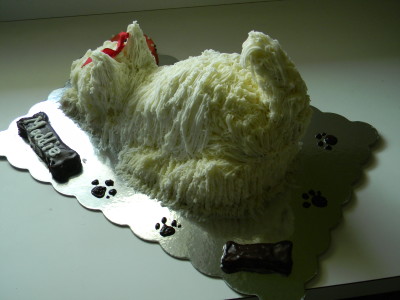
I added an edible dog bowl filled with raisinettes, chocolate dog foot prints and a couple of gnash covered pieces of cake cut into dog bones.  If I were to make another cake like this I would trace around the bones with white icing to better define them.  Next time.  The eyes and nose are melted semi sweet chocolate chips.  I piped them onto a piece of wax paper and refrigerated them until they were set.  You can’t really handle them until you’re 100% sure you’re ready to set them into the face.

2016-03-06 12.59.14

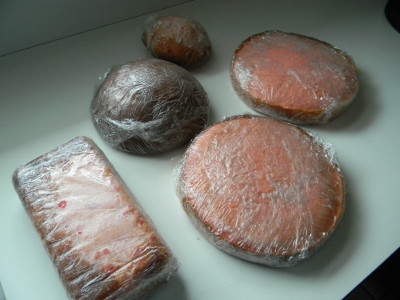
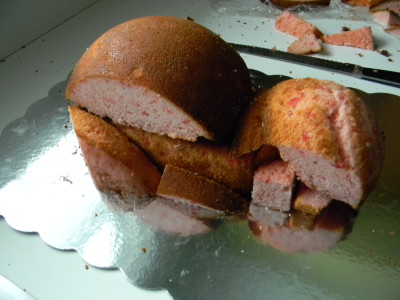
I wanted you to see all angles…I absolutely LOVED making this cake!  I’m going to now show you what I did to create her.  I baked a double recipe of yellow cake.  The guest of honor wanted a cherry cake so  I added rinsed, drained and minced maraschino cherries.  You can use your favorite recipe or even a box recipe.  Bake plenty of cake, you’ll need it.  Most importantly, make your cake ahead of time, wrap with Saran wrap well and freeze. Working with partially frozen cake is a total must!   Fresh room temperature cake is too soft and crumbly and would be way too hard to work with.

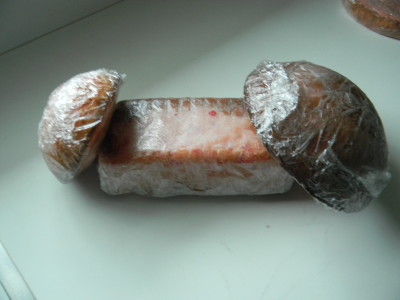
I used a couple of dome-shaped pans, one for the head and one for the little bottom that sticks up in the back.  I used a regular loaf pan for the body and thought I could use two 9″ cakes for the legs, tail and ears.  There was a good amount of one cake left, I put it back in the freezer to make a dessert trifle later.  Or there may be family members available to help with those pesky left over delicious pieces of cake!

2016-03-05 10.01.36

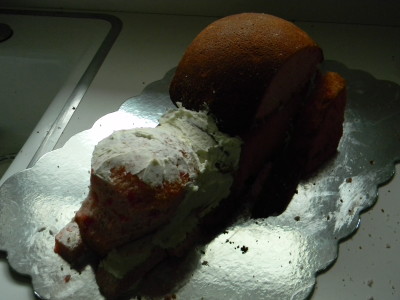
It is time to make a big batch of butter cream frosting or, the glue you will need to sculpt your cake.  You’ll also want to apply a “crumb” layer of frosting to the entire cake once you’ve got it into the shape you like.

2016-03-05 10.02.50

I started playing with the pieces, like a puzzle.  Time to unwrap the cakes and start sculpting.  The cool thing here is you can add or cut away pieces as you to shape the cake.

2016-03-05 10.41.29

At first I thought to place the cake on another cake base, no way!  Would’ve been way too hard to keep the bottom layer clean.  I thought to assemble the cake on another pan but the transfer would’ve been disastrous!  This was the best bet.  I could easily rid the board of crumbs or unwanted frosting.  You can get nice cake boards at Michael’s Craft Store.

2016-03-05 10.55.30

Here I began the gluing process.  You want all cake components to be solid.  Might be a bit messy at this point, it’s fine!  Plenty of time to clean up the board using a moist paper towel.

2016-03-05 11.17.26

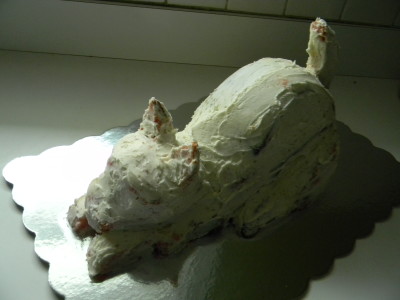
I added the tail with a 6″ skewer and the ears with a couple of toothpicks.  At this point it is looking very cat-like. Ryan quickly pointed this out to me and he was right.  I cut away a little more of the face below the eyes and added a bit more frosting to square off the face.  The cake is now coated with the “crumb” layer of frosting.  It’s time to start piping.

2016-03-05 13.12.24

Begin at the very bottom of the cake and work your way up.  I got too involved to take pictures as I went!  I started with the front paws and piped around the perimeter of the whole cake.  I did the face, head and ears all at once.  I did the back up through the tail then I had to put him into the refrigerator to set up a bit.  I took her out after about 30 minutes and finished piping.

2016-03-06 12.56.53

I kept the cake refrigerated overnight and in the morning added the finishing touches.  The dog bowl with kibble, the dog bones, the bow and the paw prints.

At this point, the cake can set out at room temperature until serving.  Room temperature cake is always better than cold cake.

Happy  Birthday Maddie!  I am quite sure this is a cake that she will never forget!

Enjoy creating!

Angie
Frozen Artichoke Tip and Artichoke and Fennel Salad…..

I’ve fallen in love with Trader Joe’s frozen artichokes.  I love that you only pay for artichokes and not the packing liquid as you do with the canned.

The first time I used them I tossed them with olive oil, lemon juice, garlic and salt & pepper.  I roasted them (when my oven was working!) at 375′ for about 20 minutes.  Delish!  The key ingredient here in terms of the brightness of the artichoke was the addition of the lemon (or acid.)   You do not have this issue with the canned artichokes because they add citric acid to the canning liquid. 

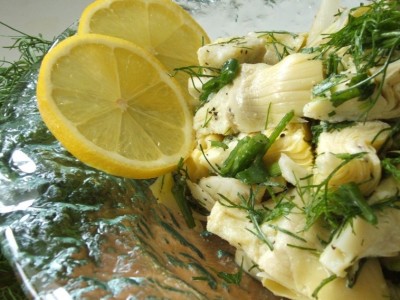
This spring like artichoke and fennel salad is really good alongside any fish or chicken dish.   Of course, I used the frozen artichokes in my salad.  When I steamed them in water and a little salt, they came out very gray.  Interestingly, I tossed them with the lemon dressing and poof, they returned to a more appetizing state.   Clearly acid is required in the cooking process which I found interesting that directions on the package did not mention this.

Steamed Frozen Artichokes

Rinse and drain a 12 ounce package of frozen artichokes.  Put into a pot with 1 tablespoon lemon juice and 3 tablespoons of water.  Steam covered over low heat until most of the water has evaporated, about 6-8 minutes.  Drain well and cool if you’re using in the above salad.   Great in any salad or pasta.  Roast with chicken or add to soups.   The possiblities are endless!

Artichoke and Fennel Salad with Lemon Dressing

2 fresh fennel bulbs with fronds
2 cans quartered artichokes, drained or two packages frozen, steamed, rinsed and cooled
3 tablespoons parsley, washed and chopped
3 green onions, rinsed and thinly sliced
3 tablespoons olive oil
2 tablespoons fresh or bottled lemon juice
2 cloves fresh garlic, crushed
½ teaspoon salt
¼ teaspoon pepper

1) Rinse thoroughly.  Trim off the bottom of the bulb and leave about 1″ of the fronds, slice thinly, place in a large bowl. Remove the tender frawns, the deep green portion, and chop coarsely. (Do not use the celery looking stalks, they are very tough, they would be great in soup.) Add parsley and green onions.
2) In a small bowl, whisk the olive oil through the pepper. Pour over vegetables and toss gently. Taste, add additional salt and pepper if necessary.

Have a great day!

Angie
Homemade Challah, Step by Step Instruction….

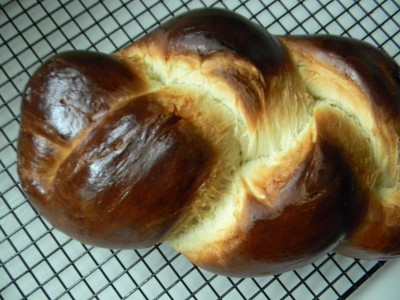
I loved everything about making this bread.  Loved the simple ingredients, the hand feel, and the smell in my house.  Next time I will double or triple the recipe.  Imagine french toast or homemade bread pudding made out of this bread…OH MY!

The dough did take quite some time for the first rising, about 2 hours.  I used regular yeast but you could use the rapid rise variety of yeast and you might be able to trim off 30-60 minutes here.  The dough itself is very dense, very lovely.  I found that when I kneaded the bread I virtually used no extra flour as I have in the past with other kinds of bread.

My friend gave me the ingredient list for this bread and she makes hers in a bread machine. I decided to make it the way I make most other yeast breads only I kneaded the dough a bit longer.  I got the same exact result.  The key here, I believe, is using bread flour as opposed to all purpose.  Bread flour has more gluten than all purpose flour.  This makes for a really nice, chewy yet tender texture.  So, so good.

Let’s get started….

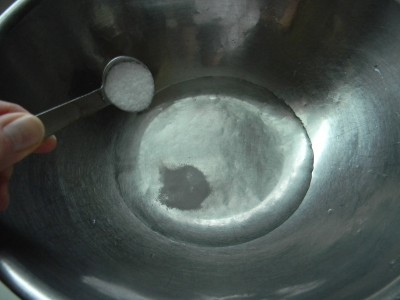
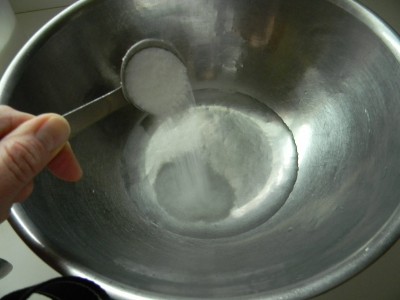
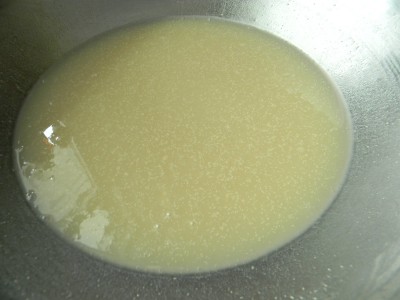
We begin with 3/4 cup of warm water.  (About the same temperature you’d make a bottle for a baby.)  Add  1 1/2 teaspoons of salt.  In a separate microwaveable bowl, melt 3 tablespoons of butter, set aside to cool.
Add 4 tablespoons of sugar.
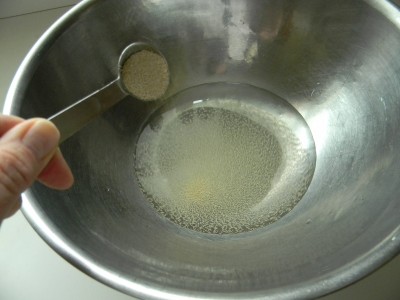
Add 2 teaspoons of dry yeast.
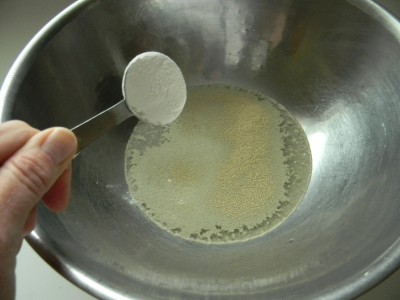
Measure out 3 cups of flour into a small bowl.  Take out one tablespoon and add it here.
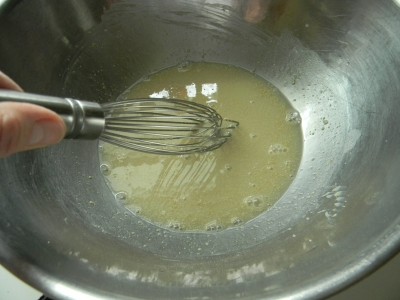
Whisk well to blend.  Allow it to sit for 10 minutes.
The yeast mixture should look like this.  If you look  closely, you can see bubbles.  This is the yeast coming to life.
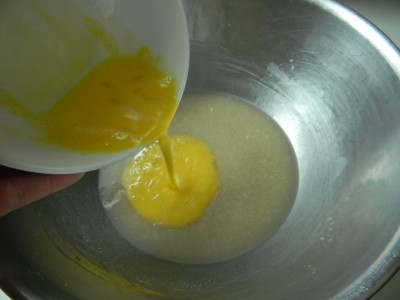
Add 2 large beaten eggs.
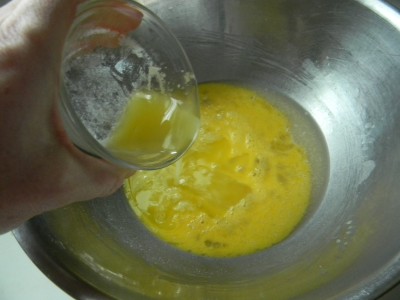
Add the cooled melted butter.  Whisk to blend.
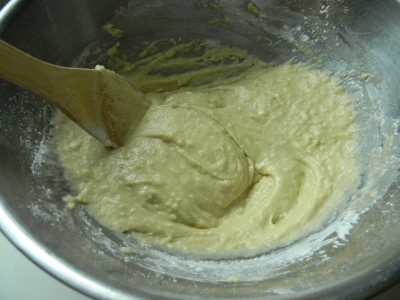
Next add half of the bread flour, beat well until smooth.
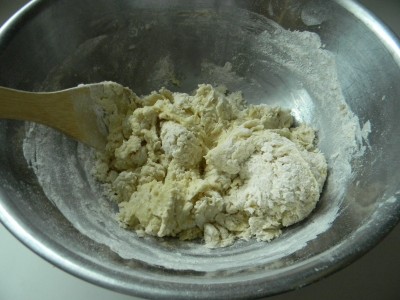
Add the rest of the flour and mix until it looks like this.
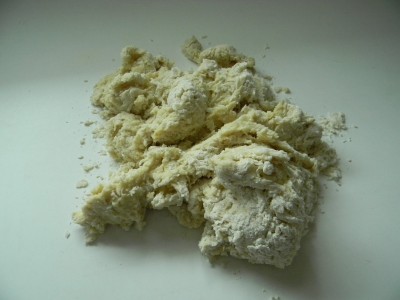
Dump the dough onto the counter and bring together with your hands to form a ball.
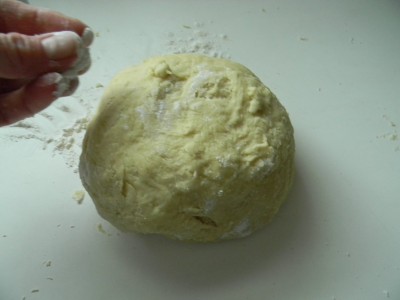
It should look like this.  I added the smallest amount of flour because it was sticking to the counter slightly.  Be careful not to add too much extra flour.  I found that I did not need any additional flour after this.  Knead the dough for 5-7 minutes.
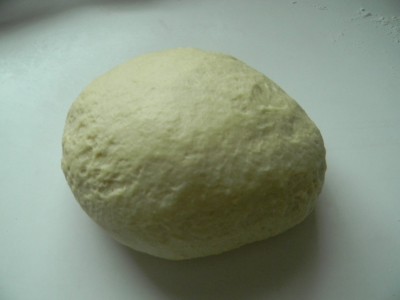
It should look like this when you’re done kneading.  The dough should be smooth and elastic.
Grease the inside of a small bowl with butter, plop the dough in and coat the dough with a thin layer of butter as well.
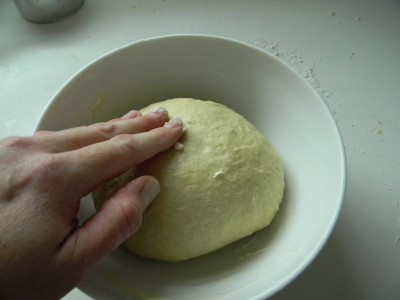
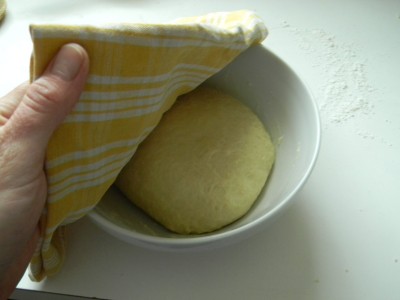
Now cover your little ball of dough with a clean cloth or kitchen towel.  Time to put it to rest in a nice warm place free of drafts.  If you have a gas stove, simply turn on the light in the oven and place the bowl on the center rack.  The pilot light and the light will provide the dough with a nice warm place to rise.  Allow it to rise until double in  bulk.   It took my dough about 2 hours on the first rise.  (If you have an electric oven, turn the heat on 300′ for one minute.  Turn off the heat and turn on the oven light.  It is now perfect for proofing the dough)
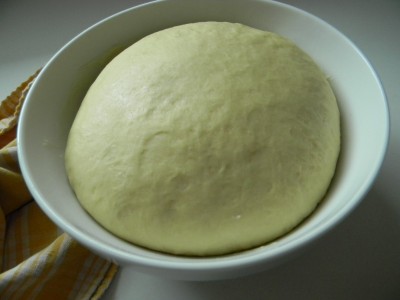
The dough has doubled in bulk, it’s ready to be shaped.
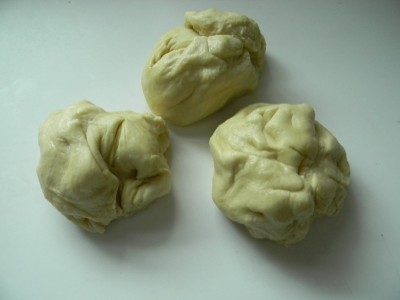
Punch the dough down and divide into 3 equal balls.
Roll each ball into 12″ sticks as shown above.  Pinch them together at the top.
Now braid and pinch the bottom together.
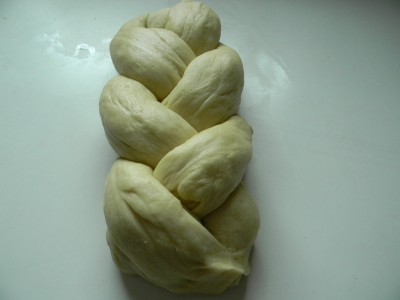
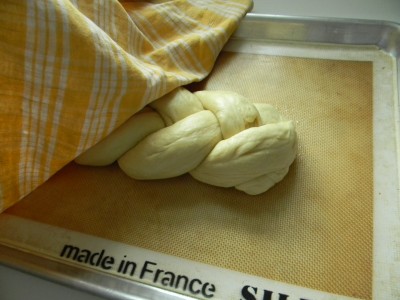
Place the shaped bread on a baking mat or parchment paper.  Cover the shaped bread with the clean towel.   The bread should just about double in size, it should take about 40 minutes.   Preheat the oven to 375′.
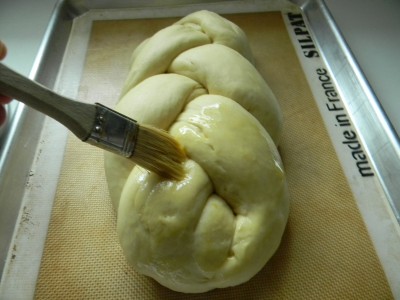
Beat an egg with a tablespoon of water and brush the oven ready bread well with the egg wash.   Bake for 25-27 minutes.  when you flick it with your finger and it has a hollow sound, it’s done.  Remove from the oven onto a cooling rack.  Enjoy it warm by tearing off chunks and slather with softened butter.   Delish!

Homemade Challah Bread

3 cups bread flour
3/4 cup water
1 1/4 teaspoon salt
2 teaspoons yeast
4 tablespoons sugar
2 large eggs
3 Tbsp butter, cut up

1 egg, 1 tablespoon of water

1)  Measure out 3 cups of bread flour in a small bowl.  In a large mixing bowl, add water, salt, sugar, yeast, and 1 tablespoon of flour out of the 3 cups of measured flour.  Whisk well to blend.  Allow to sit for 10 minutes.
2)  Melt the butter in a small microwaveable dish, set aside to cool.  Beat two eggs in a small bowl.
3)  Add the eggs and the cooled melted butter to the yeast mixture, whisk to blend.
4)   Add half of the bread flour and mix well until there are no lumps.
5)  Add the rest of the flour and mix.  Dump onto the counter and bring together into a ball.  Add a small amount of flour to the counter if the dough ball is a little sticky.  Knead for 5-7 minutes.  The dough should be elastic and smooth.
6)  Grease a medium size bowl with butter, add the dough, lightly grease the top of the dough.  Cover with a clean towel and allow to rise in a warm, draft free place.
7)  When the dough has risen to double it’s size, punch down the dough and divide into 3 equal pieces.  Shape into three 12″ logs and pinch together at the top.  Braid and pinch together at the bottom.   Cover with a clean towel and allow to rise for about 40 minutes.  Preheat the oven to 375″.
8)  Beat the egg with water.  Using a pastry brush, apply the egg wash liberally to the shaped and oven ready loaf.
9)  Bake for 25-27 minutes.  Enjoy warm by tearing off pieces with room temperature butter.  Store leftovers, if any, in a sealed plastic zip bag.  Makes one large loaf.

Thank you for sharing your recipe Genevieve!

Angie

Step by Step Sunday Onion Braised Pot Roast…..

This is a family favorite.  Tender, succulent onion braised beef served with sour cream mashed potatoes and gravy.  Are you hungry yet?  Let’s begin…..for the pot roast you will need:

2 1/2-3 lbs. beef pot roast
salt & pepper
2 large onions
5 large cloves garlic
1 1/2  cups water
1 cup wine

Generously season what appears to be half a cow!  Cripes!  Anyway, this is a 3 lb. roast.  It makes for wonderful leftovers, so I recommend making more than you need.  Don’t worry about over seasoning, especially with this amount….

Next, heat a large dutch oven or pan that can go into the oven with a lid over medium high heat.  When hot, add 2 tablespoons of olive oil and put the seasoned meat into the pan.  Cook about 7-10 minutes per side to caramelize the beef.

While the meat is browning, thinly slice a couple of large sweet onions…..

When the meat is nicely browned, remove the meat from the pan onto a platter.  Set aside.  Add onions to the pan, stir often.  Add a couple of tablespoons of water to the pan to prevent scorching.  Cook for about 10 minutes, or until soft.   Can you imagine how my house is smelling right about now?????
Of course, we must have plenty of garlic.  Slice 5 large cloves and add to the onions….
Cook for about 2 minutes.  Oh yes, time to preheat the oven to 325’…..

Push the onions off to the side and add the meat with the juices on the plate back to the pan.  Cover the roast with the onions and garlic.  Time for my favorite braising liquid…..

Add 1 1/2 cups of water and 1 cup of wine.  Oh look, a glass for me…how convenient! 
Cover with the lid and place into the oven….oh wait, the meat takes 3 hours, we’re eating at 6:30…better wait a bit!
Cook for 3 hours.  This would be a good time to prep your potatoes.  Peel your potatoes and put them into a large pot, add salt and cover with water.  I like to turn the heat on about 1 1/2 hours before the meat is done.  That way I can mash them and have them ready to go when the meat comes out of the oven.  My house smells unbelievable! 
The meat is done….it is so tender that it’s falling apart…..the epitome of comfort!
For the gravy…..
It is best to remove as much of the fat as possible from the drippings.  Put the roast onto a serving platter.  Remove as many of the onions as you can and put on top of the roast.  Cover with foil to keep warm.  If you have one of those fat separators, use it.  If you don’t put all of the liquid into a 2 cup clear measure.  Using your turkey baster, put it into the bottom of the cup with the juices and suck out just the liquid from the bottom, leaving the fat layer on top.  Put this liquid into a medium sauce pan.  You’ll want about 1 1/2 cups of broth, if you don’t have that much, just add water to get it to 1 1/2 cups.  In a liquid measuring cup, measure 1/2 cup of water and add 2 tablespoons of cornstarch.  Mix well and add to the broth mixture.  Turn on the heat to medium.  Heat until nicely thickened and give it a taste.  Season with salt and pepper if necessary.
I love this savory rich meal with a lovely cabbage salad.  Try my Red Cabbage and Avocado Salad with Peas.  The tart of the cider vinegar is fabulous with the roast.  Enjoy!

Best Boiled Eggs….. Light and Creamy Egg Salad…..

It seems so simple, but do you have a fool proof way to boil eggs?  My mother-in-law Patricia, shared how she makes hard boiled eggs.  I do this every time and they are always perfect.  Thank you Patricia!!

Eggs are the best, purest protein.  This egg salad is very good because it isn’t loaded with mayonnaise.  You do not miss the extra mayo and the yogurt gives it a slight “tang.”   Serve open faced on a slice of toasted whole grain bread over a bed of spinach.  Delish!!

6 large eggs
½ cup plain non fat yogurt
2 tablespoons mayonnaise
1 tablespoon yellow mustard
2 tablespoons minced red onion
2 large stalks minced celery stalks
½ teaspoon salt
¼ teaspoon black pepper
¼ teaspoon celery seeds

1) To boil eggs, fill pan that has a lid with cold water, add eggs. Place over high heat, bring to a boil. Once boiling, remove from heat and cover with lid. Let stand, covered, for 10 minutes. Drain hot water and fill pan with cold water to cool. Once cool, peel.
2) In a medium bowl, whisk together yogurt, mayonnaise, and mustard.  Add onion through celery seeds, mix well.  Taste. Adjust seasoning if necessary.   (This is the best time to taste and adjust seasoning due to the delicate nature of the eggs.)  Chop eggs and add to bowl, stir gently until just blended.  Refrigerate immediately in an air tight container.  Salad will keep nicely refrigerated for 3-4 days.  Gently stir before serving.