Post “Parent” Depression????

My big 1st grader!

Is there such a thing as post parent depression?  If not, here’s my take on it….

When you have your first child, you don’t really realize just how much your life will change until you experience it for yourself.  I feel very fortunate that I was able to stay home with Ryan.  Of course, this created a few challenges for me.  I really missed being out in the world.  I missed “lunching” with friends and staying on top of all the fashion trends working and simply being an adult.  Don’t get me wrong, I wouldn’t change a single thing, but this made me feel at times a little down.

When Ryan turned 3, I thought it time for pre school.  Kids could go 5 days a week, three (M,W,F), or two, (T,TH).  I opted for the two days a week, I just couldn’t do a day more!  I remember feeling sad when I left him there the first day.  There too was the end of the year party for pre school.  I was sad because the next step in our educational journey would be Pre-K.

Do you get where I’m going with this?  Pre-K, Kindergarten, and now 1st grade.  Our Jack is off at school, major change in our house, and now Ryan, gone all day! 

This morning when I dropped Ry off for his first day of 1st grade, my friend Sarah’s boy was starting kindergarten.  She got a little teary and I was feeling a little guilty because I didn’t feel a pang of sadness….until I went on my walk.

I set out on my walk, like most days in high gear.  It wasn’t until I came across the largest bee looking insect I’d ever seen!  I thought, boy, Ryan would love to see this!  Suddenly my mind was flooded with memories of walking my little boy to pre school, calling me “Mama”, (he still does:-) asking me for a “toochie” (this meant cookie).   I then was trying to remember exactly how he looked when he was much younger…I was a mess!  Emotional power walking.  I wonder if you earn more Weight Watcher’s Points when your crying and exercising????

I packed Ry’s first lunch of many today.  Reflection is good.  Time goes too quickly.  Enjoy the chaos that comes with kids, we’ll miss it when it’s gone.

Have a great evening!

Angie

Our Whirlwind Vacation…..


We started out in Ft. Collins, Colorado.  We went to visit my brother Rich and his family.  I’m pictured here with Ryan and Rich’s niece, Penelope.  We traveled a couple of hours from Ft. Collins to the Georgetown Loop Railroad.

Loved the scenic and relaxing ride!

The railroad was used in the late 1800’s for gold and silver mining.  Read more on the history of the railroad here.

It was great to spend time with my brother Rich (far right), and my nephews Cory (center), and Caleb (left).

Pictured here with my nephews is my sister in law Pam.  She is a massage therapist….total jackpot!  Yes, I received a glorious massage from her the day before my journey back to Chicago. 

My brother Steve also came along, he too lives in the Chicago area.  It was so great to be with my brothers!

The next day after our train ride, we ventured on to Estes Park and the Rocky Mountain National Park.  In one word….BEAUTIFUL!  One of the things I noticed from the moment I arrived in Denver was the lack of trash on the road sides and in public places.  There is a great respect for nature.

 The entrance into Rocky Mountain National Park.

It was great to bring Penelope along, Ry had a pal for the trip!

Awesome Caleb….the scenery is pretty awesome too!

This picture was taken from my car, thank you very much!  There were people getting far too close for my comfort.  The rangers came along and made the spectators leave.

Here you see a herd of elk.  We saw other herds and smaller groups through out our ride through the mountains.

Beauty.  Pure and simple.

What would vacation be without some fun in the sun and swimming???

My big (soon to be) first grader….

Ryan and I returned to Chicago with my brother Rich and Caleb.  We were home for one night then off to Michigan for a couple of family reunion picnics.  So FUN!

Aren’t cousins the best???  Here we have Ryan, Caleb, Lucas, and Bianca.

So fun, so great to be back home!  Now it’s time to gear up for school!

Have a wonderful day!

Angie

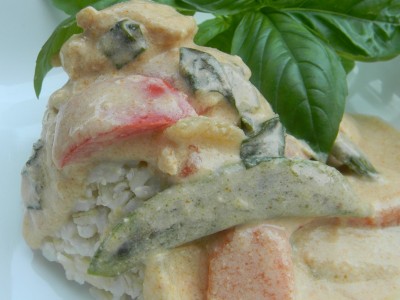
Simple Thai Red Chicken Curry With Steamed Rice….

I love grilling and all but I can’t stand over a hot grill in 95′ heat, come on!!  When it’s like this I want a quick and delicious dinner that goes together in a snap. 

This is a favorite dish that fits the bill.  Prep the vegetables  first.  Actually cooking time is only about 30 minutes.   Serve over brown or white rice.  Brown rice will take more time, so start it before you begin preparing the curry.

Use whatever vegetables you like.  I used carrots, red bell pepper, onions, sugar snap peas, and fresh basil.  Add edamame, broccoli or even sliced jalepeno peppers if you’d like more heat.  Feel free to substitute peeled and deveined shrimp for the chicken.   Cook until the shrimp turn bright pink.

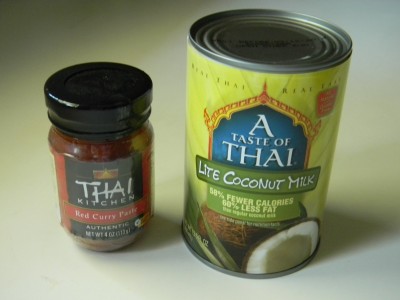
The key ingredients in this dish would be the coconut milk and Red Thai Curry Paste.

This curry paste is slightly spicy, it will not over power the dish with heat.  It is incredibly flavorful and delicious.  My recipe calls for enough to make the coconut milk slightly pink.  Feel free to add more to your taste.  Coconut milk lends a rich and deep flavor to the dish.

Thai Red Chicken Curry

1 large red pepper, seeded and cut into bite size pieces
2 large carrots, peeled and cut into 1/4″ slices
1 medium sweet onion, cut into bite size pieces
8 ounces sugar snap peas or pea pods
1 tablespoon canola oil
1 tablespoon red curry paste
2 cans unsweetened coconut milk (you can use light or regular)
2 tablespoons brown sugar
1 lb boneless skinless chicken breasts, cut into 1″ chunks
1 large bunch of basil, thinly sliced
3 cups cooked brown or white rice

1)  Heat a large heavy skillet over medium high heat.  Add the prepared red pepper, carrots, and onions.  Cook, stirring often, for about 4 minutes.  Add the snap peas and cook another minute.  Dump into a large bowl and cover loosely with foil.
2)  Add the curry paste to the pan.  Using a wooden spoon, mix into the oil.  Add the coconut milk and whisk to combine.  Add the brown sugar and whisk.  Bring to a simmer.  Add the raw chicken and simmer another 15 minutes.   Add the sliced basil just before serving.
3)  Add the basil and serve over steamed rice.  Makes 5-6 servings.

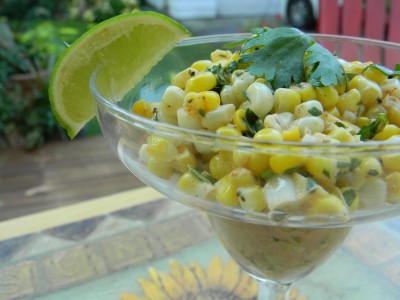
Fresh Grilled Corn Salad With Chili Lime Dressing….

This salad reminds me of corn on the cob served by street vendors in Mexico.   The combination of the sweet corn, lime and cilantro makes for a very light and refreshing summer salad.  I cook the shucked corn directly on the grill, no fuss with the husks or soaking and all that jazz.  Most often when I make corn on the cob, I end up with an ear or two left over.  Oil and season them up the same way and toss on the grill for some color.  Add the grilled corn to most any salad you’re serving for an unexpected treat.

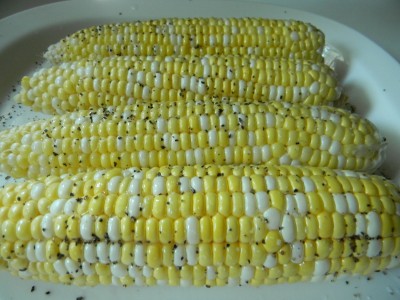
The easiest way to grill corn is to shuck it and coat evenly with canola oil.  Season with a couple of pinches of salt and pepper and right onto the grill for 10-12 minutes.

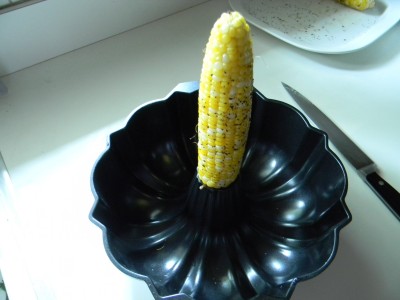
The best way to remove the corn from the cob without making a mess of the kitchen is to stick the cob into the top of a bundt pan.  It will hold the cob in place while you hold the top.  Use a sharp knife and carefully remove the corn from the cob.

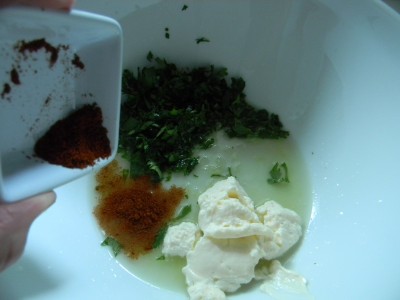
 Now for the dressing.  Squeeze the juice of two limes into a medium size mixing bowl.  Add 2 tablespoons of light mayonnaise, 1/2 cup fresh chopped cilantro(or more), and 1 teaspoon of chili powder.

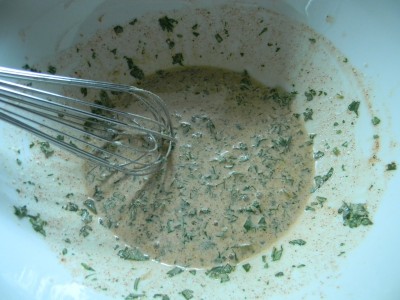
Whisk until combined.

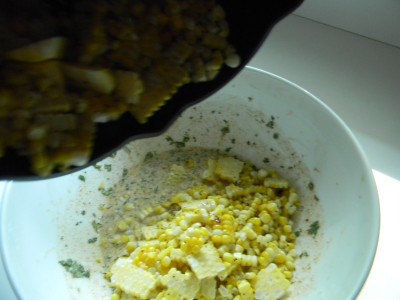
Add the corn and mix gently to combine. Give the salad a taste.  Add additional salt and pepper to taste.   Makes four 1/2 cup servings.

Fresh Grilled Corn Salad With Chili Lime Dressing

4 ears of sweet corn
2 teaspoons canola oil
salt and pepper

For the dressing:

2 limes, juiced
2 tablespoons light mayonnaise
1/2 cup chopped cilantro
1 teaspoon chili powder
2 pinches salt
1 pinch black pepper

1)  Preheat the grill to medium high.
2)  Shuck and rinse the corn cobs.  Rub the two teaspoons of oil over the corn cobs.  Season each piece with a little salt and pepper.  Place corn directly on the grill.  Grill for about 12 minutes, turning every few minutes.  Remove from grill and allow to cool until you can easily handle them.
3)  While the corn is cooling, add all dressing ingredients to a medium size bowl and whisk to blend. 
4)  Remove the corn from the cobs and add directly to the bowl with the dressing.  Mix to blend.  Add more salt and pepper to taste.  Makes four 1/2 cup servings.

*add black beans and diced red pepper and serve with grilled fish or chicken.
**Corn on the cob out of season? Try it with white frozen corn.  Cook in a skillet with a tablespoon of olive oil.  Saute until the sugar in the corn caramelizes.  Cool completely and continue with the rest of the salad.


Chris Turns 16!


Chris is 16!  We’re working on our driving hours, he will soon have his licence.  Life is good.  Sitting in front of him is the cake I’ve made him since he was 9.  Whenever I come across the pan, I can’t help but smile.

Seven years ago he’d been watching tv in the basement and presented me with a scap of paper with an 800 number on it.  His birthday was a few weeks away and he decided that he wanted the “Betty Crocker Bake-N-Fill” for his birthday cake.  It was this cool pan that would bake a cake that you could fill with ice cream, very cool.  I’d forgotten all about it and about a week later, he presented me with another piece of paper with the number scratched on it.  He said, “hey Ang, in case you lost the number, here’s the number again for the Betty Crocker Bake-N-Fill.”   I realized that this was a very serious request, I ordered the pans.

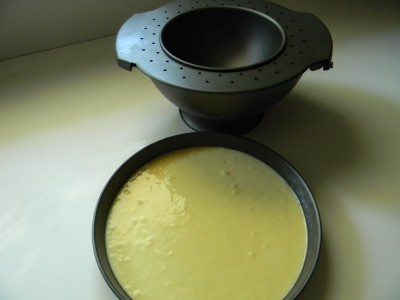
Aside from the very cheesey infomercial, the pans really work great!   You fill the pans with the batter and top the larger of the pans with the lid.

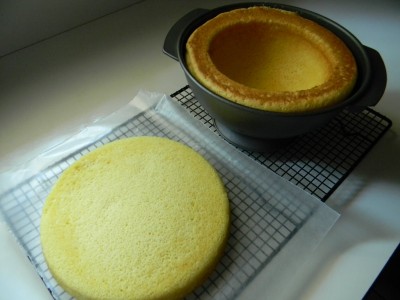
 You can see that the pan will bake around the indentation.

Once the cake is baked, cool, and then into the freezer. 

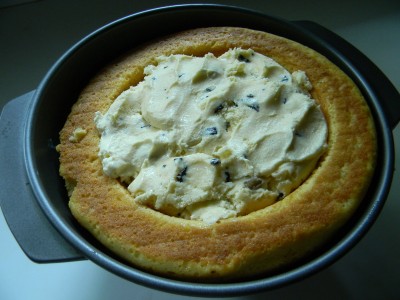
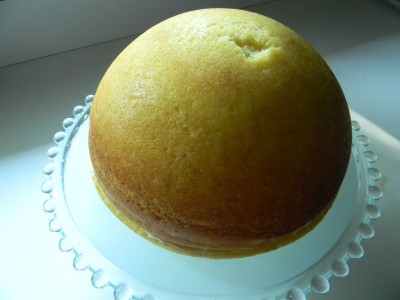
Fill the cake with the ice cream, flip over onto the base.

Ready to frost.  Ice it and right back into the freezer.  Take out of the freezer 20 minutes before serving.   

I so enjoy making each of my boys their own special birthday cakes.  I love that Chris has had this cake every year since we bought the pan. 

Happy boy/young man.  Where has the time gone?  He was so little when I met him, I remember the size of his little hands and all the missing teeth.   I hope he’ll continue to want this cake year after year, I so love making it:-)     So cute.  Warm fuzzies. 

I thought I’d share a couple of my favorite “Chris” birthday pictures…..

I LOVE little boys and cheesy smiles!  This is a picture of Chris BA, (before Ang)

This is the first cake I made for Chris, he was 7,  it too was an ice cream cake.   Very camera shy as you can see:-)

Enjoy every moment with your kids, in a blink they’ll be all grown up!

Angie
Back From “Pure Michigan”…..

Hello Everyone!

So sorry to be MIA!  No WiFi at our family lake house in “Pure Michigan.”   Too much effort to seek it out as I was a lazy loaf for a week!

Didn’t stop cooking, however, did plenty of that!  Gotta eat, right?  Had a really nice Italian dinner last night.  I made a Simple Marinara Sauce with a fun curly fusilli pasta, grilled hot Italian sausages, homemade Caesar salad (mine of course!), and homemade Garlic Bread.   It’s a little wierd having such a comfort type of dinner at a lake house in the middle of summer, but I sometimes crave a little of that.

So glad to be home!  Much of my focus has been getting Jack ready for his first year of college.  Big stuff.  I’m so excited for him, I think more so than he is presently.  Fear of the unknown and all that .

Speaking of unknown, if you printed my recipe for Raspberry Bars, please reprint!  Thankfully Susan casually mentioned that the eggs might go in somewhere!  I immediately made the correction, geeze!  Hopefully if you were in the midst of making them you’d have put them in as you normally would, with the sugar and butter, so sorry if I caused any inconvenience!!  Must be more careful, sometimes I work on posts late in the evening when I’m fried!  You know, when no one is asking where their shoes, hat, or wallet might be!

I’ve missed posting, please bear with me, I have sooooo many ideas I’m just dying to share:-)

Have a great day!

Angie
ps-the beautiful rose bush pictured is actually a desendant of a rose bush my Mother gave to my Grandma Rose when she was about 8 years old.  This bush has been going for over 60 years!  How cool is that???

Caesar Salad With Garlicky Croutons…..

It’s been so hot I haven’t had the energy to muster up much more than cool salads!  We’ve hardly spent time outside for the past week, huge bummer.  It’s absolutely beautiful looking outside but of course, it’s like an oven. 

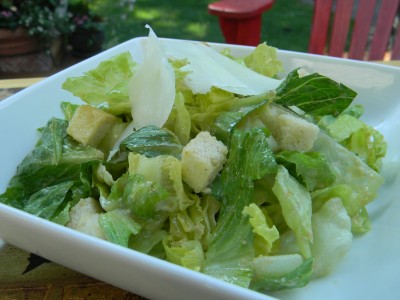
That being said, I’d like to share one of my favorite salads with you.  Caesar salad dressing is very simple to make.  I use the blender to completely pulverize all of the yummy ingredients.  I use light mayonnaise in lieu of a raw egg yolk, and of course, a Caesar salad just wouldn’t be without anchovies.  Before you wrinkle up your nose, I will tell you that when you blend these flavorful little fillets, you will not be able to detect them in the dressing.  Just this amazingly deep and rich flavor.

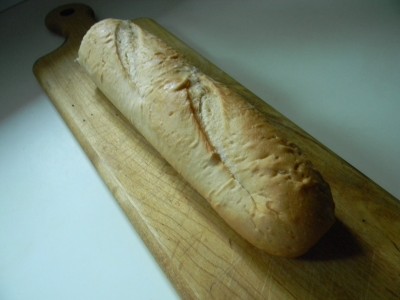
Another very important component of an authentic Caesar salad is croutons.  I simply cannot use a store bought crouton in my salad.   Use leftover bread ends or baguette.  If you simply cannot turn the oven on at this point, I understand! 

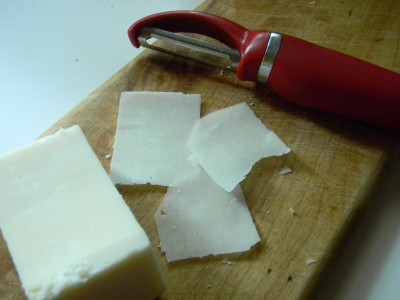
Lastly,  olive oil, (first cold pressed) and nice parmigiano cheese.  If you buy a chunk of it you can grate it or put 1/2″ chunks into the blender to make perfectly crumbled cheese.  For a lovely garnish use a basic vegetable peeler to make shavings. 

This recipe is pretty straight forward.  Feel free to double or triple it as it keeps well in the refrigerator for 3 weeks.  Check out my recipe for croutons below.

Authentic Caesar Salad

2 large cloves fresh garlic, coarsely chopped
2 teaspoons dijon mustard
2 anchovy fillets
2 teaspoons worchestershire sauce
2 tablespoons red wine vinegar
2 tablespoons light or regular mayonnaise
6 tablespoons olive oil, first cold pressed is best
6 tablespoons grated parmigiano
1/2 cup garlicky croutons (recipe below)
2  heads romaine lettuce, chopped

1)  If you’ve got a chunk of cheese, cut about a two inch piece into 1/2″ pieces and put into the blender.  Process until you have an evenly grated cheese.  Add the garlic through the olive oil and give it a whirl on high until you have a nice smooth consistency.
2)  Place the lettuce into a large mixing bowl.  Add the croutons and spoon about 4 tablespoons over the lettuce and toss.  Add additional dressing to thoroughly coat the lettuce.  Reserve the rest for another time.  Toss to evenly coat.  Plate the salad and top with a couple of parmigiano shavings.  Makes four servings.

Homemade Garlicky Croutons…..

What to do with leftover bread or crust ends?  Croutons, of course!  Great on any salad, but particularly necessary on a Caesar salad.  These are amazing and far better than any store bought crouton. 

Preheat the oven to 300′.  Cut the bread into 1/2″ pieces.  You’ll want about 4 cups of cubed bread.

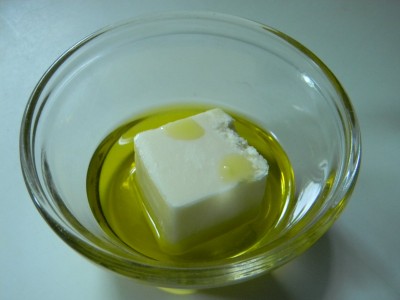
Melt 2 tablespoons of butter and 2 tablespoons of olive oil in a small dish, this should take about 30 seconds in the microwave.

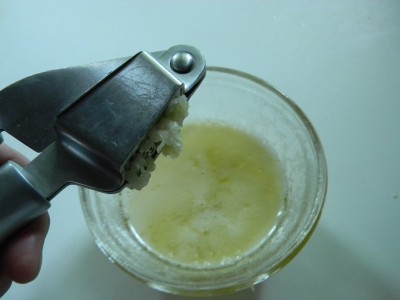
Now, the star of the show….fresh garlic.  Crush 1-2 large cloves right into the melted butter/olive oil mixture.

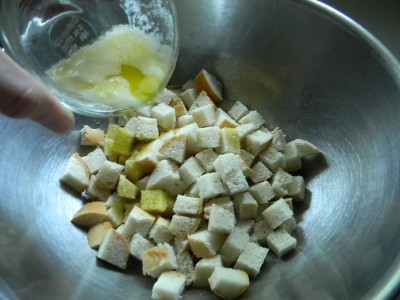
In a large mixing bowl, combine the butter mixture with the cubed bread.   Toss to evenly coat.  Add a pinch of salt if you’ve used unsalted butter.

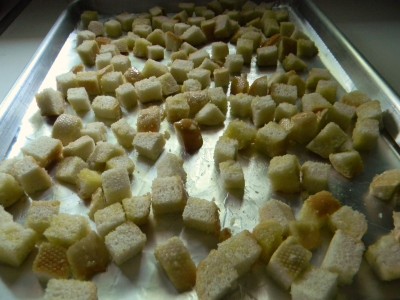
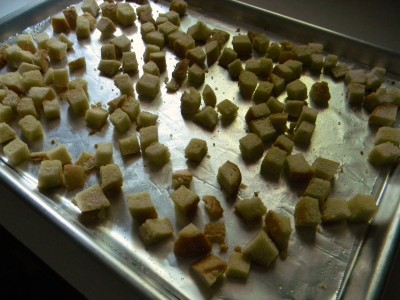
Spread the perfectly seasoned bread cubes over a cookie sheet and into the oven.  Bake for 15 minutes, then give them a turn.  Bake another 15 minutes. 
Remove the pan from the oven right onto a cooling rack.  Allow them to remain on the sheet until completely cooled.  This will assure that they will be completely dried out.  Store in a zip bag.  Makes eight 1/4 cup servings.

Homemade Garlicky Croutons

4 cups cubed stale bread, cut into 1/2″ cubes
2 tablespoons butter
2 tablespoons olive oil
1-2 large cloves fresh garlic, crushed
1 pinch of salt

1)  Preheat the oven to 300′.
2)  Cube bread and place in a large mixing bowl.  Melt the butter and olive oil together in a small microwavable dish.  Add the crushed garlic.  Pour over prepared bread and mix to evenly coat.  Add salt if you’ve used unsalted butter.
3)  Spread the bread over a large cookie sheet being sure not to crowd.  Bake for 15 minutes.  Give the croutons a turn and bake another 15 minutes.  Remove from the oven onto a cooling rack.  Allow to completely cool on the cookie sheet.  Store in a zip lock bag.  Makes 16 two tablespoon servings.

Baked Falafel Sliders with Yogurt Tahini Sauce…..

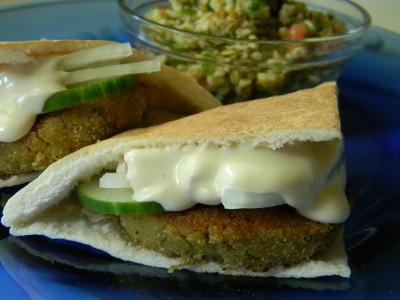
I now completely understand why these luscious cakes are fried.  Most often, I’ve had them fried until very dark brown.  I can only asssume that after working with my falafel mixture, it is needed to keep its shape.  That being said, I had to take an extra step in my preparation.  I found that when I only baked them, as I would most of my “oven fried” recipes, they were very soft and would not keep their shape very well.  I baked, allowed them to cool, then I pan fried them in a little olive oil.  This had a more favorable result.    Lightly crispy on the outside and tender and flavorful on the inside.  I loved them!

Here we go…

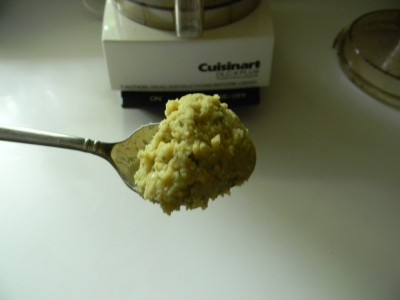
I used my food processor to blend the canned chick peas.  I’ve read recipes where you’re instructed to mash them with a spoon, seems difficult to me.   After you’ve processed the chick peas, add the rest of the falafel ingredients.  Process until well blended.  Refrigerate for at least an hour.

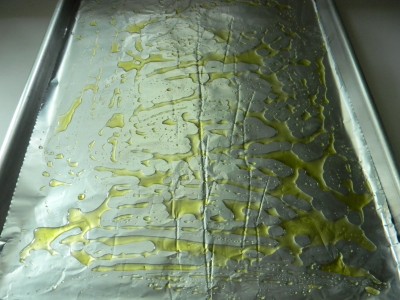
Non stick foil line a cookie sheet.  Pour about a tablespoon of olive oil over the sheet and spread with your hand to coat the whole sheet.  Preheat the oven to 375′.

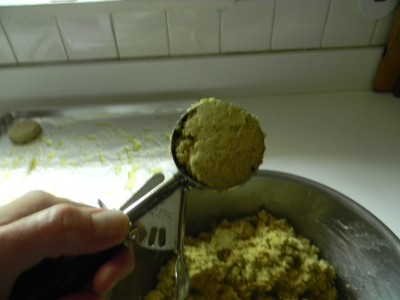
For uniform cakes, I use a large ice cream or a cookie scoop. 

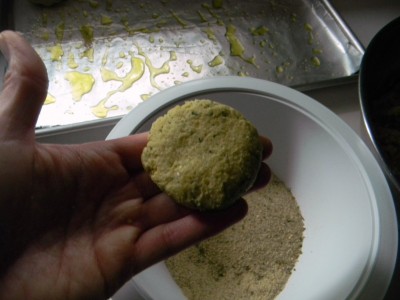
Scoop into your hand and shape into a small patty. 

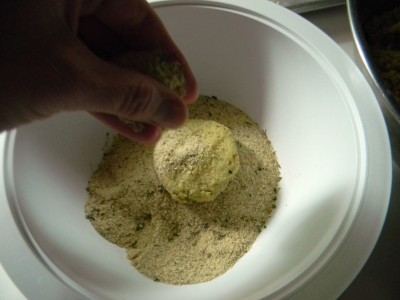
Carefully dredge in bread crumbs.

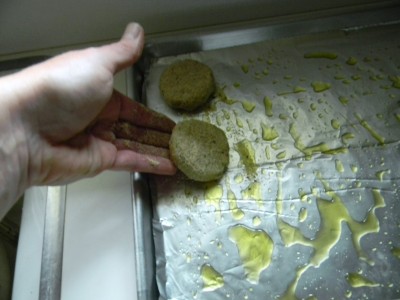
Place on prepared cookie sheet.

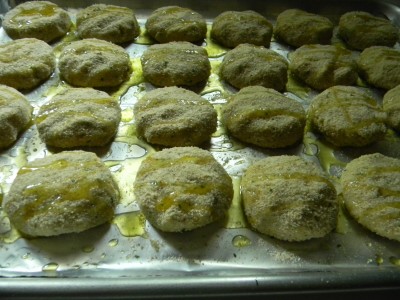
Drizzle the tops with a small amount of olive oil.  (you can see that I made a huge recipe here, this recipe only makes 8)  Bake for 30 minutes.  Allow the cakes to cool for easier handeling.  Heat a skillet over medium heat and add a couple of tablespoons of olive oil.  Once the oil is very hot, add the cakes, be careful not to crowd, and brown on both sides. (3-4 minutes per side)  Serve inside a quartered pita bread with fresh cucumber, thinly sliced sweet onion, and tahini sauce.  Serve with a yummy tabbouleh salad.  Healthy and soooooo delicious!

Yogurt Tahini Sauce

½ cup tahini
2 cloves garlic, crushed
2 tablespoons lemon juice
2 tablespoons yogurt
¼ teaspoon salt
½ cup water

Falafel

1 can chick peas, drained
1/2 large onion, coarsely chopped
2 tablespoons flat leaf parsley
1/2 teaspoon kosher salt
3 large cloves fresh garlic, coarsely chopped
1 teaspoon cumin
1/2 teaspoon coriander
1 teaspoon baking power
2 tablespoons flour
1 tablespoon water
1 tablespoon lemon juice
1/2 cup unseasoned bread crumbs.
Olive oil for frying and to coat the cookie sheet

Pita bread, cut into quarters
1 medium cucumber, thinly sliced
1 small sweet onion, thinly sliced

1)  Whisk all yogurt tahini sauce ingredients together until well blended.  Refrigerate until you’re ready to serve.
2)  Place the chick peas into the food processor and process until smooth.  Add the rest of the ingredients and process until well blended.  Refrigerate for at least an hour.
3)  Preheat oven to 375′.  Non stick foil line a cookie sheet and add a couple of tablespoons of olive oil, spread over sheet to coat.
4)  Scoop out the dough using a 2 tablespoon cookie scoop.  Carefully shape into a small patty and coat with bread crumbs.  Place on the cookie sheet.  Drizzle with a small amount of olive oil.
5)  Bake for 30 minutes.  Remove from oven and allow to cool for about 20 minutes.
6)  Heat skillet over medium heat, add olive oil to coat the bottom of the pan, about 2 tablespoons.  When very hot, fry each falafel until nicely browned.  Allow to drain on a paper towel lined plate.  Serve with pita bread, tahini sauce, fresh sliced sweet onion, and fresh cucumber.  Makes 8 falafel.  Serves 4.

*for an interesting appetizer, use a small cookie scoop and make them bite size.  Serve with the yogurt tahini sauce for dipping.

Tabbouleh Salad…..(Only 3 points plus per serving!)

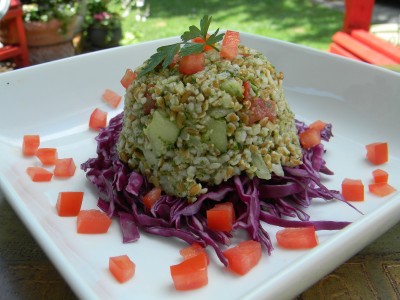
This is my favorite salad to date.  For a quick and satisfying lunch serve over a bed of nutrient rich red cabbage and garnish with fresh diced plum tomatoes.   Great with grilled fish or chicken.  Simple to prepare and it will keep for 5-7 days in the refrigerator.  I especially like to make a big tub of it and eat it for lunches or side dishes throughout the week.

The base of this salad is bulgur wheat.   I love the texture of this healthy grain.  One half cup serving contains 5 grams of protein and 7 grams of fiber.    One half cup cooked equals 3 Weight Watcher’s points plus.  As you may already know, whole grains such as bulgur digest slowly, keeping you full longer.

You can soak it in water for an hour and drain off excess water, but I think the best way to prepare it is to cook it.  It only takes 12-15 minutes to cook and I like the texture much better when it’s cooked as opposed to soaking.

Tabbouleh Salad

1 cup bulgur wheat, cooked and cooled
2 large bunches (or more) fresh flat leaf parsley, finely chopped
1/4 cup fresh mint, finely chopped
2 tablespoons olive oil
3 tablespoons fresh or bottled lemon juice
2-3 large cloves fresh garlic, crushed
1 cup sweet onion, finely chopped
2 medium plum tomatoes, seeded and finely chopped
1 large cucumber, seeded and finely chopped
2 pinches of kosher salt (or to taste)
2 pinches of black pepper (or to taste)

1)  Prepare bulgur according to package directions, allow to cool completely.  I use Bob’s Red Mill bulgur.  Add 1 cup bulgur to 2 cups of water, bring to a boil, reduce heat and cover.   Allow to simmer for 12-15 minutes.  Dump the cooked bulgur into a large bowl to promote quick cooling.  Stir often to release the heat.
2)  You can use a food processor to blend the parsley, mint, garlic, lemon juice, and olive oil.  It is not necessary, but it’s a lot easier than chopping the parsley and mint by hand.  Either way, it’s all good.
3)  Add all salad ingredients to the bulgur.  Mix well to blend.  Refrigerate the leftovers immediately.  Enjoy!

*makes about 8- 1/2 cup servings
**1/2 cup serving=3 Weight Watcher’s Points!