Pumpkin Crunch Pie…..

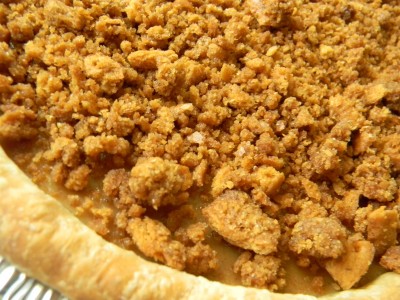
This interesting twist came about today when I baked my Thanksgiving pumpkin pies and one of them did not come out with a pretty, smooth top.  I thought about making a whipped cream topping but then thought I’d try something entirely different.  Originally I thought praline, but my peeps do not like nuts, so I came up with a mock praline topping. So simple, I just baked my crunch creation in the oven to caramelize the brown sugar, butter, and coarsely crushed graham cracker crumbs.  I cooled the concoction and just before serving I’ll sprinkle it over the top of my not so pretty pumpkin pie.   It’ll be a great contrast to the creamy custard pumpkin filling.  This would be quite delicious as an ice cream topping too.  So good!

Mock Praline Crunch Topping

2/3 cup coarsely crushed graham crackers
2 tablespoons brown sugar
2 tablespoons melted butter

1)  Crush the graham cracker crumbs and put into a small bowl.  Add the brown sugar and melted butter.  Mix well.
2)  Pour into a foil lined pie dish and bake at 350′  for 12-15 minutes ( turning every 5 minutes) or until the mixture is nicely browned and caramelized.  Cool completely and add to the top of a cooled pumpkin pie or ice cream.

Happy Turkey Day!

Angie
How To Defrost A Frozen Turkey Safely…..

We’re down to the wire.  Thanksgiving is only one day away.   It takes several days to defrost a large turkey in the refrigerator.  Never defrost a turkey at room temperature.  If your turkey is frozen, this is the safest and quickest way to defrost.    With this method, there are two things you MUST have. 

1)  An accurate instant read thermometer.

2)  A large enough pot to completely submerge the turkey in water.

To defrost a frozen turkey completely submerge it in water.  Allow 30 minutes per pound.  So if you’ve got a 10 lb. turkey at 30 minutes per pound comes out to about 5 hours of defrosting.  If you’re not cooking it right away, put it right back into the refrigerator.  Cook within a day of defrosting.  Optimum water temperature should be 41′ or below.  Check the temperature of the water with an instant read thermometer every hour making sure not to touch the side of the bowl or the turkey.  If the temperature reads above 41′ simply change the water and replace with cold tap water. 

Email me if you have questions.

Happy cooking!

Angie

How To Make Simple Thanksgiving Gravy…..

Ok, the clock is ticking!  The bird is out of the oven and you’ve got your sides are now in the oven to warm…. One last and extremely important detail, the gravy.  The best thickener to use when making turkey gravy is cornstarch.   You get a smooth and luscious  gravy without lumps.  Before we get to making the gravy, let’s discuss the very first step.  The drippings.

The best way to extract those lovely pan juices from the pan is with a turkey baster.  Remove as much liquid as possible, I’d say to go for 4+ cups if you can.  If you’ve made a large bird you will need lots of gravy.  If you come up short you can always make up the difference with chicken stock.  You’re in a bit of a hurry but try not to skip this step.  There are three good ways to do this.  (if you do not remove the fat the gravy will still thicken fine but there will be an unappetizing layer of fat over the top)

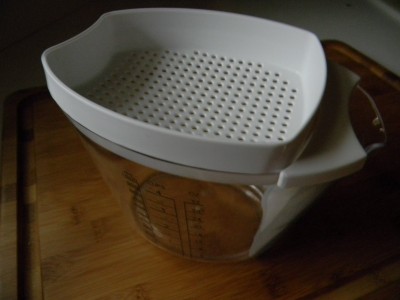
1)  A fat separator.  This is the simplest way of doing it.  Simply pour all of the liquid into the cup and let it sit for a minute or two.  You will see that all of the fat rises to the top.  When you pour the de-fatted liquid out through the spout, liquid comes out from the bottom where there is no fat.  You stop pouring when you get close to the fat layer.  This is the best one I’ve seen out there.  It’s by Pampered Chef and it has a four cup capacity.  You can see that there is a strainer on the top if you wish to remove any bits of food debris.  It’s awesome!  If you don’t have this type of gadget, read on.

2)  Believe it or not a heavy duty zip bag would work fine too.  Carefully pour the liquid into the bag, wait a minute or so until the fat rises to the top.  Carefully snip off a SMALL corner of the bag and drain the broth part of the liquid into a medium size sauce pan.  You must be quick as you don’t want the fat portion of the liquid to run through.

3)  A turkey baster.  I’ve done this on many occasions where I have way more than 4 cups of liquid I need to de-fat.  Pour all of the liquid into a large clear bowl, let it sit for a minute or so.  Using your turkey baster, extract liquid from the very bottom of the bowl.   Of course, you’ll want to stop when you get to the fat layer.  I found this to be very effective as well.

Now we’re ready to make gravy.

Simple Thanksgiving Gravy

4 cups turkey broth minus the fat (add chicken stock to make up the difference if necessary)
1/2 cup cold water
4 tablespoons cornstarch
salt to taste

1)  Pour the turkey broth into a medium size sauce pan.
2)  Add the cornstarch to 1/2 cup of water.  Mix well until the cornstarch is completely dissolved.  Pour it right into the turkey liquid.  Cook over medium heat and stir constantly until it comes to a boil. ( Enlist a guest to do this!) Once you see bubbles, it’s done, remove from heat immediately.  Taste it to see if you need to add salt.  Perfect, luscious gravy.

So the rule of thumb basically is this:

2 cups liquid (broth) + 1/4 cup cold water + 2 tablespoons cornstarch

*if you mix the cold water with the cornstarch ahead of time, you’ll need to give it another stir before adding to the turkey liquid as the cornstarch will settle to the bottom.

YOU CAN DO IT!!!!

Email me if you have any questions!

Angie

Cornbread Stuffing Tip…..

Good morning!

I just read an interesting way to make cornbread stuffing (Food and Wine Magazine).  Use 1/3 sourdough cubes and 2/3 dried cornbread cubes.  This would give the stuffing nice texture with the chewy sourdough bread.

YUMMY!

Angie

Sausage And Sage Stuffing….

This is soooo delicious!  I use Jimmy Dean’s Sage Sausage, it’s perfect for this stuffing.  Make this stuffing to your own liking.  Use any kind of bread you like.  Cornbread is a delicious option with the sausage as well.  If using cornbread, dry it out the same way you would other breads.  (instructions below)  I save the bread crust ends and toast them for stuffing.  Remember, cold stuffing into cold bird.  This is hugely important when it comes to food safety. 

Sage and Sausage Stuffing

1 lb. bulk sage pork sausage
1 tablespoon butter
5 stalks of celery, cut into small pieces
1 large onion, finely diced
1 teaspoon dried rubbed sage
1 cup fresh parsley, chopped
10 cups dried bread cubes, *homemade or store bought
3-4 cups cold chicken stock or water

1)  Dump the dried bread cubes into a large mixing bowl, set aside.  In a large skillet, cook the sausage until browned.  Drain off any excess fat.  Dump sausage into the bread bowl.
2)  Add the butter to the skillet and add the celery and onion.  Cook 6-7 minutes or until veggies are soft.  Add the sage and parsley.  Mix well.  Add to the bread bowl.  Pour half of the chicken stock over the goodies in the bowl.  Gently fold stuffing ingredients.  Keep adding the stock until all of the bread is moistened.  Cool completely and refrigerate in a large zip bag.  Stuff the cold bird with the cold stuffing right before going into the oven.

*To make your own dried bread cubes cut leftover bread into 1/2″ cubes.  Spread over a cookie sheet, do not crowd.  Bake in 300′ oven for 15-20 minutes or until the bread is totally dried out.  Turn the bread cubes every 5 minutes.  Cool completely.  Store in a zip bag if you’re not using right away.

**If you’d like to bake the stuffing in a casserole dish, butter a 2 quart dish generously with butter.  Add the stuffing and pack in.  Add a couple of pats of butter to the top.  Bake at 350′ for 30-35 minutes.  Makes about eight 1/2 cup servings.

Gobble Gobble!

Angie

Thanksgiving…..

Thanksgiving is my favorite holiday!  An entire holiday with the focus on wonderful food and getting together with friends and family.  Good times.

I am cooking, are you?   There are many things to think about like how am I going to cook all that food and serve it hot with only one oven!  Check out my tips for a stress free Thanksgiving holiday.  https://www.angiespantryblog.com/stress-free-thanksgiving-day/

Here’s what I’ll be making:

TURKEY-I am a purist when it comes to a Thanksgiving bird.  I don’t want my turkey to have an Asian or Southwestern twist.  I want good old fastioned turkey, very close to how it was originally served on this momentous holiday.  The meat is so mild that I don’t want to cover up that lovely gentle taste.  I do not want it to taste like chicken….ok, you get my drift.  Don’t mess with the turkey.

STUFFING-I love sage stuffing.  I also happen to be a big fan of sausage, so I’ll be making sage and sausage stuffing.  I will stuff the bird as I think that makes for the most delicious stuffing.  I will make it in advance so I’ll be stuffing my cold turkey with cold stuffing.  Will post recipe tomorrow.

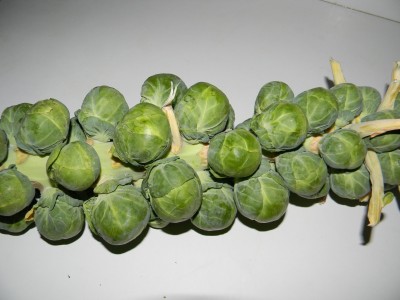
PAN ROASTED BRUSSEL SPROUTS WITH BACON– I bought them on a stalk.   Made me feel like a pilgrim.  Don’t have much else to say about these but YUM!

FRESH CRANBERRY SAUCE-so simple.  Just follow the directions on the back of the package of fresh cranberries.  I do not add lemon or orange zest, I just like the cranberries.  I grew up on the jellied canned stuff….can’t stand it!

SWEET POTATOES-I’m going to first roast them in the oven.   Toss in lemon juice, honey, olive oil and salt and pepper.  I will them mash them.  Simple and delish!

PIES-Traditional Pumpkin Pie made with fresh pumpkin I made a couple of days ago and Blueberry Crumb. 

My peeps will be making the salad, mashed potatoes,  and rolls.  I think we’re good!

Have a great week!

Angie

Apple Cinnamon Streusel Coffee Cake…..

One of my fondest childhood memories is walking home from school and smelling apples and cinnamon in the air.  It was then that we broke out into a full sprint for home.  The smells were always coming from our house!  My Mom made some of the most delicious goodies!    I always wanted to be like my Mom.

I think it’s interesting how popular cinnamon scented candles are these days.  I found it funny that when I first met my husband he had many of these candles in his house.  I remember thinking how much he’d enjoy my homemade apple pie or cinnamon rolls.    To this day anything I make that has cinnamon in it drives my people crazy!

Try this amazing apple cinnamon delight.  There are a few steps involved.  Make the apples and the streusel a day in advance if you like.

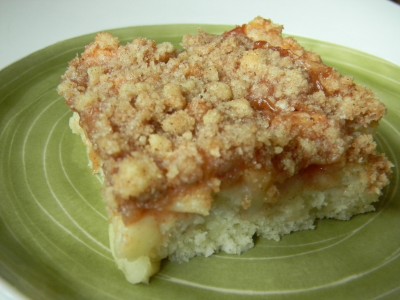
Apple Cinnamon Streusel Coffee Cake

For the apples:
3-4 small tart apples such as Johnathon or Granny Smith, peeled and cut into 1/4″ pieces
1/2 cup sugar
1 tablespoon flour
1/2 teaspoon cinnamon
3 tablespoons lemon juice
1/2 cup water

For the streusel:
3/4 cup sugar
1/2 cup flour
a pinch of salt
1 teaspoon cinnamon
5 tablespoons room temperature butter

For the cake:
2 cups all purpose flour
1/2 cup sugar
1 tablespoon baking powder
1 teaspoons salt
4 tablespoons melted unsalted butter
1 egg, slightly beaten
1 1/3 cup milk

1)  For the apples.  Place the prepared apples into a medium size sauce pan and add the sugar, flour, cinnamon.  Mix to evenly coat the apples.  Add the lemon juice and water.  Cook over medium-low heat for 8-10 minutes, stirring often to prevent sticking.  Add a little more water if it’s too thick.  Remove from heat and set aside or refrigerate if using the next day.
2)  For the streusel.  Add all ingredients into a small mixing bowl and blend together using your fingers until you get a nice crumbly mixture.  Refrigerate in an air tight container if using the next day.  Otherwise, set aside.
3)  For the cake.  Preheat the oven to 350′.  Generously coat a 9×13″ baking pan with cooking spray and set aside.  Add the flour, sugar, baking powder and salt to a large mixing bowl.  Stir to blend.  Make a well in the center of the ingredients.
4)  Add all of the wet ingredients into the well.  Mix until the dry ingredients are incorporated, do not over mix.
5)  Pour the batter into the prepared baking pan.  Evenly top with the cooked apple mixture.  Top evenly with the streusel topping.  Bake for 30-35 minutes.  A toothpick should come out clean.  Allow to cool for at least 15 minutes before serving.  Cover and refrigerate leftovers.  Makes 12 servings.

Enjoy!

Angie

Fresh Pumpkin…..

My Mom used to cook regular old pumpkins to make pies and baked goods so I decided to do the same.  You do not need “pie pumpkins” specifically.  I cooked one large 12 lb. (approximately) and got roughly 24 cups of pureed pumpkin.  That’s equivalent to about 12 cans of store bought Libby’s pumpkin at $2.99/can.  So I’ve saved $35.88 simply by cooking one of our uncarved Halloween decorations,  I LOVE that!

The process is quite simple.  You will need a food processor.  My Mom tried using a blender but it was too thick to completely puree.

1)  Cut the pumpkin in half.  Scoop out all of the seeds and connective stuff.
2)  Place cut side down on a large cookie sheet with sides.  I added water to the bottom of the pan as when I originally started roasting the pumpkin I could hear sizzling.  I did not want the edges to become browned or caramelized so I added just enough water to cover the bottom of the pan.
3)  Roast in a 350′ oven.  I cannot tell you exactly how long to bake as it depends on the size of the pumpkin.  You must bake it until the flesh is very soft.  This took a good amount of time for the huge pumpkin I roasted.   It took a little over an hour and a half.
4)  Remove the pumpkin from the oven and carefully flip it over to release the steam/heat.
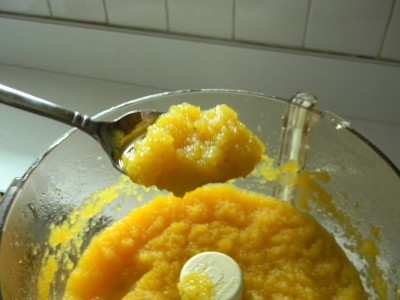
5)  Scoop out the flesh and put it right into the food processor.  Reserve some of that cooking liquid from the bottom of the pan.
6)  Puree in the food processor, add a small amount of water if it’s too thick.
7)  To freeze, first label and date quart size freezer bags.  Remove as much air as possible from each bag.  Freeze and use in recipes like Whole Wheat Pumpkin Spice Bread, Traditional Pumpkin Pie, or one of my absolute favorites Pumpkin Squares with Cream Cheese Frosting.  As good as these recipes are with canned store bought pumpkin, they’re even better with freshly made pumpkin.

Have a great week!

Angie


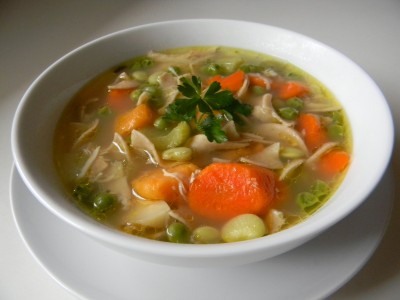
Old Fashioned Chicken Noodle Soup…..

The absolute best way to make homemade chicken noodle soup is to start  with homemade chicken stock using leftover chicken meat/bones.  The next time you make whole roasted chicken,  leave a bit of meat on the bones and save the whole carcass.  If you don’t plan on making soup within a few days, label, date and freeze.  I prefer to accumulate several carcasses in the freezer along with miscellaneous leftover pieces of chicken for soup/stock.  Once I have a pretty big stock pile, I make stock.  I use what I want for a big pot of soup and then freeze the rest of the stock for later use.  There is NOTHING like homemade chicken stock. 

I enjoy my soup loaded with vegetables and noodles and or rice, almost like a stew.  Soup made this way is a meal in itself.  Growing up my Mom made soup once a week.  She would gather all of the leftovers that accumulated over the week and come up with a delicious and unusual soup.  She made the BEST soups!  Remember, there are no rules.  Add whatever YOU like.

I especially like to make stock on days when I’ll be home most of the day.  I put it on the stove and allow it to slowly simmer for several hours.  Minimum simmering time is about 2 hours but I think the longer it cooks the better it is.  If the liquid evaporates 1″ or more, add more water as you go.  However long you choose to simmer your stock, your house will smell wonderful!  You’ll notice that I do not season the stock.  I think it best to season whatever your using it for at the very end.  That way over seasoning can be avoided.

What to do with that beautiful liquid  and all the bones and vegetables?  I remove as much of the bones/veggies with a slotted spoon into a large platter.  I then strain the rest of the soup through a fine grate colander into a large bowl to remove small bits of skin and bones.  If you’d like to take it a step further, you can allow the stock to cool completely in the refrigerator and skim the fat off the top.  You would be removing the “schmaltz.”  It is actually quite delicious and a very important ingredient in matzo balls….another topic for another time.  Most people would remove this to reduce the amount of fat and cholesterol.   Many chefs today are using “schmaltz” for cooking as it is loaded with incredible flavor.

Allow the bones/meat/skin to cool so that you can handle it.  Remove any small bits and pieces of chicken from the bones.   Put the chicken in the refrigerator until you’re ready to add it to the stock for soup.

Here’s what you’ll need to make chicken stock:

For the chicken/turkey soup stock

1-2 chicken carcases or 1 turkey carcass (the more bones the better)
2 whole chicken breasts with bone and skin if you like more meat in your soup (optional)
1 large stalk of celery, sliced into 3 pieces
1/4 medium onion, cut through the root so that it stays intact
1 large carrot, cut into 3-4 large pieces
1 small bunch of fresh parsley

1)  Add all ingredients to a large stock pot.  Add enough water to submerge all of the stock ingredients.  Place pot over low heat and allow it to simmer for 2-4 hours.  Add water when it evaporates by an inch.
2)  Remove the solid ingredients from the stock with a slotted spoon onto a large platter.  Strain the stock through a fine colander into a large bowl. 
3)  If you’d like to de-fat the stock, pour it into storage containers and allow it to cool a bit on the counter top.  Stir often to release heat.  Refrigerate until completely chilled.  Remove the fat from the top with a spoon. 
4)  Pick through the bones to remove all of the meat you can.  Refrigerate until you’re ready to make soup.
5)  If you’re going to make soup, follow the steps below.  Remember you can make it your own.  Add any leftover vegetables you might have in the refrigerator.  My last batch contained leftover roasted sweet potatoes and parsnips and half a bag of frozen peas.

Old Fashioned Chicken Noodle Soup

1 large onion, chopped
4 large stalks of celery, chopped
4 large carrots, chopped
8-10 cups of stock
Chicken reserved from cooking the stock
2 lb. mixed vegetables, use anything you like
2 cups of cooked soup noodles or leftover rice or both, add more if you like

Salt and pepper to taste

1) Add the chicken stock to a large pot over medium-low heat.  Chop up all vegetables and add to the stock.  Cover with a lid to get the soup going.  Once it begins to simmer, leave the lid on ajar.  Simmer for 30-40 minutes or until the vegetables are tender.
2)  Time to add all of the goodies.  Add the chicken and frozen vegetables if you’re using frozen.  Allow to simmer for at least 5 minutes.  Add the noodles and whatever other tid bits you may have from your refrigerator.  Do  not be afraid to add salt to the soup.  Remember this is a whole lot of stock/vegetables/chicken.  Taste the soup and add it a half a teaspoon at a time, tasting after each addition.  Makes 6-8 servings.

*Soup freezes beautifully.  Simply divvy it up in individual portions or in large tubs.  As always, label and date.
**Try topping your hot soup with a tablespoon of fresh grated parmesan cheese, YUM!
***Cook the noodles BEFORE you add to the soup as the raw pasta will absorb too much of the liquid in the soup.

Food is Love…..

Hello Everyone-

I haven’t posted in a bit and for that I apologize.  Life has been a bit tricky of late.  (excuse the Halloween pun)

It seems that more and more people I love are having health issues.  Serious health issues.  I just lost my best friend, who I am going to write a tribute to in a few days.  I need time for the perfect words as she was so very special to me.

One message I’d like to share with you this beautiful fall morning is to take care of the people you love.  If you have a sick friend, neighbor or family member, show them love through the love and care you put into a delicious comforting dinner or your “go to” baked good.   I have always believed that cooking for a loved one whether they’re sick or well is the truest expression of love.  When I just don’t know what to do for someone and want to help, I cook.

The food I most want when I don’t feel well or am in distress is  chicken noodle soup.  So simple.  So comforting.  So healing.  So versatile.  You can make it any which way you please.  There are no rules.  I empty out my bits of frozen vegetables from my freezer and any veggie or rice/pasta leftovers in my refrigerator right into the pot.  I get this from my Mother, she always made the best soups out of leftovers in the frige.   Warm fuzzies.

I just went through my soup posts and realized I’ve never posted a recipe for Chicken Noodle Soup.  I’ll be sharing that one next.

Have a blessed day.

Angie