Homemade Challah, Step by Step Instruction….

I loved everything about making this bread.  Loved the simple ingredients, the hand feel, and the smell in my house.  Next time I will double or triple the recipe.  Imagine french toast or homemade bread pudding made out of this bread…OH MY!

The dough did take quite some time for the first rising, about 2 hours.  I used regular yeast but you could use the rapid rise variety of yeast and you might be able to trim off 30-60 minutes here.  The dough itself is very dense, very lovely.  I found that when I kneaded the bread I virtually used no extra flour as I have in the past with other kinds of bread.

My friend gave me the ingredient list for this bread and she makes hers in a bread machine. I decided to make it the way I make most other yeast breads only I kneaded the dough a bit longer.  I got the same exact result.  The key here, I believe, is using bread flour as opposed to all purpose.  Bread flour has more gluten than all purpose flour.  This makes for a really nice, chewy yet tender texture.  So, so good.

Let’s get started….

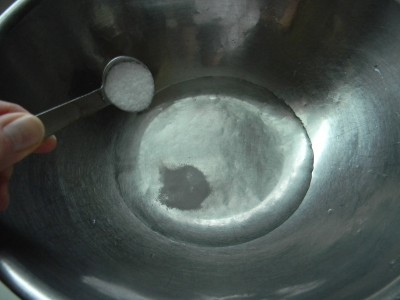
We begin with 3/4 cup of warm water.  (About the same temperature you’d make a bottle for a baby.)  Add  1 1/2 teaspoons of salt.  In a separate microwaveable bowl, melt 3 tablespoons of butter, set aside to cool.
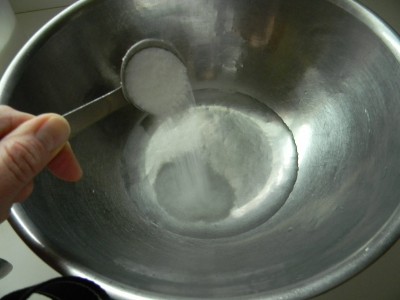
Add 4 tablespoons of sugar.
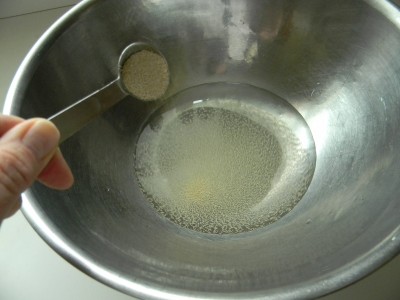
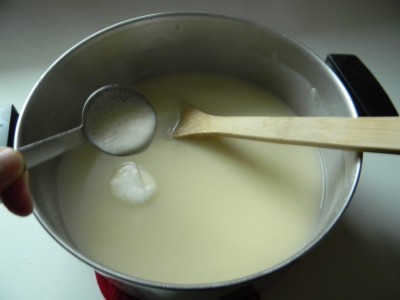
Add 2 teaspoons of dry yeast.
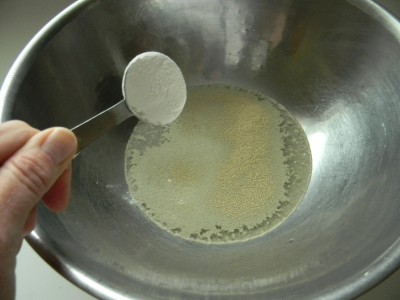
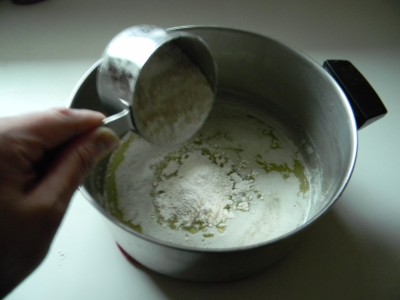
Measure out 3 cups of flour into a small bowl.  Take out one tablespoon and add it here.
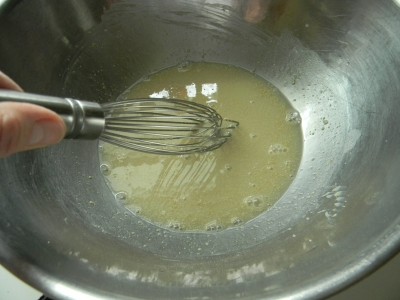
Whisk well to blend.  Allow it to sit for 10 minutes.
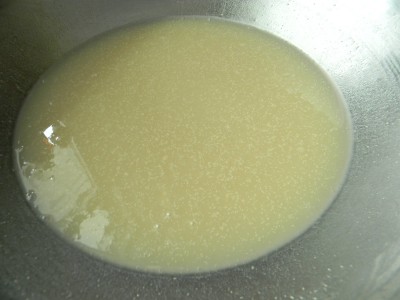
The yeast mixture should look like this.  If you look  closely, you can see bubbles.  This is the yeast coming to life.
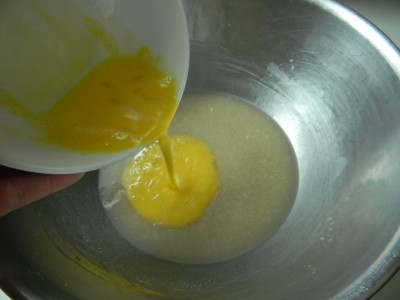
Add 2 large beaten eggs.
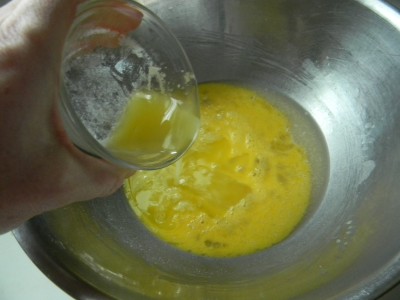
Add the cooled melted butter.  Whisk to blend.
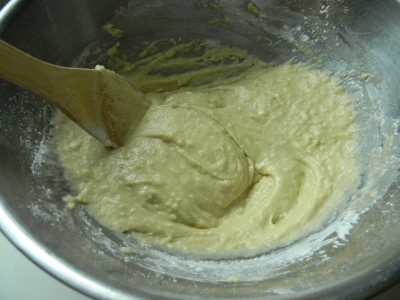
Next add half of the bread flour, beat well until smooth.
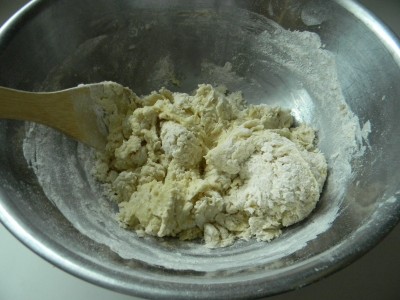
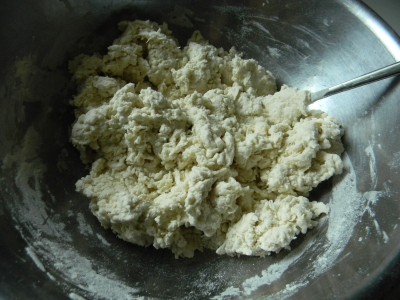
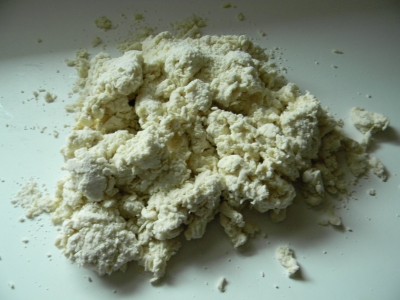
Add the rest of the flour and mix until it looks like this.
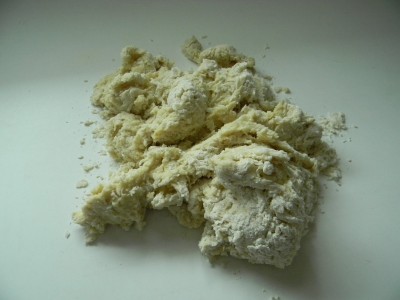
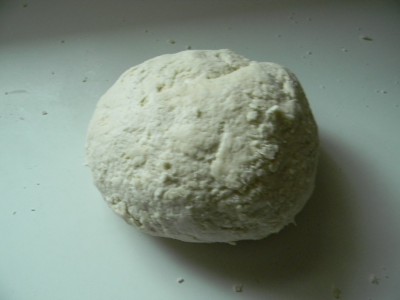
Dump the dough onto the counter and bring together with your hands to form a ball.
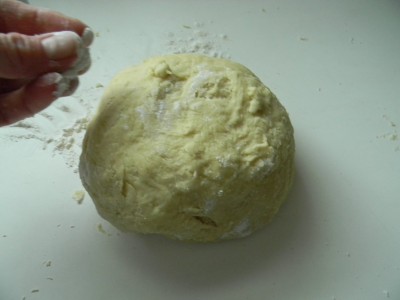
It should look like this.  I added the smallest amount of flour because it was sticking to the counter slightly.  Be careful not to add too much extra flour.  I found that I did not need any additional flour after this.  Knead the dough for 5-7 minutes.
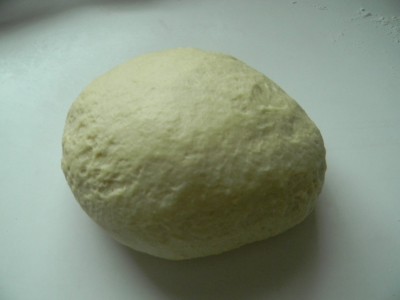
It should look like this when you’re done kneading.  The dough should be smooth and elastic.
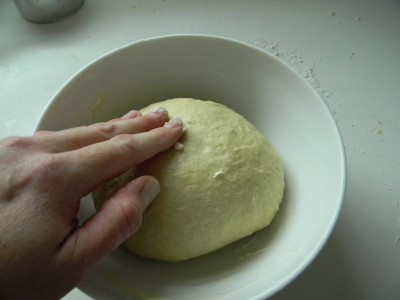
Grease the inside of a small bowl with butter, plop the dough in and coat the dough with a thin layer of butter as well.
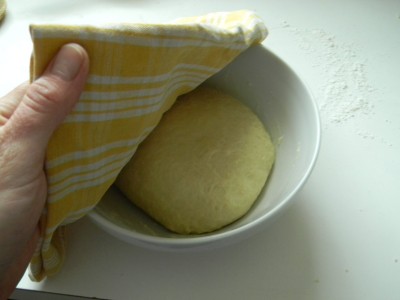
Now cover your little ball of dough with a clean cloth or kitchen towel.  Time to put it to rest in a nice warm place free of drafts.  If you have a gas stove, simply turn on the light in the oven and place the bowl on the center rack.  The pilot light and the light will provide the dough with a nice warm place to rise.  Allow it to rise until double in  bulk.   It took my dough about 2 hours on the first rise.  (If you have an electric oven, turn the heat on 300′ for one minute.  Turn off the heat and turn on the oven light.  It is now perfect for proofing the dough)
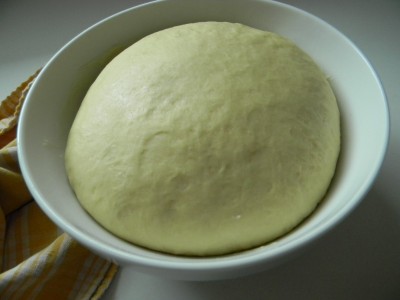
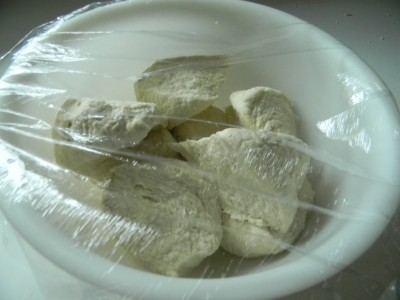
The dough has doubled in bulk, it’s ready to be shaped.
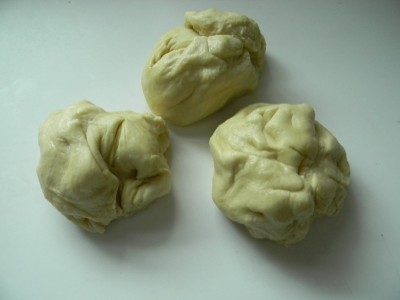
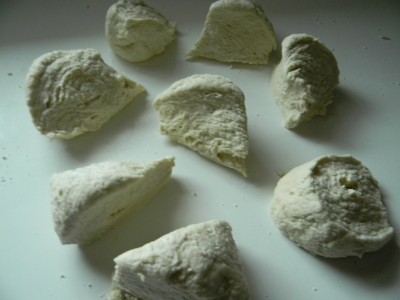
Punch the dough down and divide into 3 equal balls.

Roll each ball into 12″ sticks as shown above.  Pinch them together at the top.
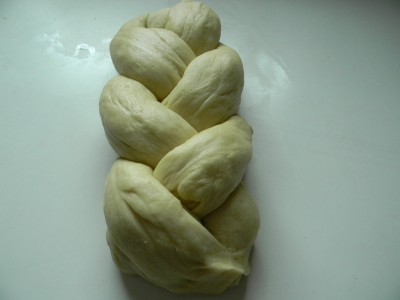
Now braid and pinch the bottom together.
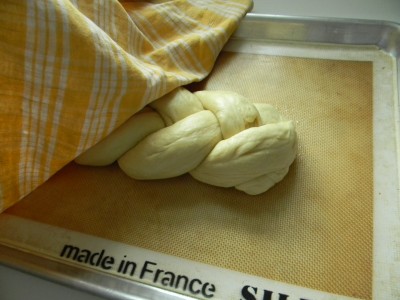
Place the shaped bread on a baking mat or parchment paper.  Cover the shaped bread with the clean towel.   The bread should just about double in size, it should take about 40 minutes.   Preheat the oven to 375′.
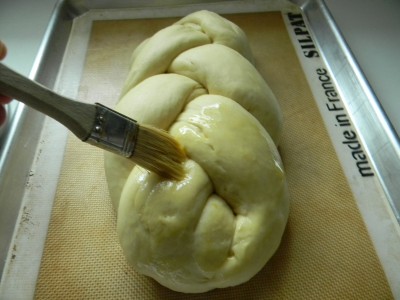
Beat an egg with a tablespoon of water and brush the oven ready bread well with the egg wash.   Bake for 25-27 minutes.  when you flick it with your finger and it has a hollow sound, it’s done.  Remove from the oven onto a cooling rack.  Enjoy it warm by tearing off chunks and slather with softened butter.   Delish!

Homemade Challah Bread

3 cups bread flour
3/4 cup water
1 1/4 teaspoon salt
2 teaspoons yeast
4 tablespoons sugar
2 large eggs
3 Tbsp butter, cut up

1 egg, 1 tablespoon of water

1)  Measure out 3 cups of bread flour in a small bowl.  In a large mixing bowl, add water, salt, sugar, yeast, and 1 tablespoon of flour out of the 3 cups of measured flour.  Whisk well to blend.  Allow to sit for 10 minutes.
2)  Melt the butter in a small microwaveable dish, set aside to cool.  Beat two eggs in a small bowl.
3)  Add the eggs and the cooled melted butter to the yeast mixture, whisk to blend.
4)   Add half of the bread flour and mix well until there are no lumps.
5)  Add the rest of the flour and mix.  Dump onto the counter and bring together into a ball.  Add a small amount of flour to the counter if the dough ball is a little sticky.  Knead for 5-7 minutes.  The dough should be elastic and smooth.
6)  Grease a medium size bowl with butter, add the dough, lightly grease the top of the dough.  Cover with a clean towel and allow to rise in a warm, draft free place.
7)  When the dough has risen to double it’s size, punch down the dough and divide into 3 equal pieces.  Shape into three 12″ logs and pinch together at the top.  Braid and pinch together at the bottom.   Cover with a clean towel and allow to rise for about 40 minutes.  Preheat the oven to 375″.
8)  Beat the egg with water.  Using a pastry brush, apply the egg wash liberally to the shaped and oven ready loaf.
9)  Bake for 25-27 minutes.  Enjoy warm by tearing off pieces with room temperature butter.  Store leftovers, if any, in a sealed plastic zip bag.  Makes one large loaf.

Thank you for sharing your recipe Genevieve!

Angie
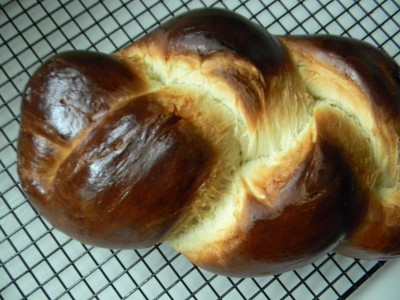

Homemade Warm Challah Bread….

Good morning-

I hope all of your Christmas shopping is coming together nicely.  I’ve done most of mine on line, such a great way for me to shop!

It’s been hard to post during this flurry of parties, baking, and..well, you know, we’re all busy.

I had the lovelist surprise from my friend Genevieve.  A warm loaf of Challah bread.   Definitely a December highlight.  First because she took the time to make something special for ME during this very busy time of year.  Secondly, have you ever had a warm loaf of homemade Challah bread?  If you have, you know what I’m talking about.  Slightly sweet.   Firm yet tender texture.  A beautifully browned lovely crust.  Pure heaven.

Needless to say, my friend not only shared the warm Challah, but the recipe too!!  Yippee!!  Genevieve tells me she’s been making it for about ten years and she’s “tweeked” it over the years to her taste.  The best recipes around are the ones we tailor to our own taste.

This is going to be good.  I’m going to make a homemade Challah, photograph it, and share it with you, compliments of Genevieve.  This will become a regular in my rotation of baking, for sure.

Planning on baking my brains out this weekend. In addition to the Challah bread, I’ll be making Raspberry Bars, Festive Peppermint Brownies, Peanutbutter Bars (with red and green M&M’s, Gingerbread CookiesPecan Squares, Coconut Macaronns, and Santa Thumbprints

Have a blessed day.

Angie

Prosciutto & Boursin Cheese Appetizer…..

This is a very elegant, simple, and amazingly delicious appetizer!  The best part?  There is no cooking involved!  If you like ham rolls with cream cheese, this is a bit more sophisticated.  I used onion bread sticks, a blend of cream cheese and garlic & herb boursin cheese, baby arugula, and prosciutto ham.   I was disappointed when I opened the box of bread sticks and half of them were broken.  I decided that it made the plate look interesting to offer different sizes.

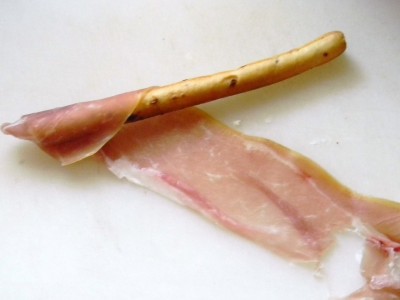
When you buy prosciutto, ask for it to be sliced slightly thicker than usual, which is paper thin.  If it’s too thin it can be very difficult to work with.  Cut the prosciutto in half longways.   This ham actually sticks to itself nicely so they stay wrapped.  I used a broken bread stick here.  I just made sure that the prosciutto covered the broken top.
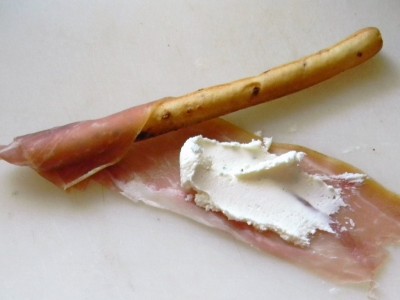
Next add a smear of cream cheese and boursin cheese, beaten together with a hand mixer.
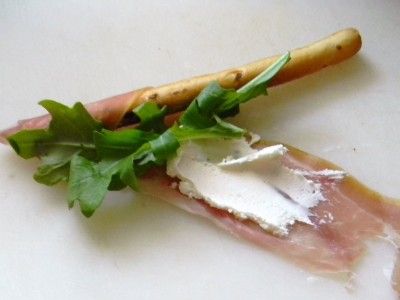
Add a couple of pieces of arugula.  Be sure that it’s completely dry after washing.
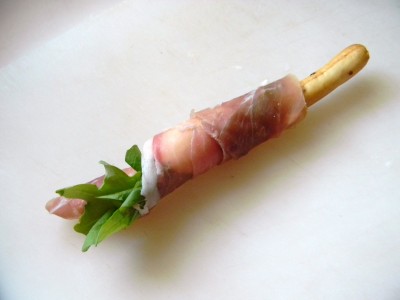
Carefully roll the ham over the cheese and arugula.  Done.  Now taste one.  Holy moley that’s good!

Prosciutto and Boursin Cheese Appetizer

1 box of onion bread sticks (20 pieces)
4 ounces softened cream cheese
4 ounces garlic and herb boursin cheese
14-16 slices proscuitto ham, sliced thin
8 ounces of arugula, washed and completely dried

1)  With a hand mixer beat the softened cream cheese and the boursin cheese until well blended.
2)  Slice the prosciutto in half longways.  Wrap the tip of a bread stick with the ham, add a smear of the cheese mixture, add a couple of arugula leaves.  Gently wrap the ham around the stick.
3)  Refrigerate until you’re ready to serve.  Makes about 10 servings.

Pretty and yummy.

Have a great week!

Angie

Lebanese Chicken…..

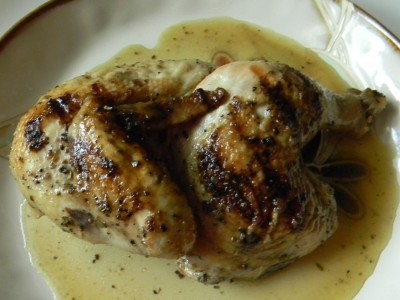
This chicken couldn’t be more simple.  Start out by putting some color on the skin by grilling or broiling, then finish cooking in the oven.

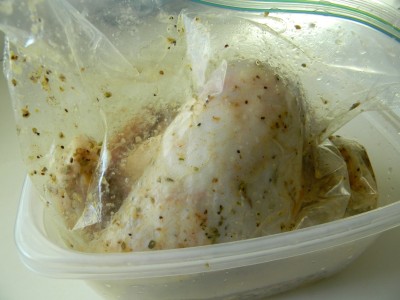
The marinade has few ingredients that most of us have on hand.  Whisk all of the marinade ingredients together in a small bowl and pour over the chicken in a large zip bag.  Marinate the chicken 30-60 minutes.

Place the marinating chicken into a plastic container so avoid any leaking in the refrigerator.   When you marinade this way you can mush and squish (official cooking terms) it around to distribute the lovely marinating liquid.

Lebanese Chicken

1 whole frying chicken, either cut in half or into individual pieces
1/4 cup olive oil
1/4 cup fresh lemon juice
2 teaspoons dried oregano
1/4 teaspoon cinnamon
1 large clove garlic, crushed
1 teaspoon kosher salt
1/2 teaspoon pepper

1)  Whisk all marinade ingredients together in a small mixing bowl.
2)  Place chicken into a large zip bag.  Pour marinade over chicken.  Place in a bowl and refrigerate 30 minutes to an hour.  Half way through marinating, shake up the bag and move the chicken around.
3) Preheat the grill and the oven to 350′.    Foil line a baking sheet.
4)  Grill the chicken just until there is good coloring on the skin, 10-15 minutes.  Place on foil lined baking sheet and bake for 45 minutes.  Makes 5-6 servings.  Serve with hummus and warm pita bread, and salad.

Enjoy!

Angie

Pecan Squares…..

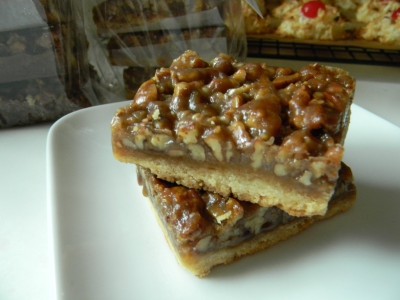
These are sinful.   Consider yourself warned.  Think caramel, pecans, and butter crust.  Truly amazing!  The recipe calls for a 12″x18″ pan but you could make it in two 9″x13″ pans.  They package beautifully.  Layer with small squares of wax paper between pieces in the cellophane bags.  Perfect gifts for teachers, the crossing guard, yourself!

Pecan Squares

For the crust:

3/4 lb. butter at room temperature
3/4 cup sugar
2 large eggs
1/2 teaspoon vanilla
4 cups all purpose flour
1/2 teaspoon baking powder
1/2 teaspoons salt

For the topping:

1 lb. unsalted butter
1 cup honey
3 cups light brown sugar, packed
1/4 cup heavy cream
1 1/2 lb. chopped pecans

1)  Preheat oven to 350′.
2)  For the crust, beat the butter and sugar together in a large mixing bowl.  Add the eggs, vanilla, mix well.  In a small bowl, mix the flour, baking powder, and salt together.  Add to the butter/sugar mixture on low speed until just combined.
3)  Press the dough evenly into an ungreased 12 x 18 x 1-inch baking sheet making an edge around the outside.  If the dough is sticky, coat your hands with a little flour.  Using a fork, poke holes all over the crust.   (This will prevent large bubbles from forming under the crust while baking)  Bake for 15 minutes.  Cool.
4)  For the topping, combine the butter, honey and brown sugar in a large, heavy saucepan.  Cook over low heat until the butter is melted.   Raise the heat to medium and bring to a boil for 3 minutes.  Remove from heat.  In this order, stir in the pecans, then the cream and vanilla.  (when liquid is added to a boiling candy like mixture it can spatter)  Pour over the prepared crust.  Bake for 25 minutes.  Cool completely.  Store in refrigerator in air tight container. Makes 54- 2″ x 2″ pieces.

Enjoy!

Angie

Twenty Minute Homemade Sloppy Joes…..

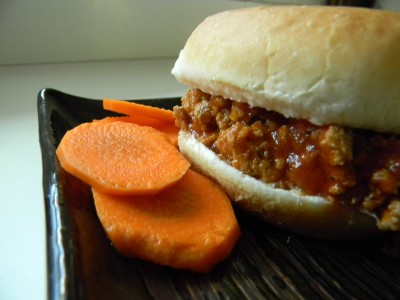
It is that time of year when there just isn’t loads of extra time to spend in the kitchen.  I do not make this meal often enough for my people as they go nuts when I make them!  So simple.   I make my Sloppy Joes with ground turkey and a few basic ingredients.  Since your family will love this, double or triple the recipe and freeze it for a couple of other quick weeknight meals.  You’ll be so happy you did!

If you REALLY want to drive ’em crazy make these.  My Oven French Fries  are sure to please and they actually taste like a real potato…imagine that!  They take a bit more effort than opening a bag (which I am certainly not above!) but will be well worth it!

Homemade Sloppy Joes

1 1/2 lbs. ground turkey*
2 teaspoons vegetable oil
1 medium onion, finely diced
4 cloves fresh garlic, finely minced
1 teaspoon salt
1/2 teaspoon pepper
1 tablespoon chili powder, or more to your taste
1 6 ounce can of tomato paste
3 tablespoons brown sugar
2 cups water
8 hamburger buns

1)  Heat a large heavy skillet over medium heat.  Add the oil.  Add the ground meat to to the hot skillet and add the onion garlic and salt and pepper.  Cook until the meat is cooked through.
2)   Add the chili powder, tomato paste and the brown sugar.  Stir the mixture to incorporate the ingredients into the meat.  Add the water all at once.  Simmer for about 10 minutes or until you’ve achieved the right consistency for the saucy meat to to onto a bun.  Taste and adjust seasoning if necessary.  Makes 8 happy, smiley, and very much appreciated servings.

There you go.  An easy, delicious and healthy dinner for your family that everyone will LOVE.

Have a great weekend!

Angie

*you can substitute beef for the turkey meat.  I would suggest cooking the beef all the way through and then draining off any excess fat before adding the rest of the ingredients.

Best Holiday Cookies Ever!

Hi Everyone-

This is the perfect time to start cookie baking.  I find it much easier to mix one day, bake another, and decorate yet another.  This is a good time to get started.

First check out my tips for holiday baking essentials.  This is my equipment guide to successful cookie baking, easy clean up and efficient use of your time in the kitchen.

Cookie dough will keep very nicely wrapped in cling wrap and into a zip storage bag.  Label and date, as always, especially if you’re making a wide assortment of cookies.   The dough will keep nicely for 2 weeks.  I’ll be mixing gingerbread dough (aka “people cookies”) today.  I’m thinking I’ll mix approximately 6 batches as they are the #1 cookie tradition in our house.  My boys always look forward to these.

FYI, after the gingergread cookie dough has completely chilled, it may seem quite unmanageable.  Allow the dough to sit on the counter for 30 minutes before you begin.  Cut off a chunk and really work it with your hands to make it pliable to roll out on your board.  After you cut out the first batch, bring all the scraps together and add another chunk, working it together.  It is very easy after the initial batch.

Another lovely dough I like to use is a roll out butter cookie that has no levening.  It is the perfect recipe for layered and filled cookies.  Same deal here with rolling it out.  Use the same recipe for darling snowmen cut outs.

Mix your dough a day or two ahead then bake.   If you’re not ready to decorate at this point simply freeze the cooki  Pick a day closer to Christmas to actually decorate and put some aside for the kids to go crazy and decorate!  There is plenty of finger licking going on here, so I put their personal creations into their own bag.

I mix up my assortments as I do not like to decorate every cookie I make.  Lovely bars such as raspberry bars, and festive peppermint brownies are perfect because they slice beautifully and make for a pretty presentation.  My other Christmas cookie fav’s include santa thumbprints and chocolate dipped coconut macaroons.  Beautiful and delicious!

I’m so ready to get baking!

Have a great day-
Angie

Turkey Pot Pie With A Twist…..

Who doesn’t like pot pie?  The perfect combination of creamy savory filling topped with a buttery crust.  I decided to use as many Thanksgiving leftovers as possible for my pot pie.  Turkey, of course, turkey stock from the carcass, and stuffing.  Stuffing?

I decided to press a thin layer of stuffing into the bottom of each individual pot pie.  It was DELICIOUS!  Turkey, stuffing, vegetables, gravy and a killer crust.  YUMMY!

Of course, you can make this pot pie without stuffing.  You can also easily substitute chicken and chicken broth for a chicken pot pie.  Add whatever frozen vegetables you like.  I would normally add a one pound bag of frozen mixed vegetables but all I had on hand were frozen petite peas.  Gosh, you could substitute all vegetables and vegetable stock if you wanted a completely vegetarian pie.  It’s your choice.

This recipe is large, it makes 8 individual pies.  You can very easily cut the recipe directly in half if you like.

I use a food processor for the crust.  It goes quickly and perfectly blends the cold butter into the flour.

Here we go:

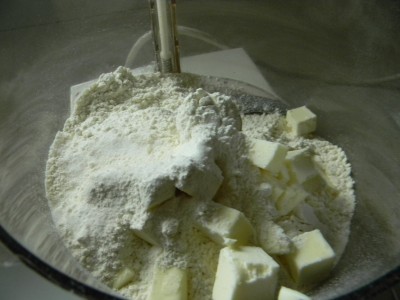
Add 4 cups of flour, 1 teaspoon of salt and 1 stick of unsalted butter cut into 1/2″ cubes to the food processor . Pulse 15 times, should be perfect.
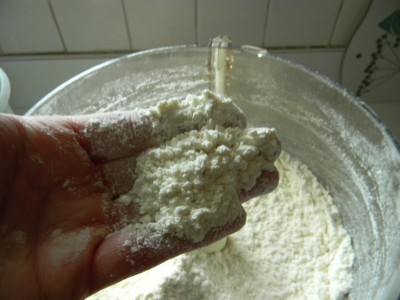
It should look like this.  No uneven lumps.  Should resemble cornmeal.   Alternatively, you could use a pastry blender to incorporate the butter into the flour.   Dump the mixture into a large mixing bowl.
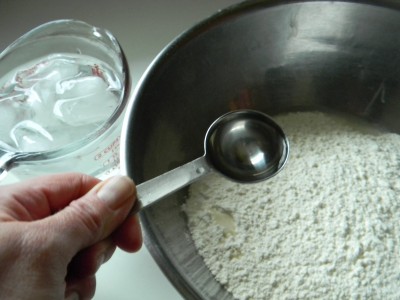
Next you’ll need to add ice water.  With this recipe you can go ahead and add 1 cup of ice water and mix with a fork.
Add additional water a tablespoon at a time so that it looks like this.  You do not want lots of dry ingredient left in the bottom of the bowl.  Most of the ingredient should come together and be pretty moist but not too wet.
Dump the dough onto your board or counter.
Form a ball of dough with your hands, kneading only 2-3 times.
Cut the dough into 8 equal pieces.  Do this by first cutting it in half, then half the halves, you know what I mean.
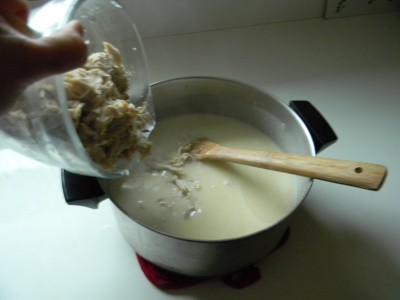
Place the chunks of dough into a bowl and refrigerate while you prepare the filling.  Warm 6 cups of turkey (or chicken or vegetable) stock in the microwave until just warm (like the temperature you’d give to a baby).  When you add this to the flour mixture below this will prevent lumps.
Have a large spoon and a whisk handy.  Melt one stick of butter in a large pot.  Once it’s completely melted, add 1 cup of flour.  Cook over medium heat for a couple of minutes.   With your whisk in hand, add all 6 cups of the warm stock to the flour mixture.  Whisk the mixture to prevent any lumps.  Cook over medium heat, stirring constantly until it comes to a boil. Cook another couple of minutes.  Remove from heat.
Add a couple of tablespoons of heavy cream or half and half.  Optional.  This is the perfect time to taste and add salt and pepper to your taste.
Add 5 cups of shredded cold turkey.
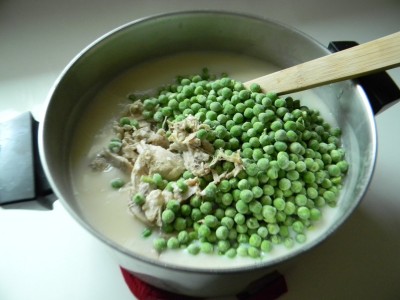
And 1 pound of frozen vegetables, you can see that I used peas.  Don’t worry that it will cool the sauce.  It’ll be in the oven soon and will make it easier to place the crust on the top.
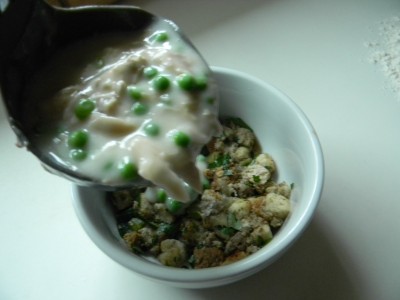
You will need eight 2 cup oven proof dishes.  Coat with cooking spray.  Layer 1/2 cup or so of prepared stuffing. (optional)  Evenly distribute the filling into the prepared dishes.
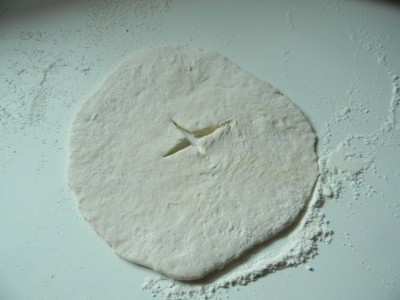
Time for the crust.  Form each chunk of dough into a ball and roll out on a floured board until large enough to for 1″ of dough to go over the side of the bowl.  Cut a slit in the top for the steam to escape.
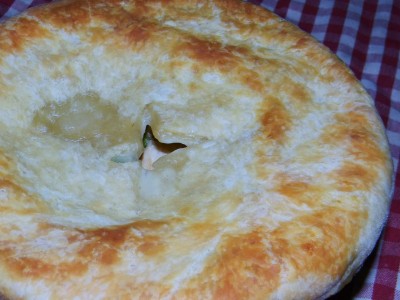
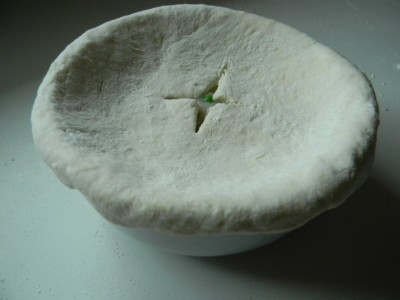
It should look like this.
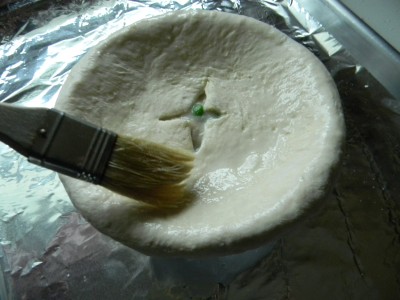
Lastly, using a pastry brush, coat the crust with milk.  This will make for a nicely browned top.  Bake at 350′ for 45-55 minutes or until bubbly and nicely browned.    Serve with a salad with a vinaigrette.  Serves 8.

Enjoy!

Angie

Leftover Turkey & Carcass…..

Hi Everyone-

If you know anything about me, you know that I waste nothing.  You should also know that when it comes to soups or using stock in any recipe, I make my own.  That being said, let’s talk turkey.

Hopefully you’ve got the entire carcass left in the refrigerator.  First pick off as much meat as possible and refrigerate until your soup is ready for it.  Check out this post,  turkey stock and soup.  Great simple instruction on how to deal with the leftover bones and meat. 

Email me if you have any questions!

Enjoy the long weekend!

Angie

Mock Praline Crunch Topping….

Good Black Friday Morning!

I am so not going out today!  Not my cup of tea.  Will have to do my grocery shopping this weekend but will save it till tomorrow.  

The question is….what will I be cooking today???  My oldest son Jack who’s home from college for the holiday is wanting tacos.  So cute!

I discovered that when I put my delicious crunchy Mock Praline Crunch topping on my pumpkin pie ahead of time the topping absorbed the moisture from the pumpkin, it was no longer crunchy:-(  So, I would recommend storing the topping in an air tight container after it’s completely cool and top just before serving.

Have a great day!

Angie