Grilled Pork Tenderloin with Apricot Ginger Glaze…..

Make this simple dish any night of the week.  Pork tenderloin usually comes 2 per package.  They weigh between 1 and 1 1/2 lbs. per tenderloin.  You’ll want to trim off any excess fat and sinew (fibrous connective tissue).  Using a sharp knife, run closely under the tissue to remove.

Coat the tenderloins with 1 tablespoon of olive oil and season with salt and pepper.  Cook on the grill on medium-high heat for about 25 minutes.  Top with the apricot ginger sauce for an additional  5-8 minutes of cooking.  Keep a close watch as the sugar in the jam can easily burn.

Here we go….

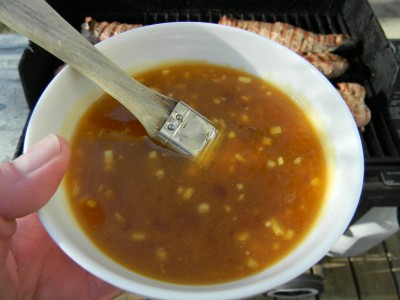
Make the simple sauce.  1 cup apricot preserves, 1/4 cup rice vinegar, 2 tablespoons minced ginger root,  1 tablespoon toasted sesame oil, 1 clove crushed garlic, and  1/8 teaspoon red pepper flakes.  Mix well and divide in half.  You will use half while cooking and half when serving.  Preheat the grill.  Cook the tenderloins on medium-high for about 25 minutes.

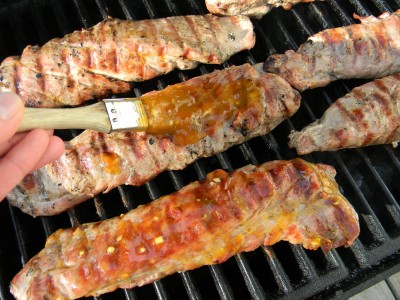
Reduce the heat on the grill to medium-low.  Generously baste the tenderloins with the glaze.  Be sure to watch carefully as the sugars in the glaze can easily burn. Cook another 5-8 minutes.  Allow to rest lightly covered with foil for 15 minutes before slicing.

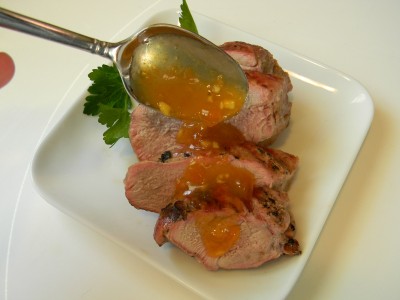
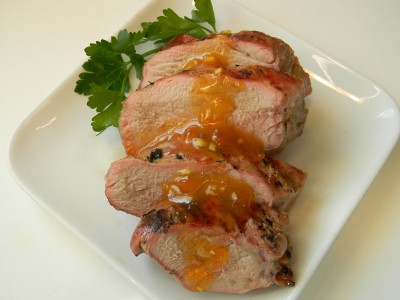
Thinly slice on a diagonal and top with extra apricot/ginger sauce.  Serve with steamed rice and stir fry sugar snap peas.  Enjoy!

Grilled Pork Tenderloin with Apricot Ginger Glaze

1 1/2-2 lbs. pork tenderloin
1 tablespoon olive oil
1/2 teaspoon salt
1/4 teaspoon black pepper
1 cup apricot or peach preserves
1/4 cup rice vinegar
2 tablespoons finely minced ginger root
1 tablespoon toasted sesame oil
1 clove crushed garlic clove
1/8 teaspoon crushed red pepper flakes

1)  Preheat the grill.  Trim the tenderloins and coat with olive oil.   Season with salt and pepper.

2)  In a small bowl, add the preserves through the red pepper flakes, mix well.  Divide in half.  You will use half to glaze the tenderloin on the grill and half for serving.

3)  Once the tenderloins have been cooking for about 25 minutes and have good color, reduce the heat to medium low and generously baste with the sauce.  Watch carefully as the sugars in the glaze can easily burn.  Cook for another 5-8 minutes, continue to baste.  Serve with extra sauce.  Serves 4.
Oven Roasted Asparagus…..

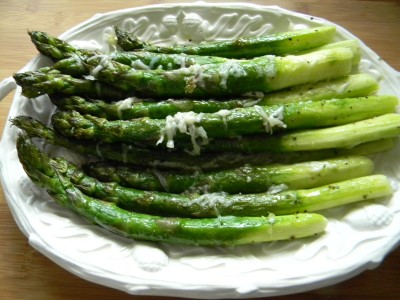
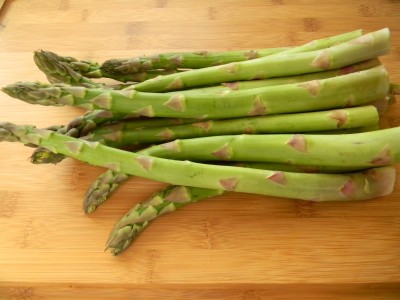
Did you know that there are male and female asparagus?  Of course, as luck would have it, the chubby spears are the female and the very thin spears are male.  As it turns out, the chubby ones have always been my favorite.  Girls have to stick together, right?    Anyway, I believe asparagus to be the most elegant of all vegetables.    Preparation is very simple and it is best grilled or oven roasted.  Serve hot or at room temperature.  Here I’ve roasted the elegant spears in the oven and topped them with a little fresh grated Romano cheese.  Perfect and simple enough for any occasion.  Enjoy!

Here we go….

Start by thoroughly rinsing as it can be a bit sandy.

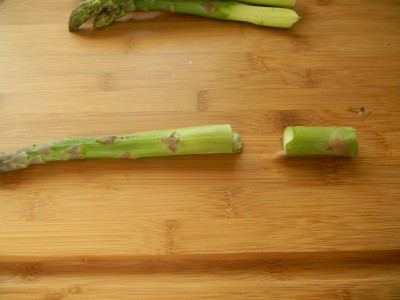
Sometimes the thicker asparagus can be tough.  Bend each piece of asparagus at the ends and it will break at the point that it’s tender. 

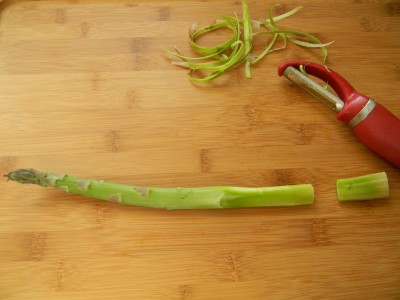
With a vegetable peeler, peel the asparagus about three inches from the bottom.

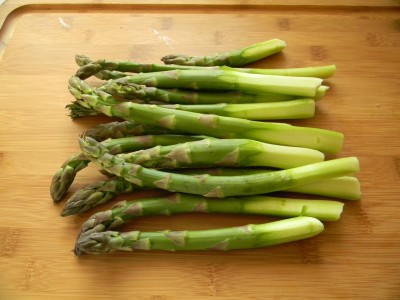
Once all of the asparagus is peeled, we’re ready for the oven.  Preheat to 400′.

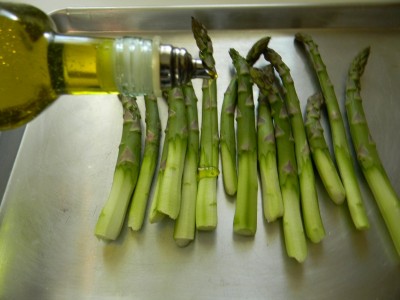
Place the asparagus onto a baking sheet and drizzle with about 1 tablespoon of olive oil.

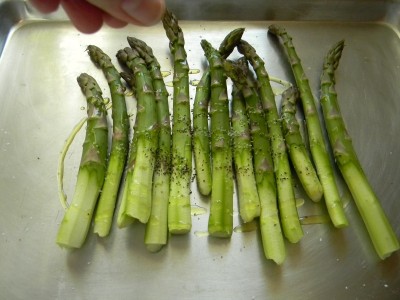
Season with a couple of pinches of kosher salt and a pinch of black pepper.

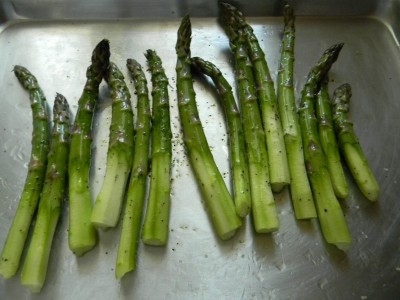
Toss the asparagus to evenly coat.  Roast in the oven for 6 minutes.

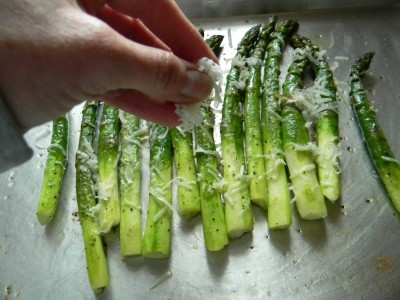
Remove from the oven and top with fresh grated Romano cheese.  Place back into the oven for an additional 3 minutes.  Serve immediately.

Oven Roasted Asparagus

1-2 bunches fresh asparagus
1 tablespoon olive oil
2 pinches kosher salt
1 pinch black pepper
1-2 tablespoons fresh grated Romano or Parmesan cheese

1)  Preheat the oven to 400′.

2)  Rinse asparagus well and snap off the tough ends.  Peel the ends 3″ from the bottom.  Place on a cookie sheet with sides.  Drizzle with 1 tablespoon of olive oil.  Season with salt and pepper.  Roast in the oven for 6 minutes.  Remove from the oven and top with fresh grated cheese.   Bake an additional 3 minutes.  Serve immediately.

Lebanese Menu: Shawarma with Tahini Sauce…..

I owe my love of kitchen experimentation to my Mom.  Growing up she was always trying new and interesting things.  She made things like homemade yogurt, brined pickles in a crock, homemade phyllo dough, and dandelion wine.  (most likely to cope with the five of us hunyocks!)  Still today we talk on the phone for hours pouring over different recipes and new  recipes we should try.  So fun!

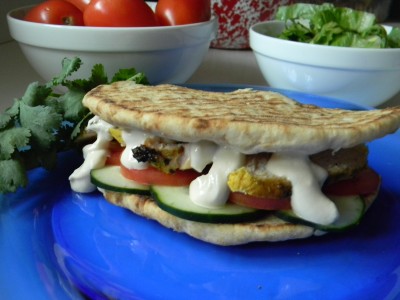
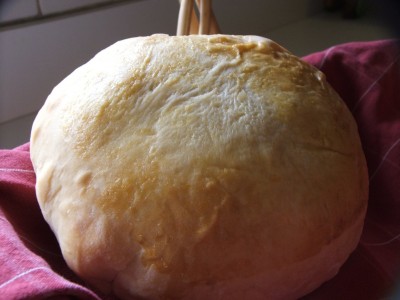
Today, 5 hours away,  Mom was making  homemade bread.  I was making Shawarma with Tahini Sauce, Hummus,  and Tabbouleh Salad.  Fresh simple ingredients make for a most delicious and out of the ordinary dinner.  No hum-drum mealtime here!

I’ve had Shawarma with Tahini sauce many times in restaurants and really love the flavor combination.  Serve with fresh tomato and cucumber slices over warm whole wheat flat bread and tahini sauce, Delish!  Round out this meal with a scoop of fresh tabbouleh salad.  Will share that recipe soon:-)

Shawarma with Tahini Sauce

2 lbs. boneless chicken breast or thighs, trimmed of any fat

Marinade:

4 tablespoons lemon juice
1 tablespoon olive oil
3 large cloves garlic, crushed
3 tablespoons plain yogurt
1 teaspoon tomato paste
2 teaspoons cumin
1 teaspoon coriander
1 teaspoon turmeric
1 teaspoons salt
½ teaspoon pepper 

Tahini Sauce

½ cup tahini
2 cloves garlic, crushed
2 tablespoons lemon juice
2 tablespoons yogurt
¼ teaspoon salt
½ cup water

Whole wheat flat bread (8 pieces)
Fresh cucumber and tomato slices

1)  Whisk all marinade ingredients together.  Leave the chicken breast whole or cut into bite size pieces to skewer.  (If making kabobs, skewer chicken now, it will be much less messy)  Pour marinade over chicken and turn pieces to evenly coat. Cover with a lid or plastic wrap and allow to marinate in the refrigerator for 1-3 hours.

2)  While the chicken is marinating, make the tahini sauce.  Whisk all of the ingredients together in a small bowl that has a lid.  Thin it out with a little more water if too thick.

3)  Preheat grill.  Allow the excess marinade to drip off of the chicken before you place on the grill.  Discard marinade.  Cook the chicken until the juices run clear.  Allow to rest for 15 minutes covered with foil before slicing.  Thinly slice the chicken on a diagonal.  Serve over warm pita bread with tahini sauce, and fresh sliced cucumbers and tomatoes.  YUMMY!  Serves 8. 

**Weight Watcher’s Point Value=10 (four ounces chicken, 1 whole pita, 1 tablespoon tahini sauce, cucumber and tomatoes)

Traditional Croatian Easter Bread (Sirnica)…..

I absolutely love learning about food traditions of other ethnicitys.    I think it’s my favorite part about being a cook.    Every week I try to make something I’ve never made before, sort of a dinner passport to different places all around the world.  This holy week, I’ll be making Croatian Easter Bread.   Check out another interesting version of this bread made with boiled, colored eggs, so interesting and beautiful!

Heather with her darling daughters Sadie,Clara, and Fiona.

I first had the pleasure of tasting this delicious bread when my friend Heather surprised me with a loaf right before Easter last year.  I was honored that she would share a loaf of her treasured family recipe.    It had a gentle yet distinctive citrus taste and was very pleasantly sweet without being too sweet.  Tender, moist, and delicious.   Of course, after the first bite I wanted to make this bread for all Easter Dinners going forward.  Heather kindly shared her recipe.

Try this Croatian Easter Bread.  It may become the next family tradition in your family:-)

Traditional Croatian Easter Bread
(Sirnica)

 Ingredients:

2 cups milk
1 package active dry yeast or 2 ¼ teaspoon

½ cup softened butter (1 stick)
½ cup sugar
2 large eggs
1 teaspoon salt
Zest of half of a lemon and half of an orange
6 cups all purpose flour
Crushed sugar cubes or sugar for dusting

1) Slightly heat the milk in a microwave. Add the yeast and set aside. (about 10-15 minutes or until yeast is dissolved and a little bubbly)

2) Meanwhile, in a large bowl or stand mixer, beat the butter, and sugar, then add the eggs and salt, and zest, beat until well blended. Add the yeast-milk mixture and half of the flour, beat well. Add remaining flour gradually, until a smooth, soft dough forms. (you may not use all the flour or may require more)

3) Place the dough in a large greased bowl, burning to coat both sides, and let rise, covered, until doubled. Punch down and turn out onto lightly floured surface and knead for 2 minutes.

4) Preheat oven to 375′.  Divide dough into 4 to 6 equal pieces, shape into a nice round ball. Cover and allow to rest 5 minutes.

5) Place dough on cookie parchment lined cookie sheet. Egg wash the dough with 1 large beaten egg and 1 tablespoon of water. Sprinkle with crushed sugar cubes. Bake for 20 minutes or until golden brown. Cool completely.

 *one way to check if a yeast bread for doneness is to thump it with your fingers, if it sounds hollow, it’s done. Be sure that you have a nice brown color was well.

Simple Apricot Glazed Easter Ham…..

I love to plan for any food celebration!  Easter is especially exciting because of all of the spring produce readily available.  Your holiday dinner doesn’t have to be complicated!  I truly believe that the best foods are the ones with the simplest preparation.  There are many side dishes that can be prepared ahead and simply warmed before serving.

Personally, I especially love a precooked  Easter ham.   Since it’s fully cooked all you need to do is warm in the oven and add a tasty glaze.  I make a simple glaze with apricot preserves, a little dijon mustard, and  a little cider vinegar.  Be sure to warm the ham with a little water or pineapple juice in the pan and cover it tightly with foil.  Your ham will not dry out.  

Warm a precooked ham at 350′ for 15 minutes per pound.  (example:  10 lb. ham x 15 = 150 minutes.  Divide 150 by 60 minutes=2 1/2 hours.  You want an internal temperature of 160′.  Even though it’s fully cooked, rewarming foods, especially meats, need to reach a certain temperature to make it completely safe.  Use an instant read thermometer or one you can put into the ham and leave while in the oven.  With the bone in, figure about 1/2 lb./serving.  Save the bone for soup!

If you’re using a ham that isn’t pre cut, you’ll want to score it with a sharp knife about half way through cooking.  So for a 10 lb. ham score after about an hour and 15 minutes of cooking.  Simply run your knife lightly over the ham making a criss cross pattern.  You will begin to glaze at this point as well.

My Favorite Easter Ham with Apricot Glaze

1 ham-can be spiral cut or uncut
1 cup apricot preserves
1/4 cup brown sugar
2 tablespoons cider vinegar
1 tablespoon dijon mustard
pinch of salt and pepper
2 cups Pineapple juice

1)  Preheat oven to 350′.  Place the ham in a shallow baking dish fat side up (you can use a pan with a rack).  Add  pineapple juice or 2 cups of water to the bottom of the pan.  Cover tightly with foil and bake for about half of the cooking time.  Remember, 15 minutes per pound.  Insert your thermometer if using one that is oven safe.  Try not to touch the bone.

2)  Half way through cooking, remove from the oven and carefully remove the foil, watch out for steam, it’s terribly hot!  Score the ham if you need to.  Generously coat the ham with the glaze.  Lightly re-cover with the foil.  Add a little water to the pan if the pineapple juice has evaporated.  Back into the oven.  Baste with the glaze a couple more times before it’s done.  Remove from the oven and keep the foil on the top to keep the heat in.  Allow the ham to rest for about 30 minutes.  This will allow you to use the oven to warm any other side dishes you’ll be serving.   Baste the ham one last time before serving.  Enjoy!

More easy Easter recipes to come!

Have a wonderful weekend!

Angie

World’s Best Sugar Cookies…..With Easter Colors

My Mom has been making these sugar cookies for years.  Buttery, light, and delicious.  Use any color sugar you like to top the cookies.  These make for very simple and festive cookies without a lot of fuss.  For these cookies, I simply used equal parts yellow and pink sugars.

World’s Best Sugar Cookies

 1 cup unsalted butter, softened
1 cup powdered sugar
1 cup white sugar
2 eggs
2 teaspoons vanilla
1 cup oil
5 cups all purpose flour
1 teaspoon salt
1 teaspoon soda
1 teaspoon cream of tarter
½ cup sugar for pressing

 1)  Preheat oven to 375’.  Parchment line a cookie sheet, set aside.

2)  In a large mixing bowl, beat the butter and sugars until fluffy.  Add the eggs and vanilla, beat well.  While the mixer is going, stream the oil into the butter mixture.  Beat until well blended.

3)  In a medium size bowl, add the flour through cream of tarter, whisk to blend. 

4) Add half of the flour mixture to the butter mixture, mix well.  Add the rest of the flour and mix until well blended.

5)  Portion out the cookie dough (about 1 tablespoon) right onto the cookie sheet using a cookie scoop.  Lightly grease the bottom of a glass, dip into the sugar and lightly press the cookie down.

6)  Bake for 11-12 minutes.  Cool completely and store in air tight bag or container.  Makes about 3 1/2 dozen.

*use colored sugar for different occasions.

East African Chicken….Weight Watcher’s Friendly!

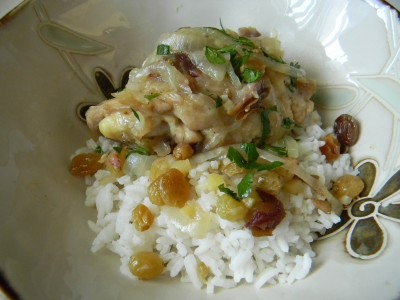
I first found a recipe for East African Chicken in a Cooking Light magazine about 10 years ago.  Of course, I’ve long since lost the recipe, but tried to duplicate the recipe from memory.  The combination of the spice from the ginger,  the sweet from the raisins and dates, and the savory flavor from the onions and garlic give this dish fantastic balance and flavor.  Serve over brown or white rice.  Sooooo good!

Here we go:

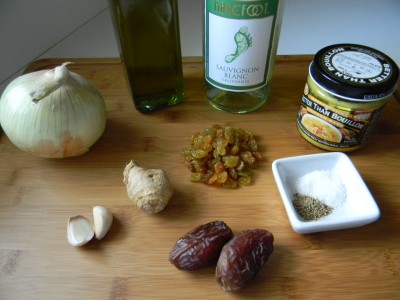
You’ll need onion, fresh garlic, fresh ginger, pitted dates, golden raisins, chicken broth, dry white wine, olive oil, and salt and pepper.

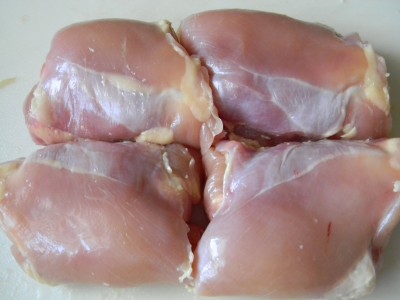
The original recipe didn’t call for skinless chicken thighs, but I think they make for the most flavorful and most economical meal.  You can often times find them on sale for $.99/lb.  I removed the skin and excess fat.

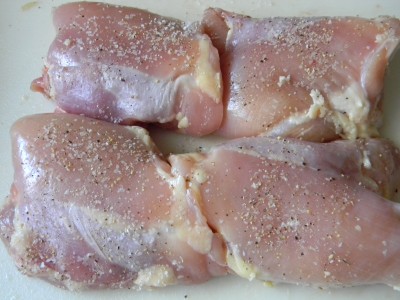
Season both sides of the thighs with kosher salt and fresh ground pepper.

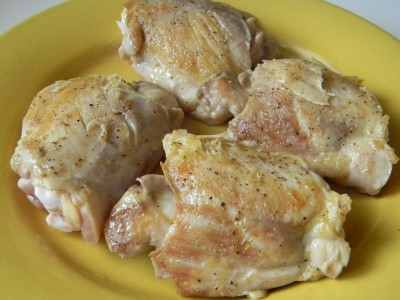
Brown the thighs in your braising pan with olive oil.  Remove from the pan onto a plate.

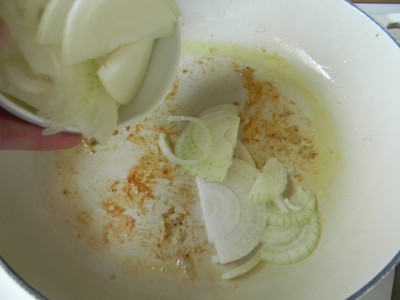
Add onions to the pan and cook for a few minutes or until the onions begin to soften.  Add a touch of the chicken broth to loosen the bits from the bottom of the pan.  This will evaporate and you’ll still be able to give the onions some color.

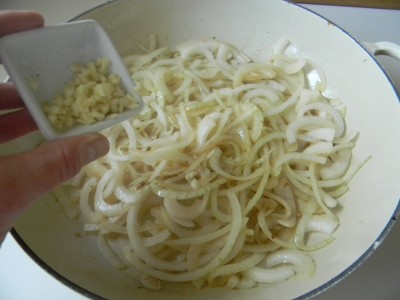
Add the fresh garlic…

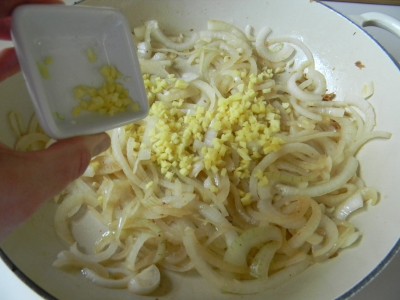
and the ginger and cook for a few minutes.

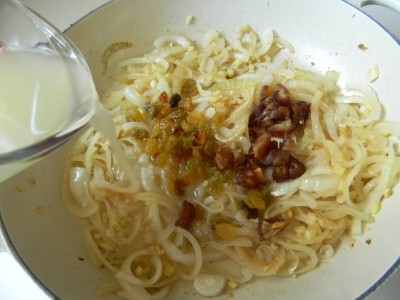
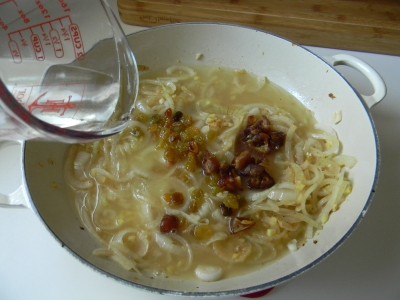
Add the dates, raisins, and chicken broth to the pan.

Add the wine and allow this mixture to simmer for about 10 minutes.

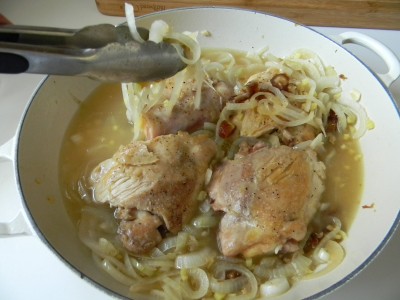
Nestle the chicken into the onion and broth mixture.  Top each piece of chicken with the onion mixture.  Cover with a tight fitting lid and braise over low heat for 40 minutes.  (try not to peek)  Serve over steamed white or brown rice.   Serves four.  This dish will only cost you 7 Weight Watcher’s points! (10 points with 1/2 cup of brown rice)

East African Chicken 

4 medium chicken thighs with bone, skin removed
½ teaspoon kosher salt
¼ teaspoon fresh ground pepper
1 tablespoon olive oil
1 medium onion thinly sliced, about 2 cups
2 large cloves garlic, minced
2 tablespoons fresh peeled and finely minced ginger root
¼ cup golden raisins
¼ cup chopped dates
1 ½ cups chicken broth
½ cup dry white wine

1) Remove the skin and excess fat from the chicken thighs and season with salt and pepper.

2) Heat a heavy skillet with a lid over medium heat. Add olive oil. Brown the chicken on both sides. While the chicken is browning, slice the onion, mince the garlic, and peel and mince the ginger.

3) Remove the browned chicken from the skillet onto a plate, cover loosely with foil.

4) Add the onion to the pan. Cook for about 5 minutes, the onions should be soft.

5) Add the garlic and ginger, cook another two minutes.

6) Add the raisins, dates, chicken broth, and wine. Simmer for about 10 minutes. Nestle the chicken pieces in the liquid and top with the goodies. Cover with the lid and cook over low heat for 40 minutes. Serve over steamed rice. Serves 4.
 

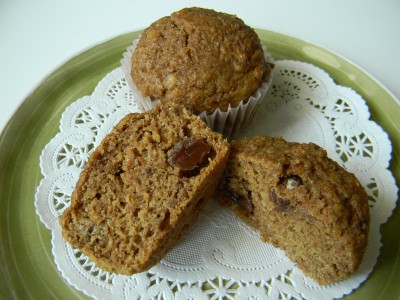
Pumpkin Bran Muffins…..Weight Watcher’s and Ryan Worthy!

Forget the notion that bran muffins are bland and dry.  As far as bran muffins go, these are incredibly moist and delicious, and will only cost you 4 Weight Watcher’s points!  Packed with flavor and fiber they’re very satisfying and filling.  Ryan gave them the double thumbs up so I know they’re great:-)   My recipe makes 10 but you can easily double it and put some in the freezer (individually wrapped)  for an easy breakfast.  This simple recipe goes together in no time.
Pumpkin Bran Muffins
(4 points/muffin)

Wet ingredients:

½ cup all bran cereal
¼ cup milk
½ cup pumpkin
1/3 cup water
¼ cup non fat yogurt
1 egg
2 T. canola oil
¼ cup raisins

 Dry ingredients:

 1 cup whole wheat flour
6 tablespoons packed brown sugar
½ teaspoon soda
½ teaspoon cinnamon
¼ teaspoon each cloves and nutmeg
1/2 teaspoon salt

 1)  Preheat oven to 350’.  Add 10 muffin liners to muffin pan and coat with cooking spray.

2)  In a medium size mixing bowl, mix all wet ingredients and allow to stand for 10 minutes (this will make the bran cereal dissolve)

3)  In a large mixing bowl add dry ingredients.  Make a well in the center and add the wet ingredients all at once.  Mix until just blended.  Divide among 10 prepared lined muffin cups.  Bake for 16-18 minutes.

*add nuts if you like (this will affect the point value.

Simple Cheesy Scalloped Potatoes…..

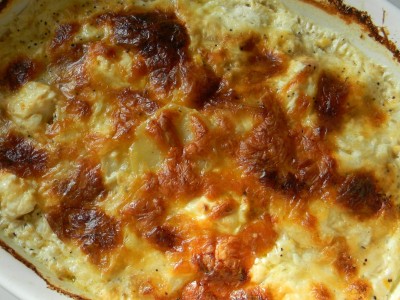
I’ve never met a potato I didn’t like.  What’s not to love about a cheesy, scalloped potato that’s really easy??  They go together in about 15 minutes and bake for about an hour.  These are especially delicious the next day.  Make a day ahead and serve at your next barbeque or potluck.  Simply rewarm in the microwave or oven before serving.

Here we go….

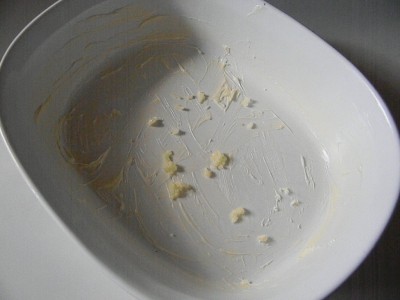
Start by generously buttering a large casserole dish.  Add a couple of crushed cloves of garlic, set aside.  Preheat the oven to 375′.  Peel 5 medium size potatoes or 4 large and cut into thin slices.

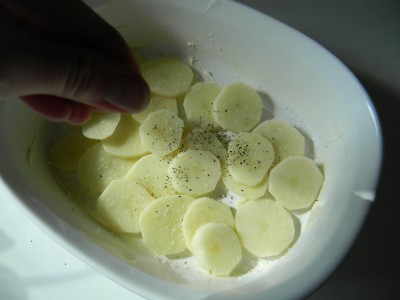
We begin to layer.  First a layer of potatoes and season with salt and pepper….

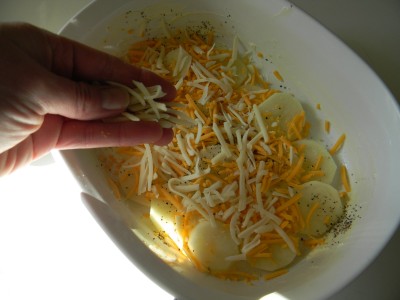
Next the cheeses.  I’ve used sharp cheddar, gruyere swiss and….

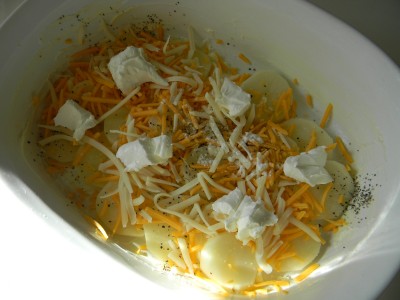
Cream cheese.  I like the creaminess it adds to the dish.

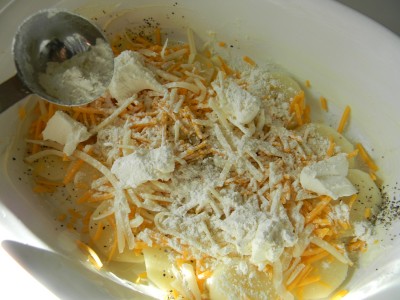
Then flour for thickening.  You’ll want to repeat the layers at least one more time.  Now for the liquid.

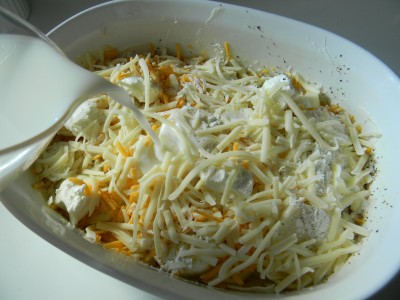
Pour the milk over the top of the potatoes and cheese moistening any flour you may see.  Bake for about an hour or until the cheese is nicely browned and bubbly.  If you’re serving right away, allow them to sit for 10-15 minutes.

Simple Cheesy Scalloped Potatoes
 
5 medium size baking or Yukon gold potatoes, peeled and thinly sliced
1 tablespoon butter for greasing the baking dish
2 large cloves garlic, crushed
1 teaspoon salt
½ teaspoon pepper
5 tablespoons flour
1 cup shredded sharp cheddar cheese
1 cup shredded gruyere swiss cheese or regular swiss cheese
4 ounces softened cream cheese
3 cups room temperature milk, microwave until you take the chill off (for richer potatoes, use whole milk)
1) Preheat the oven to 375’. Grease an oven safe 2 quart casserole dish with 1 tablespoon of butter. Crush the garlic and spread over the bottom of the dish.

2) Layer the potatoes, salt and pepper, half of the cheeses, and half of the flour, repeat with the remaining potatoes, salt and pepper, and cheeses.

3) Pour the milk over the potatoes and cheese. Be sure to moisten any flour you may see.

4) Bake for 60 minutes. Let stand for 10-15 minutes before serving. Serves 6.

*Use any combination of cheeses you like. 

**To rewarm in the oven, 350′ uncovered for 25 minutes.  In the microwave-on high for about 10-15 minutes.

Simplest Barbeque Ribs…..

This recipe uses very few ingredients and a very simple cooking technique called braising.  Slow roast the simply seasoned ribs in the oven with low heat for a couple of hours and finish on the grill for 10-15 minutes.  Feeding a crowd?  Cook the ribs ahead and refrigerate (you’ll want to use within a few days).  Grill for 10-15 minutes and add BBQ sauce and serve.

Here we go….

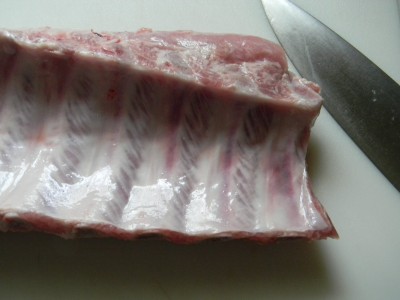
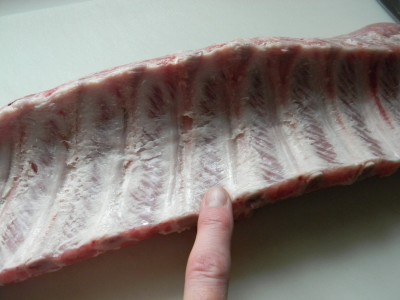
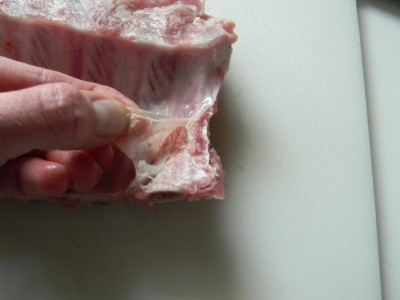
There is a skin on the underside of the ribs, you’ll want to remove it.

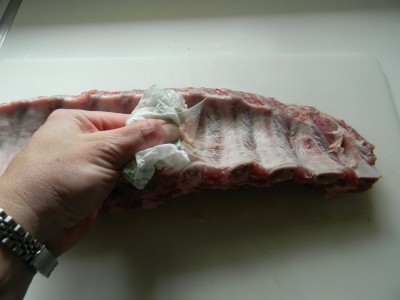
Using your fingers, grip the skin and pull away from the ribs.

If it’s too difficult to grab ahold of the skin with your fingers, use paper towel.  This will help to grip the skin.

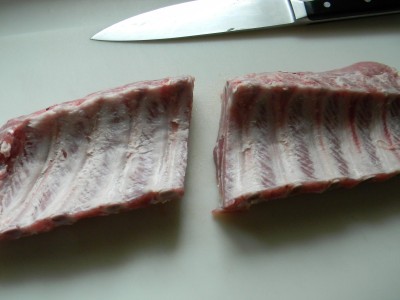
Once the skin is removed,  halve the slabs to make them more manageable when cooking.  Choose a meaty spot between two bones and slice with a sharp knife.

Preheat the oven to 275′.  Foil line a deep pan that will hold the ribs without too much crowding.

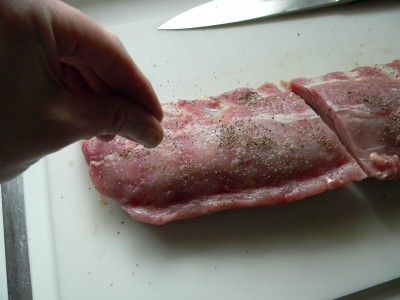
Now we’re ready to season.   I  season simply with salt and pepper.  I think salt and pepper bring out the natural flavor in the ribs and of course, you get tons of flavor from BBQ sauce.

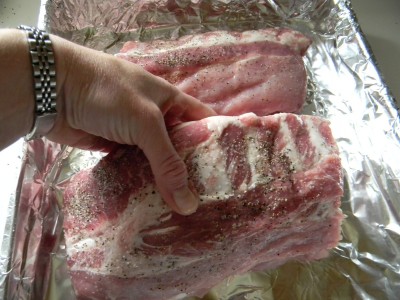
Place in prepared pan.

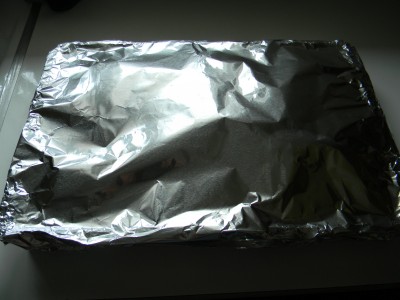
Cover the pan tightly with foil.  Roast for 2 1/2 hours.

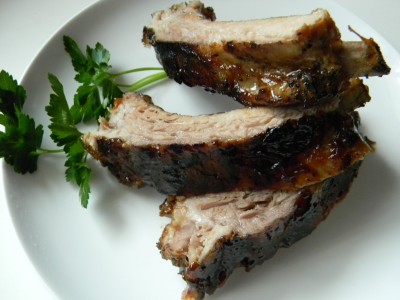
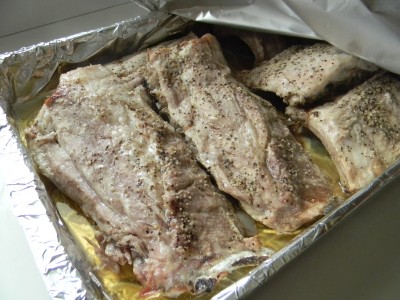
They’re done.  They don’t look very appetizing at this point but believe me, they’re tender and ready for the grill.  I find that they are more manageable when you allow them to cool a bit before grilling.  Preheat the grill to medium high.  Place ribs on the grill.  Grill until they’re heated through.   Add your favorite BBQ sauce at the very end.   I LOVE Sweet Baby Ray’s, it’s sweet, thick, and a bit spicy, so good.

Best BBQ Ribs

1-2 slabs of baby back ribs, skin removed and halved
salt and pepper
Sweet Baby Ray’s BBQ Sauce, or your favorite BBQ sauce

1)  Preheat the oven to 275′.  Foil line your pan with heavy duty aluminum foil.

2)  Remove the skin from the back side of the ribs and halve the slab.  Season generously with salt and pepper or your favorite seasoning or rub.  Place into prepared pan.

3)  Cover the pan tightly with foil.  Place in 275′ oven for 2 1/2 hours.  No need to peek.

4)  Remove from oven and cool or refrigerate to grill later.  Preheat grill to medium-high.  Place ribs on the grill for about 15 minutes.  Liberally add BBQ sauce to the ribs and watch carefully as to not burn the BBQ sauce.  Serve immediately.

ENJOY!

Angie