Homemade Garlicky Croutons…..

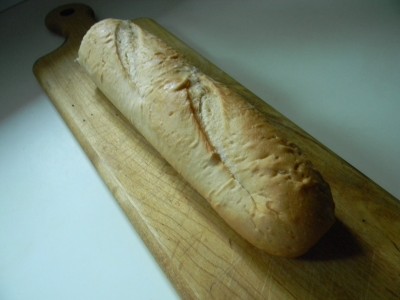
What to do with leftover bread or crust ends?  Croutons, of course!  Great on any salad, but particularly necessary on a Caesar salad.  These are amazing and far better than any store bought crouton. 

Preheat the oven to 300′.  Cut the bread into 1/2″ pieces.  You’ll want about 4 cups of cubed bread.

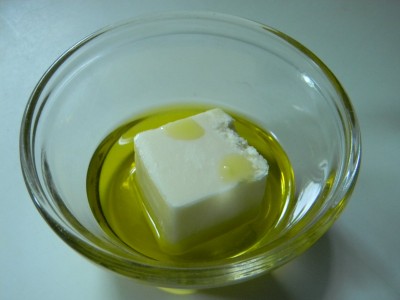
Melt 2 tablespoons of butter and 2 tablespoons of olive oil in a small dish, this should take about 30 seconds in the microwave.

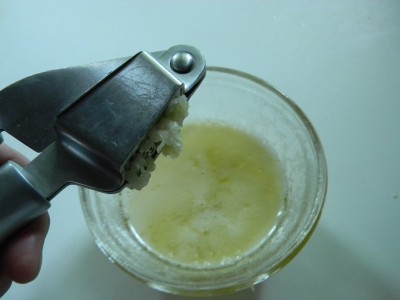
Now, the star of the show….fresh garlic.  Crush 1-2 large cloves right into the melted butter/olive oil mixture.

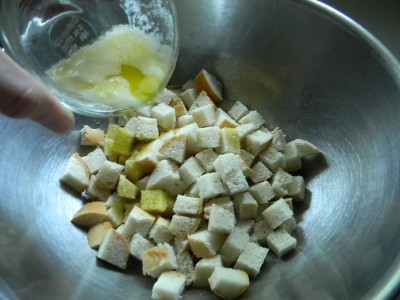
In a large mixing bowl, combine the butter mixture with the cubed bread.   Toss to evenly coat.  Add a pinch of salt if you’ve used unsalted butter.

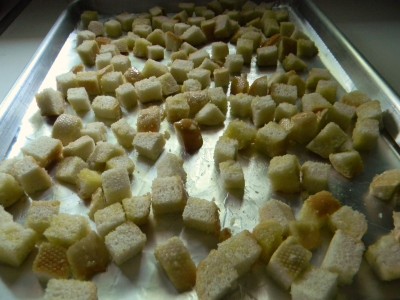
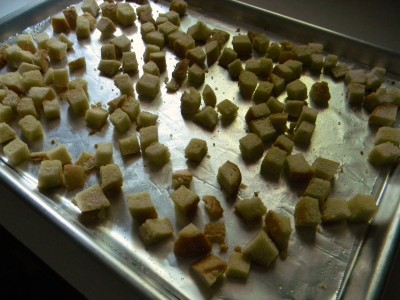
Spread the perfectly seasoned bread cubes over a cookie sheet and into the oven.  Bake for 15 minutes, then give them a turn.  Bake another 15 minutes. 

Remove the pan from the oven right onto a cooling rack.  Allow them to remain on the sheet until completely cooled.  This will assure that they will be completely dried out.  Store in a zip bag.  Makes eight 1/4 cup servings.

Homemade Garlicky Croutons

4 cups cubed stale bread, cut into 1/2″ cubes
2 tablespoons butter
2 tablespoons olive oil
1-2 large cloves fresh garlic, crushed
1 pinch of salt

1)  Preheat the oven to 300′.
2)  Cube bread and place in a large mixing bowl.  Melt the butter and olive oil together in a small microwavable dish.  Add the crushed garlic.  Pour over prepared bread and mix to evenly coat.  Add salt if you’ve used unsalted butter.
3)  Spread the bread over a large cookie sheet being sure not to crowd.  Bake for 15 minutes.  Give the croutons a turn and bake another 15 minutes.  Remove from the oven onto a cooling rack.  Allow to completely cool on the cookie sheet.  Store in a zip lock bag.  Makes 16 two tablespoon servings.
Baked Falafel Sliders with Yogurt Tahini Sauce…..

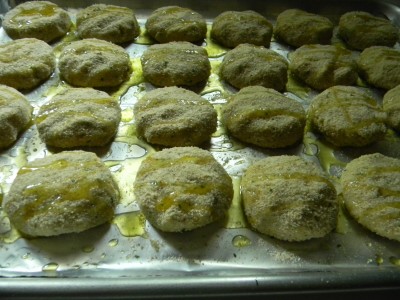
I now completely understand why these luscious cakes are fried.  Most often, I’ve had them fried until very dark brown.  I can only asssume that after working with my falafel mixture, it is needed to keep its shape.  That being said, I had to take an extra step in my preparation.  I found that when I only baked them, as I would most of my “oven fried” recipes, they were very soft and would not keep their shape very well.  I baked, allowed them to cool, then I pan fried them in a little olive oil.  This had a more favorable result.    Lightly crispy on the outside and tender and flavorful on the inside.  I loved them!

Here we go…

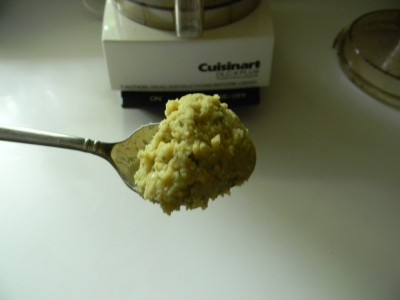
I used my food processor to blend the canned chick peas.  I’ve read recipes where you’re instructed to mash them with a spoon, seems difficult to me.   After you’ve processed the chick peas, add the rest of the falafel ingredients.  Process until well blended.  Refrigerate for at least an hour.

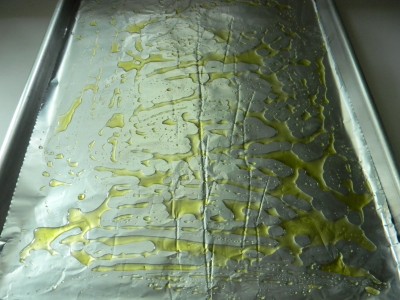
Non stick foil line a cookie sheet.  Pour about a tablespoon of olive oil over the sheet and spread with your hand to coat the whole sheet.  Preheat the oven to 375′.

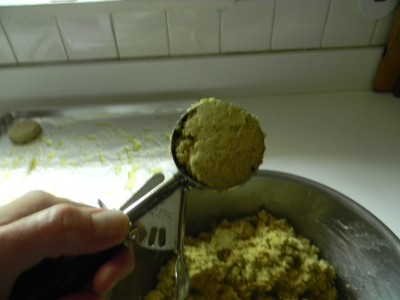
For uniform cakes, I use a large ice cream or a cookie scoop. 

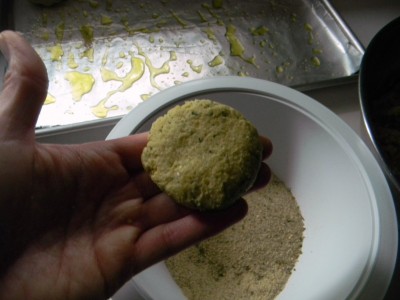
Scoop into your hand and shape into a small patty. 

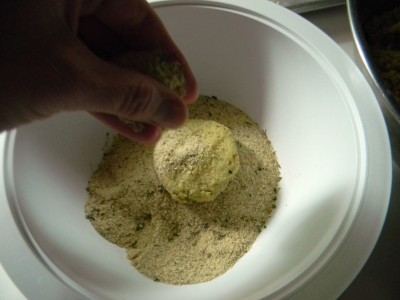
Carefully dredge in bread crumbs.

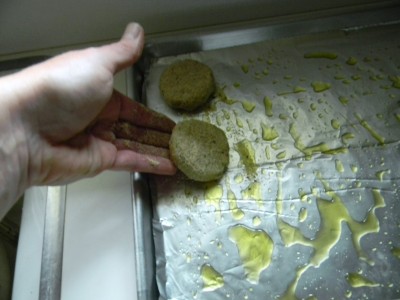
Place on prepared cookie sheet.

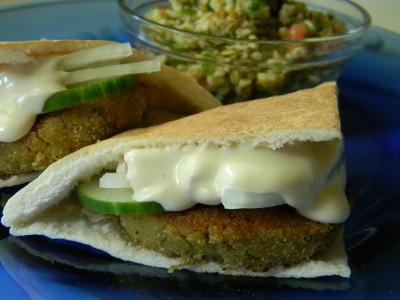
Drizzle the tops with a small amount of olive oil.  (you can see that I made a huge recipe here, this recipe only makes 8)  Bake for 30 minutes.  Allow the cakes to cool for easier handeling.  Heat a skillet over medium heat and add a couple of tablespoons of olive oil.  Once the oil is very hot, add the cakes, be careful not to crowd, and brown on both sides. (3-4 minutes per side)  Serve inside a quartered pita bread with fresh cucumber, thinly sliced sweet onion, and tahini sauce.  Serve with a yummy tabbouleh salad.  Healthy and soooooo delicious!

Yogurt Tahini Sauce

½ cup tahini
2 cloves garlic, crushed
2 tablespoons lemon juice
2 tablespoons yogurt
¼ teaspoon salt
½ cup water

Falafel

1 can chick peas, drained
1/2 large onion, coarsely chopped
2 tablespoons flat leaf parsley
1/2 teaspoon kosher salt
3 large cloves fresh garlic, coarsely chopped
1 teaspoon cumin
1/2 teaspoon coriander
1 teaspoon baking power
2 tablespoons flour
1 tablespoon water
1 tablespoon lemon juice
1/2 cup unseasoned bread crumbs.
Olive oil for frying and to coat the cookie sheet

Pita bread, cut into quarters
1 medium cucumber, thinly sliced
1 small sweet onion, thinly sliced

1)  Whisk all yogurt tahini sauce ingredients together until well blended.  Refrigerate until you’re ready to serve.
2)  Place the chick peas into the food processor and process until smooth.  Add the rest of the ingredients and process until well blended.  Refrigerate for at least an hour.
3)  Preheat oven to 375′.  Non stick foil line a cookie sheet and add a couple of tablespoons of olive oil, spread over sheet to coat.
4)  Scoop out the dough using a 2 tablespoon cookie scoop.  Carefully shape into a small patty and coat with bread crumbs.  Place on the cookie sheet.  Drizzle with a small amount of olive oil.
5)  Bake for 30 minutes.  Remove from oven and allow to cool for about 20 minutes.
6)  Heat skillet over medium heat, add olive oil to coat the bottom of the pan, about 2 tablespoons.  When very hot, fry each falafel until nicely browned.  Allow to drain on a paper towel lined plate.  Serve with pita bread, tahini sauce, fresh sliced sweet onion, and fresh cucumber.  Makes 8 falafel.  Serves 4.

*for an interesting appetizer, use a small cookie scoop and make them bite size.  Serve with the yogurt tahini sauce for dipping.

Tabbouleh Salad…..(Only 3 points plus per serving!)

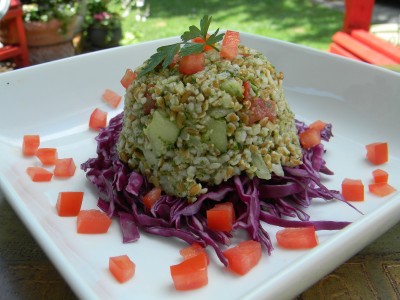
This is my favorite salad to date.  For a quick and satisfying lunch serve over a bed of nutrient rich red cabbage and garnish with fresh diced plum tomatoes.   Great with grilled fish or chicken.  Simple to prepare and it will keep for 5-7 days in the refrigerator.  I especially like to make a big tub of it and eat it for lunches or side dishes throughout the week.

The base of this salad is bulgur wheat.   I love the texture of this healthy grain.  One half cup serving contains 5 grams of protein and 7 grams of fiber.    One half cup cooked equals 3 Weight Watcher’s points plus.  As you may already know, whole grains such as bulgur digest slowly, keeping you full longer.

You can soak it in water for an hour and drain off excess water, but I think the best way to prepare it is to cook it.  It only takes 12-15 minutes to cook and I like the texture much better when it’s cooked as opposed to soaking.

Tabbouleh Salad

1 cup bulgur wheat, cooked and cooled
2 large bunches (or more) fresh flat leaf parsley, finely chopped
1/4 cup fresh mint, finely chopped
2 tablespoons olive oil
3 tablespoons fresh or bottled lemon juice
2-3 large cloves fresh garlic, crushed
1 cup sweet onion, finely chopped
2 medium plum tomatoes, seeded and finely chopped
1 large cucumber, seeded and finely chopped
2 pinches of kosher salt (or to taste)
2 pinches of black pepper (or to taste)

1)  Prepare bulgur according to package directions, allow to cool completely.  I use Bob’s Red Mill bulgur.  Add 1 cup bulgur to 2 cups of water, bring to a boil, reduce heat and cover.   Allow to simmer for 12-15 minutes.  Dump the cooked bulgur into a large bowl to promote quick cooling.  Stir often to release the heat.
2)  You can use a food processor to blend the parsley, mint, garlic, lemon juice, and olive oil.  It is not necessary, but it’s a lot easier than chopping the parsley and mint by hand.  Either way, it’s all good.
3)  Add all salad ingredients to the bulgur.  Mix well to blend.  Refrigerate the leftovers immediately.  Enjoy!

*makes about 8- 1/2 cup servings
**1/2 cup serving=3 Weight Watcher’s Points!

Graduation Cupcakes…..

I decided on cupcakes for Jack’s graduation cake.    I waffled between a large decorated cake, a large decorated cookie, and cupcakes.   Cupcakes are a great choice for so many reasons.  They bake in about 18 minutes and cool completely in about an hour.  They’re completely self serve with no plate and fork required.   They’re perfectly portioned and easy to eat.  I like that the dessert table looked nice the entire evening.  I left the cupcakes out on the dessert table all day.  At the end of the day I put the leftover treats in the refrigerator.

I chose to make chocolate and pumpkin cupcakes.  I used my Pumpkin Squares with Cream Cheese Frosting recipe.  The recipe made about 2 1/2 dozen cupcakes.  Of course, my go to chocolate cake recipe is the Hershey’s “Perfectly Chocolate” cake. (made about 2 1/2 dozen cupcakes)   This one bowl recipe will become your favorite chocolate cake recipe too!  It’s on the back of the can, but I’m going to give it to you.  The writing is really small!  I’ll also give you the frosting recipe.

I doubled the cream cheese frosting recipe and used Wilton gel colors to make his high school colors.  They work best because you can get very intense color without totally watering down your frosting.  So fun and so hard to resist!

Hershey’s “Perfectly Chocolate” Chocolate Cake

2 cups sugar
1- 3/4 cups flour
3/4 cups Hershey’s Cocoa
1- 1/2 teaspoons baking powder
1- 1/2 teaspoons baking soda
1 teaspoon salt
2 eggs
1 cup milk
1/2 cup vegetable oil
2 teaspoons vanilla extract
1 cup boiling water

1) Preheat oven to 350′.  Line muffin pan with cupcake liners and coat the liners with cooking spray. 
2)  Combine dry ingredients in large bowl.  Add eggs, milk, oil and vanilla; beat on medium speed for  2 minutes.  Stir in boiling water (batter will be thin).  Fill each cup about 2/3 full.
3)  Bake for 16-18 minutes.  A toothpick should come out clean.  Cool completely.  Makes about 30 cupcakes.

*for two 9″ pans, grease and flour pans.  Bake for 30-35 minutes.  Cool for 10 minutes.  Remove from pan onto wire racks and cool completely.

Perfectly Chocolate” Chocolate Frosting

1 stick (1/2 cup) butter
2/3 cup Hershey’s Cocoa
3 cups powdered sugar
1/3 cup milk
1 teaspoon vanilla extract

1)  Melt butter.  Stir in cocoa.
2  Alternately add powdered sugar and milk, beating on medium speed to spreading consistency.  Add more milk, if needed.  Stir in vanilla.  Makes about 2 cups.

Have a wonderful week!

Angie

Amazing Raspberry Bars!

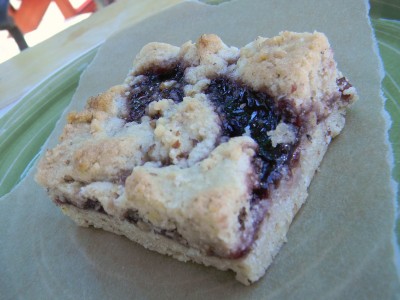
These are the best raspberry bars I’ve ever had!  My Friend Ann M. brought me a sample at the end of the school year and I’ve been dreaming of them ever since.  She was kind enough to share the recipe with me.  This will be my “go to” raspberry bar recipe from now on. 

There are few ingredients, which I love.  Ann uses Soho raspberry filling,  I used seedless raspberry jam, it’s what I had on hand.  You could substitute any fruit filling you like. (apricot would be awesome too!)  The recipe called for ground walnuts, I only had pecans on hand so I used them.  They turned out amazing!  The bars cut beautifully and make for a very professional looking presentation. 

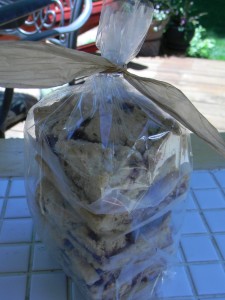
This is the sort of thing I love to share with friends.  If you’d like to package them, cut small squares of wax paper to layer between bars.  There is nothing like receiving a beautifully packaged homemade treat!

THANK YOU ANN!!!

Raspberry Bars

1 lb. softened butter (4 sticks) 
1 1/2 cups ground walnuts or pecans
2 cups sugar
4 1/2 cups flour + 1/2 cup more
1/2 teaspoon salt
3 large eggs
2 cups raspberry filling

1)  Preheat the oven to 350′.  Coat your pan (*see below) or pans well with cooking spray, set aside.
2)  In your stand mixer or large bowl with electric mixer, beat the butter and 1 cup of the ground nuts.  Add the sugar and beat well.  Add the eggs, beat well.  Add 4 1/2 cups of flour.  The dough will be a little sticky.
3)  Press a little over half of the dough evenly into the bottom of the baking pan.  You may have to put a little flour on your hands to prevent the dough from sticking.  Spread the filling over the dough keeping it 1/2″ from the outer edge.
4)  Add the additional 1/2 cup of flour and the remaining 1/2 cup of the ground nuts back to the mixing bowl and beat until blended.
5)  Add the remaining dough in clumps to the top of the filling. 
6)  Bake for 35 minutes or until nicely browned.  Cool completely before slicing.

*This recipe is quite large.  I made a half sheet pan which is 12″ x 18″.  You could use two 9″ x 13″ pans if you don’t have a half sheet pan.
*Reduce the baking time slightly if you’re using a dark pan.  Set the timer for 25 minutes and watch carefully.

Whole Wheat Pumpkin Bread Video…..


Pumpkin bread?  In the summer?  Always a wonderful breakfast/snack option in my house.  Why not make a delicious trifle?  Cube the delicious bread and layer in a pretty individual serving dishes with custard, whipped cream, and fresh blueberries…delish!

Check out this video.  This is the simplest and most deliciously moist pumpkin bread I’ve ever had!  I use 100% whole wheat flour in the recipe.  The recipe is especially near and dear to my heart because it’s one of my very first posts in 2009!  It also freezes beautifully.  Bake some up on a mild summer day and squirrel it away for later.

I’ve had a hard time finding canned pumpkin in the stores I shop.  I’ve never had a problem, I could always find pumpkin year round.  There was a pumpkin shortage a couple of years ago.  We had a lot of rain that year and it made it impossible for the farmers to harvest their pumpkins, so sad!  Anyway, I’m wondering if they’re still trying to recover from that.

Have a wonderful evening!

Angie

Chayote, Pear, and Avocado Salad with Fresh Lime Dressing…..

Of all of the “UFO’s” I’ve featured on my blog, this is my favorite!  Chayote is available year round and packed with amino acids and vitamin C.  It is great to be able to add another fruit/vegetable to the rotation.  I originally thought it was a vegetable as it’s technically a squash, however vegetables that contain seeds are technically fruits.    I’ve known for years that tomatoes were considered a fruit but never gave squash a thought.  Either way, I love chayote.

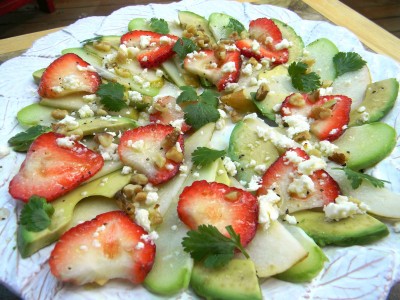
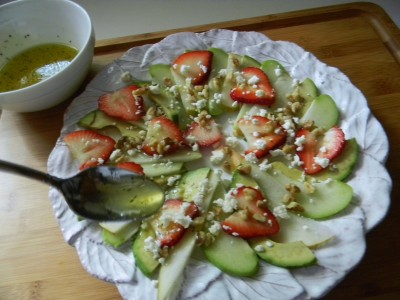
Now for salad specifics.  The layers of flavors in this salad are incredibly delicious.  You’ve got the crunch of the chayote, the sweetness of the pears and strawberries, the creamy avocado, saltiness of the feta, and the richness of the toasted walnuts.  Topped with a drizzle of simple fresh lime and honey dressing adds the perfect amount of acidity to pull all of the flavors of the salad together perfectly.

Serve at your next dinner party either on individual salad plates or on a large platter for buffet style serving.  Lovely and Delicious.

Here we go:

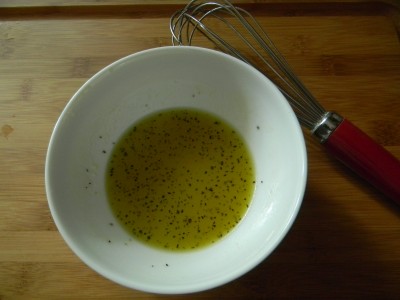
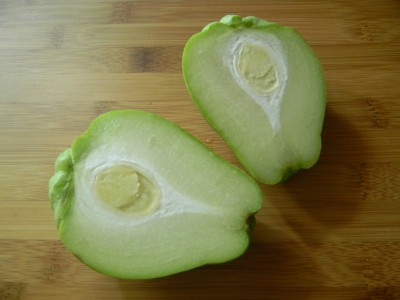
We’ll begin with the very simple lime dressing.  Whisk the juice of one fresh lime (about 1 1/2 tablespoons), 1 1/2 tablespoons of honey, and 2 tablespoons of olive oil.  Add 2 pinches of salt and a pinch of pepper.  Whisk to blend.  Set aside.Chayote is quite simple to work with.  I would say that it the texture resembles an unripe pear when slicing.  As you can see it has a seed.  It is edible but I removed it.

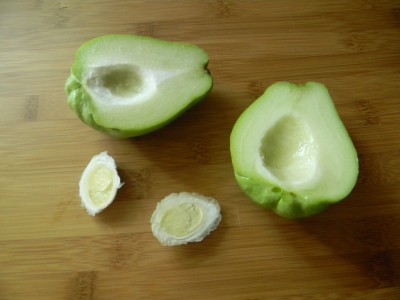
The seed is very easy to remove, simply scoop it out with a spoon.

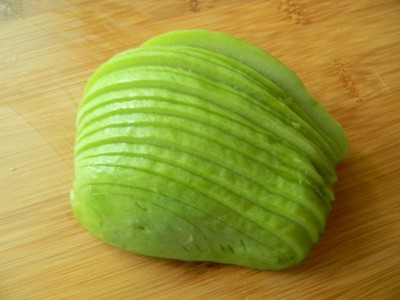
After you halve it, slice it into thin strips flat side down.

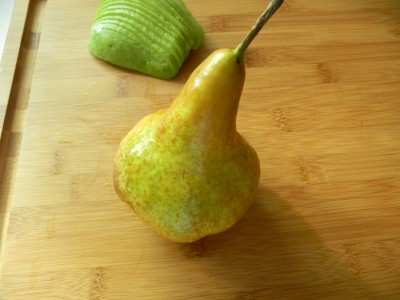
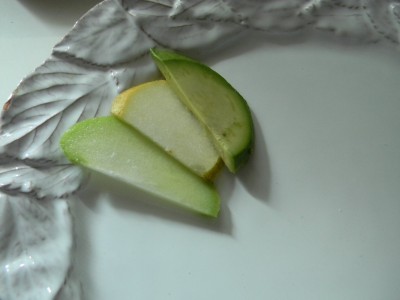
Next we’ll be using a crisp pear. 

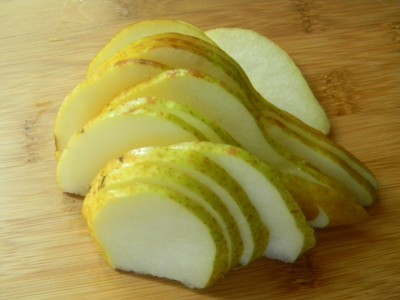
Slice it in half and thinly slice it around the core.

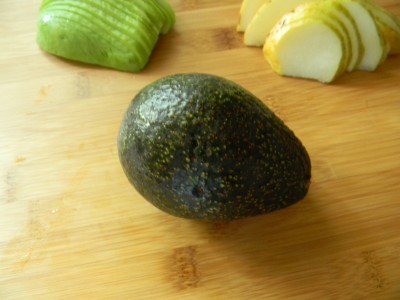
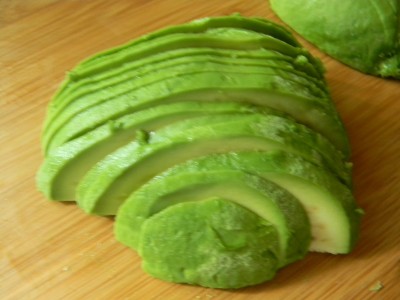
Next, avocado, my favorite salad ingredient. 

Slice the avocado in half.  Remove the pit with a spoon.  Carefully remove the flesh of the avocado from the peel with a spoon.  Slice thinly.  If you’re making the salad a few hours ahead of time, place the avocado in a bowl and drizzle lime juice over it to coat to prevent browning.  (Do this with the pears as well)

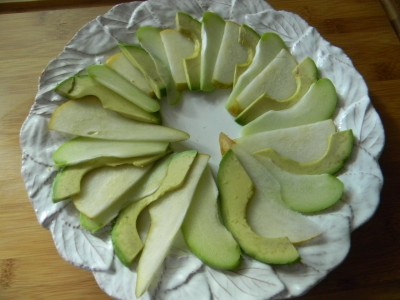
To assemble the salad, alternate layers between the chayote, the pear and avocado. 

Once the chayote, pear and avocado fill the plate.  Add the strawberries, feta, and toasted walnuts.  (There is enough salad ingredient  to make two dinner plate size salads or 6 individual salad plates)

Lastly, drizzle the salad with the lime dressing and top with a little fresh cilantro.

Chayote, Pear, and Avocado Salad with Fresh Lime Dressing

For the dressing:

1 lime, juiced or 1 1/2 tablespoons bottled
1 1/2 tablespoons honey
2 tablespoons olive oil
2 pinches kosher salt
1 pinch black pepper

For the salad:

1 chayote, sliced in half, seeded, and thinly sliced
1 crisp pear, halved and thinly sliced around the core
1 avocado, pit removed and thinly sliced
5-6 strawberries
2 ounces crumbled feta
2 tablespoons toasted walnuts (325′ oven on cookie sheet for 8-10 minutes, watch closely)
1 small bunch cilantro for garnish

1)  Whisk all salad ingredients together to blend, set aside.
2)  Arrange sliced chayote, pear, and avocado on the serving plate.  This amount of vegetables will make two plates of salad pictured.
3)  Top with sliced strawberries, feta, and walnuts.  Whisk the dressing again and drizzle over the salad.  Garnish with fresh cilantro leaves.  Serves 6.

*This recipe will make one large serving platter of salad, or two dinner size plates, or 6 individual salad plates.

Simplest Grilled Salmon with Fresh Cucumber Dill Sauce…..

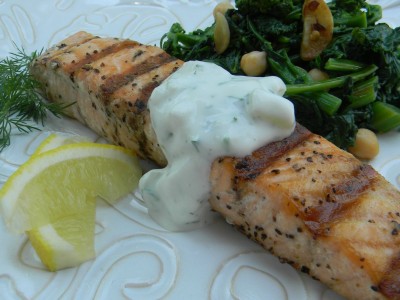
If you’ve never grilled salmon before, it’s time.  It cooks in a matter of minutes.  Season it very simply with olive oil, salt and pepper and serve it with a fresh cucumber dill sauce.  This creamy sauce is made with fat free greek yogurt and is incredibly delicious with the grilled salmon.  Make up to a day ahead.  Today I served it with sauteed rapini but you can serve it with most any side.  Try it with oven roasted dijon potatoes or why not with orzo pasta salad with roasted garlic vinaigrette dressing? Delish~

Simple Grilled Salmon with Fresh Cucumber Dill Sauce

For the sauce:

1 cup non fat greek yogurt
1/2 cup sweet onion, finely chopped
1/2 cup seeded and peeled cucumber, finely chopped
1 small bunch of fresh dill, chopped
2 large cloves fresh garlic, crushed
1/4 teaspoon kosher salt
1/4 teaspoon black pepper

4-6-8 ounce skinless salmon fillets, about 1″ thick
1 tablespoon olive oil
2-3 pinches of kosher salt
1-2 pinches of coarsely ground black pepper
1 lemon cut into wedges and seeds removed for garnish
1 small bunch of fresh dill, chopped

1)  In a medium mixing bowl, combine all of the sauce ingredients, gently mix well to blend.  If too thick and you’d like a slightly looser consistency, simply add a small amount of milk.  If you’re making it ahead, give it a stir before serving.  Of course, refrigerate immediately.
2)  Rinse the salmon fillets with cold water and pat dry with a paper towel.  Place on a plate.  Drizzle the olive oil over the fish, rub with your hands to coat.  Season both sides with salt and pepper.  You’re ready for the grill.
3)  Preheat the grill for about 5 minutes.  When cooking fish, you want to only turn it one time and you do not want to turn it too soon, so be sure your grill is good and hot.  Cook the salmon over medium-high heat.  Place the fish presentation side down.  Cook it with the lid down for 4-5 minutes.  The  fish will begin to turn to a lighter pink color around the edges and about half way up the fillet.  With a grill spatula, gently turn the fish.  Allow it to cook an additional 4-5 minutes.  Serve immediatly with the dill sauce. 

*enjoy any leftover salmon cold with the cucumber sauce, so good!
*if you have fillets with skin, no worries.  Cook it the same way.  When you turn the salmon and the skin is on the grill, once it’s done it is very easy to get your spatula under the skin when removing the fish from the grill.  Some people enjoy the crispy skin.

Orange and Cream Simple Summer Dessert…..

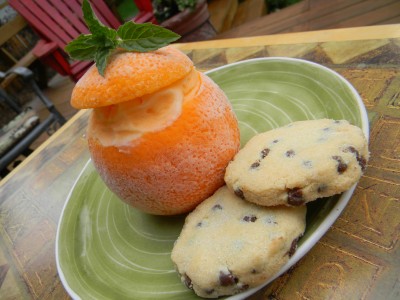
My friend Mary had this dessert at a friend’s house and raved about it.  She shared the recipe with me and I changed it up a little with the kind of ice cream I used and I served it with rich butter shortbread cookies.  This dessert takes absolutely no time at all and makes for a very beautiful presentation.  Love the layers of orange sherbet and real vanilla ice cream paired with the buttery chocolate chip shortbread cookie…need I say more??????

Here we go….

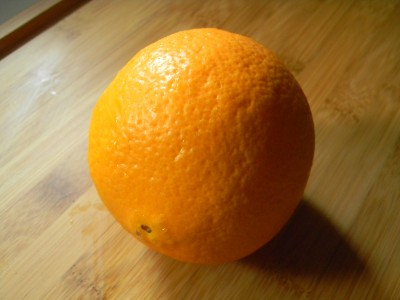
Start with a good size navel orange.

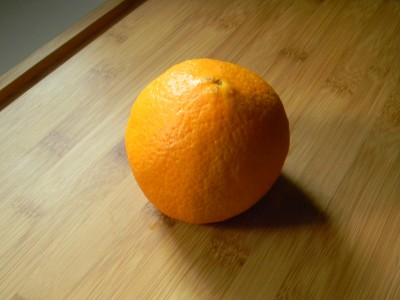
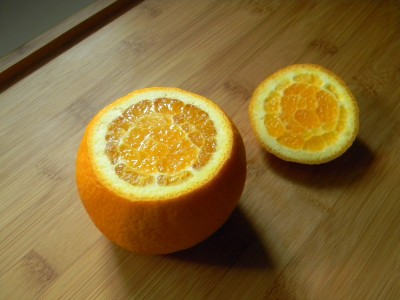
Slice off the least attractive end of the orange just enough to make it sit evenly on a flat surface.

It should sit like this.

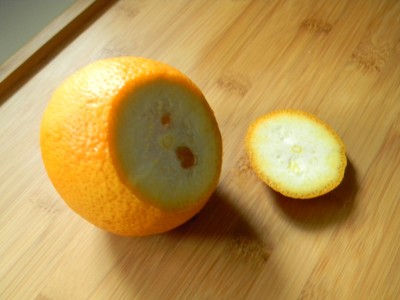
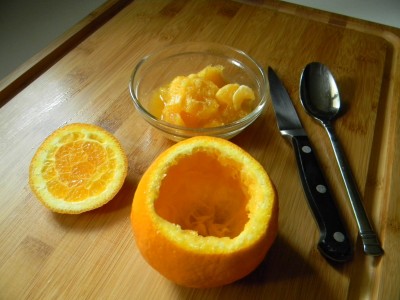
Next using a serrated knife, slice off the top of the orange.  Reserve the top for when you serve.

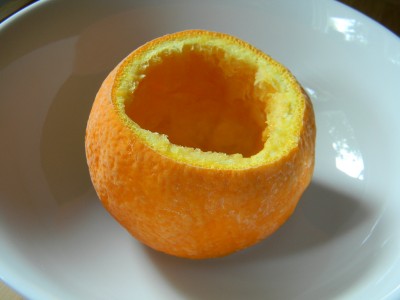
Next run a sharp paring or grapefruit knife around the inner edge of the orange to remove the flesh.  Carefully cut as much out as possible then using a spoon, scoop out the rest of the flesh.  Reserve for smoothies.  Place the hollowed out orange with the tops into the freezer.  Allow to be in the freezer for at least two hours before serving.

Get all of your dessert ingredients out and ready to go before removing the oranges from the freezer.  You’ll need serving plates, ice cream and sherbet, an ice cream scoop, the cookies if you’re serving them, and fresh mint sprigs for garnish.  Handle the outside of the orange as little as possible as the heat from your fingers will leave fingerprints on the rind.   Use a spatula to remove the orange from the freezer plate right onto the serving plate.

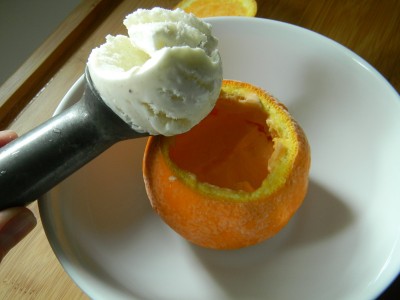
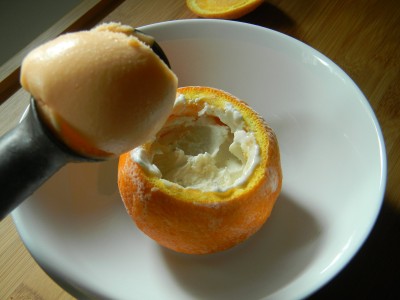
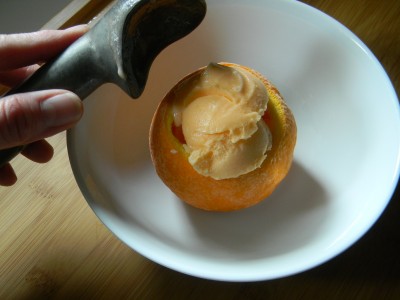
Add a scoop of the orange sherbet to the frozen orange and pack in with a spoon. 

Next add a scoop of vanilla ice cream.  Pack into the orange with a spoon.

Lastly, add a generous scoop of the sherbet.  Add the orange top or “hat.”   Garnish with a fresh mint sprig and add a couple of beautiful cookies to the plate.  Elegant and delicious!

Orange and Cream Simple Summer Dessert

4 medium oranges, leveled off at the bottom and hollowed out, reserving the tops
1 pint of orange sherbet
1 pint of real vanilla bean ice cream
Fresh mint leaves for garnish
8 chocolate chip shortbread cookies or any other pretty butter and chocolate cookie

1)  Level off the oranges with a serrated knife so that they sit nicely on a flat surface.  Slice off the top of the oranges, reserving the tops.  Carefully remove the flesh of the orange with a grapefruit knife or paring knife.  Remove the remainder of the flesh with a spoon.  Place the orange cups and the tops into the freezer on a plate for at least two hours.
2)  When ready to serve, collect everything you’ll need before removing the oranges from the freezer.  You’ll need serving plates, the ice cream, the sherbet, an ice cream scoop, the mint, and the cookies.
3)  Remove the oranges from the freezer.  Using a spatula, place an orange on each serving plate.  Add a scoop of sherbet, pack into orange, then a scoop of vanilla, pack into orange with a spoon.  Lastly, add a generous scoop of the sherbet.  Top with the orange top and a sprig of mint.  Place the cookies on the plate as well.  Serves four very happy guests:-)

Quinoa Salad with Artichokes and Lemon…..

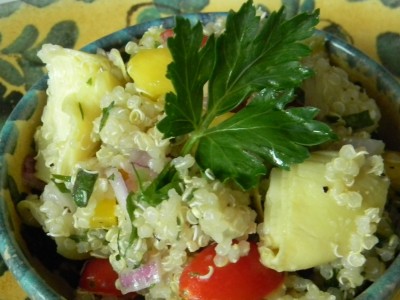
If you haven’t tried quinoa, this is the perfect recipe to introduce yourself!  It lends itself beautifully to the subtle flavor of the artichoke, lemon and garlic.   Love to serve this high protein grain alongside a delicious piece of grilled fish or chicken.  It’s fresh and light, perfect for bikini season, right?  Make this for your next picnic or barbecue, it’ll have your friends oohing and ahhing.

Quinoa Salad with Artichokes and Lemon

2 cups cooked quinoa (1 cup uncooked)
1 14 ounce can artichokes, drained well and quartered
1 large bell pepper, I used yellow, red would be beautiful too
1 cup halved grape tomatoes
1 cup chopped flat leaf parsley
1 small red onion, finely chopped
1 tablespoon chopped fresh oregano
1 tablespoon olive oil
1 large clove fresh garlic, crushed
1/2 teaspoon kosher salt, or more to taste
1/4 teaspoon black pepper, or more to taste
2 tablespoons fresh or bottled lemon juice

1)  Cook the quinoa according to package directions.  Place into a large bowl to cool.
2)  Once the quinoa is cool, add the artichokes through the black pepper.  Gently toss to coat.  Add the lemon juice to the mixture and toss to coat.  Taste.  Add additional salt or pepper to your taste.  Makes about ten 1/2 cup servings. 
*Only 2 Weight Watcher’s points per 1/2 cup!
*Add any of your favorite vegetables, hearts of palm would be a lovely addition.
*One half cup of cooked quinoa has 3 grams of fiber and 5 grams of protein.