Warm Tomato & Garlic Goat Cheese Dip


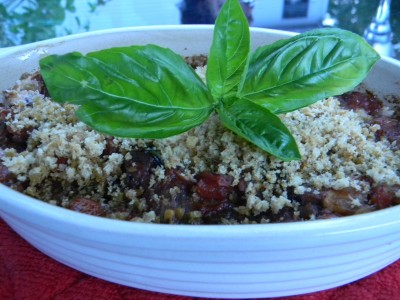
I had my good friend Amy over for dinner the other night for a belated birthday dinner.  I just  so happened to have a good size chunk of goat cheese on hand, one of my friend’s fav’s.    How could I go wrong with  fresh  plum tomatoes, onions, and lots of garlic?   I made it ahead and put in the frige.   I popped it into the oven about 10 minutes before she arrived so it would give us a little time for chat and a glass of prosecco before we dove into the appetizer.  It was savory, creamy and delicious. 

Warm Tomato & Garlic Goat Cheese Dip

Toasted bread crumbs
1 slice of whole wheat bread, processed into crumbs
1 teaspoon olive oil

Dip
1 tablespoon olive oil
1 small sweet onion finely chopped
2 large cloves fresh garlic, finely chopped
3 plum tomatoes, finely diced
2 pinches kosher salt
1 pinch black pepper
2 tablespoons of red or white wine
1/3 cup water
1/2 cup fresh basil, finely sliced (chiffonade)
4 ounces goat cheese, crumbled

1 Baguette thinly sliced on a diagonal

1)  Preheat the oven to 275′.   Process the slice of bread until you have crumbs.  Add the olive oil and pulse a couple of times.  Spread over a cookie sheet and toast in the oven for 5-8 minutes, give them a toss after about 4 minutes.  Bake a little longer if needed.  You’ll want them to be evenly toasted brown.  Watch them closely as they can easily burn.   Remove from the oven and cool.  Turn the oven temperature up to 350′.
2)  Heat a heavy skillet over medium heat, add olive oil.  Saute the onions until soft, about 5 minutes, stirring often.  Add the garlic and cook another minute. 
3)  Add the tomatoes, salt, pepper, and wine.  Cook until most of the moisture has evaporated from the tomatoes, stirring often.   Add the water.  Cook until most of the water has evaporated.  Remove from heat and add the basil.
4)  Coat a small 3-4 cup baking dish with olive oil.  Add the crumbled goat cheese.  Top with the fragrant cooked tomato mixture.  Bake for 20-25 minutes or until bubbly.  Remove from the oven and top with the toasted bread crumbs.  Serve with sliced baguette or pita chips.  Serves 4.

I hope you had a nice weekend!

Angie
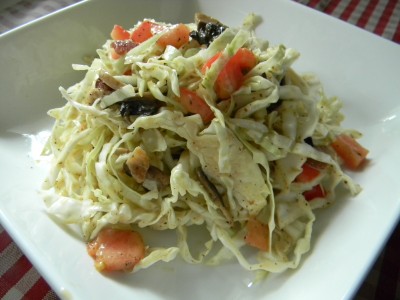
Warm Cabbage Salad with Bacon and Honey Mustard Dressing…..

This is one of my favorite salads.  The dressing is warm so it slightly wilts the cabbage.  There is a small amount of bacon for a touch of delicious smokey flavor.  Soooo good!  Serve with a simply seasoned and grilled pork chop.

Warm Cabbage Salad with Bacon and Honey Mustard Dressing 

4 cups very thinly sliced green cabbage or nappa cabbage
4 ounces of raw mushroooms, sliced
2-3 strips of bacon, cooked crisp, chopped
2 plum tomatoes, finely chopped
1/4 cup of your favorite honey mustard dressing
2 pinches of black pepper

1)  Shred the cabbage and put it into a large mixing bowl.  Chop the tomatoes and toss into the cabbage bowl.  Slice the mushrooms and chop the bacon.
2)  Heat a medium skillet over medium high heat until very hot.  Add the mushrooms.  Stir often until they’re cooked,  2-3 minutes.  Add the bacon and cook another minute.
3)  Add the honey mustard dressing, stirring constantly.  Once it’s hot and bubbly, pour over the cabbage.  Toss well to coat.  Top with a couple of pinches of black pepper.  Enjoy!  Serves 2.

Enjoy!

Angie

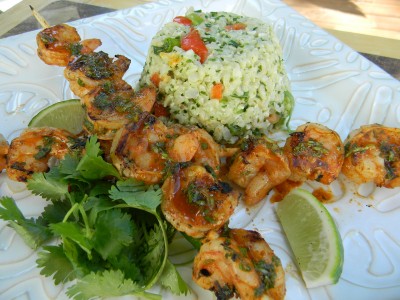
Chili Lime Shrimp with Lime Cilantro Brown Rice Salad…..

In case you haven’t yet noticed, I am in love with lime and cilantro.  This combination is fresh and makes most any grilled fish, chicken, or salad absolutely delicious!  I made this combination for the first time over Labor Day weekend and it got rave reviews.

For starters, marinated and grilled fish takes minutes.  Really.  I then save a bit of the delicious marinade to spoon over the cooked fish and a little over the salad…DELISH!  This brown rice salad is a wonderful accompaniment to the Grilled Chili Lime Shrimp.   The brown rice lends the perfect texture, the green onion and red bell pepper a little crunch, and the crumbled cheese a little salt and cream.  It’s perfect.

Why not make a whole bag (about 5 cups uncooked) of brown rice and freeze it for later use?  Defrost and use in this salad or any other quick weeknight dinner.  It’s best to use completely cooled rice for the salad.

Grilled Chili Lime Shrimp

1 lb. raw shrimp, peeled and deveined, and skewered

Marinade:
1/4 cup fresh lime juice
2 tablespoons honey
2 tablespoons canola oil
2 tablespoons chili powder (mild or to your own taste)
1 clove fresh garlic, crushed
1 cup fresh cilantro, chopped

1)  Combine all of the marinade ingredients, whisk well to combine.  Reserve a couple of tablespoons of the marinade to spoon over the cooked shrimp.  Use the rest of the marinade for the raw shrimp.  Marinade for 20 minutes before grilling.  Skewer the shrimp and cook over medium high heat for 4-5 minutes.  Shrimp will be bright pink when they’re done.  Spoon the reserved marinade over the shrimp when  ready to serve.  Makes 4 servings.

Lime Cilantro Brown Rice Salad

Dressing:
1/4 cup fresh or bottled lime juice
2 tablespoons honey
2 tablespoons olive oil
1/4 teaspoon salt or more to taste
1/8 teaspoon black pepper

Salad ingredients:
2 cups cooked and cooled brown rice
1 small red bell pepper, seeded and chopped
1 bunch green onions, thinly sliced
1 large bunch fresh cilantro, chopped
4 ounces *Fresco Mexican cheese, crumbled

1)  Whisk dressing ingredients together in a large mixing bowl.
2)  Add the salad ingrediens to the dressing bowl.  Mix well to combine.  Taste and add more salt and pepper if necessary.  Makes four 1/2 cup servings.

*Fresco Mexican Cheese is made from cow’s milk.  It tastes a bit like mozzarella yet has a crumbly almost grainy consistency.  It doesn’t  melt completely like mozzarella.
**If you’d like a more spicy shrimp, add a couple of pinches (or more) of cayenne to the marinade.
***If you’re using bamboo skewers, soak them in water for 20 minutes before using to prevent burning on the grill.

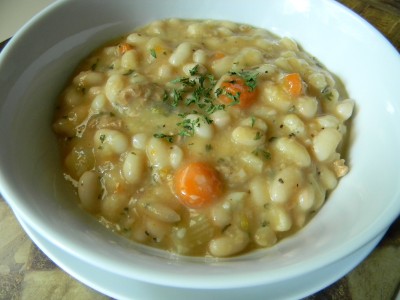
Great Northern Bean Soup with Homemade Italian Chicken Sausage…..

Great northern beans are a lovely, mild white bean.  Soak them over night to make for quicker cooking the next day.  For an extra creamy textured soup, puree a couple of cups after the beans have fully cooked or use an immersion blender for a few seconds.  Use a small amount of chicken sausage (recipe below) as the flavor goes a long way.

Great Northern Bean Soup with Homemade Chicken Sausage

1 lb. dried great northern beans, soaked over night, drained and rinsed
2 tablespoons olive oil
1/2 lb. homemade chicken Italian sausage (recipe below)
1 large sweet onion, diced (about 2 cups)
2 cups celery, cut into 1/2″ pieces
3 large cloves garlic, minced
2 cups carrots, cut into 1/2″ pieces
Water
2 tablespoons dried or fresh parsley
2 teaspoons dried thyme
1 teaspoon kosher salt
1/2 teaspoon black pepper

1)  The night before cooking, sort through the beans to pick out any debris.  Place in a large cooking pot and cover with 2″ of water.  Allow to soak over night.
2)  The next day, drain and rinse the beans. 
3)  Into the large pot, add the olive oil and warm over medium-high heat.  Add the Italian sausage to the hot pan and cook through.  Add the onion and celery.  Cook for about 7 minutes.  Add the garlic, cook another minute.
4)  Add the carrots, parsley, thyme, salt, and pepper.  Add the beans to the pot and fill the pot with water to cover the beans 1″.  Cook over medium heat for 1-1 1/2 hours.  Stir often to prevent sticking.  Add additional water if the water cooks below the beans.  Once the beans are done,  taste.  Add additional seasoning if necessary.  Remove a couple of cups of hot soup and place in a blender or food processor.  Blend until smooth and add back to soup.  Makes about 8 one cup servings.

Homemade Italian Chicken Sausage…..

Sausage is one of my favorite meat varieties.  I seldom buy commercially prepared pork sausage because of the high fat content.  I tried Whole Food’s Italian Chicken Sausage, it was FANTASTIC!  Very good, but very pricey.  One sausage came out to about $3.00.  So if I were to buy the usual 2-3 per person for my guys… you get the picture!   It was then that I decided to get into my kitchen and come up with my own version.  I must admit, I do not want to deal with the casings, so I make it in bulk and use it in soups, sauces, and pastas.    I have a meat grinder, but I find that using the food processor works nicely too.

Whole Food’s sausages were very juicy,  reminisent of pork sausage.  I decided the best cut of chicken would be chicken thighs.    You can kick up the spice simply by adding more red pepper flakes.

Here we go….

Ingredients needed:   

3 pounds of boneless, skinless chicken thighs, excess fat trimmed
2 tablespoons whole fennel seeds( toasted)
2 tablespoons fresh garlic (coarsely chopped)
1 1/2 tablespoons paprika
2 teaspoons salt
1 teaspoon black pepper
1/2 teaspoon red pepper flakes
1/2 teaspoon ground anise
2 tablespoons dried parsley flakes
3 tablespoons of red wine

Before you pull the meat out of the refrigerator,   toast the fennel seeds in a skillet over medium-low heat for about 5 minutes, shaking the pan often to prevent burning.   Coarsley chop the garlic.

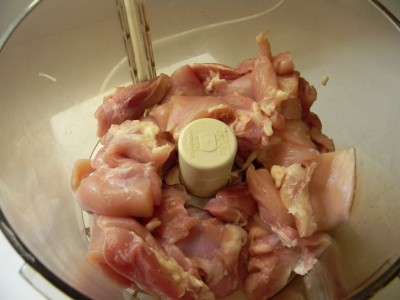
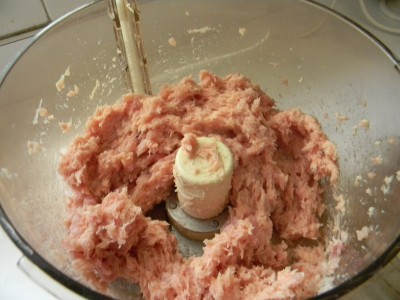
Trim the skinless chicken thighs of excess fat and put it into the food processor. 

Process until it resembles coarsely ground meat.

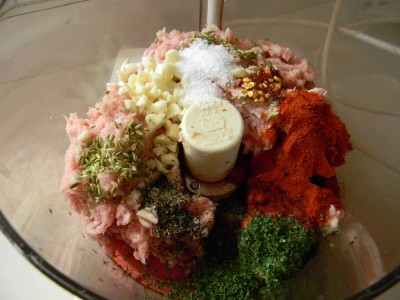
Add the rest of the seasonings to the processed chicken. 

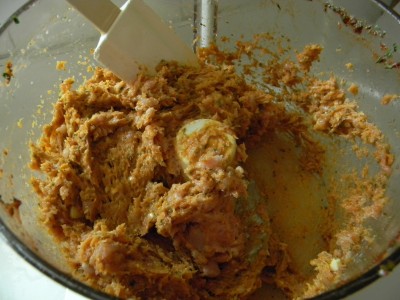
Process until all ingredients are well blended.   Allow the sausage to meld in the refrigerator for 12-24 hours.  Divide it up for freezing if you wish, date, and label.  When cooking in a skillet, add oil to the pan as the sausage is very lean and will stick otherwise.   Use in pastas, sauces, omeletts, or soups just to name a few.

Stay tuned for a couple of savory and simple recipes using this flavorful Italian Chicken Sausage.

Have a great holiday weekend!!

Angie

Eggplant Parmesan With Fresh Mozzarella And Marinara Sauce…..

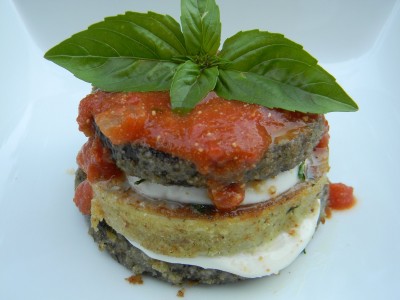
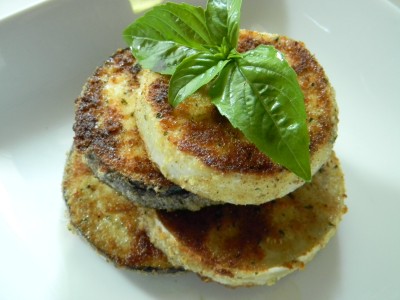
I’m crazy about eggplant.  This is my version of eggplant parmesan, only a little prettier.  I’ve coated white and purple eggplant with Italian bread crumbs and fresh grated parmesan, fried it in olive oil, and layered it with fresh mozzarella and topped it with fresh marinara sauce

Let’s begin…

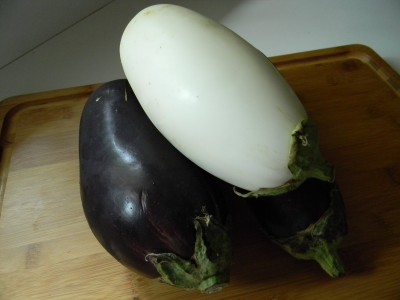
I came across white eggplant and was very intrigued, I had to buy it!  I did not notice a difference in taste between the white and the purple.  When buying eggplant, you’ll want to pick out eggplant that is firm and is free of bruises. 

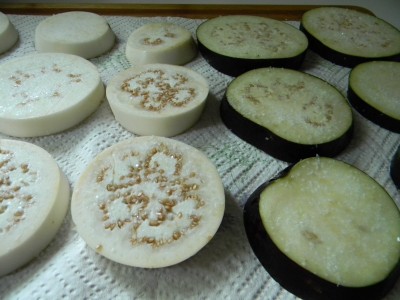
A must in the preparation of eggplant is to remove the bitterness and excess moisture by lightly salting it and allowing it to sit on paper towels for 20-30 minutes.  Blot off the liquid that accumulates with paper towel.  This will keep the eggplant from absorbing too much oil when cooking.

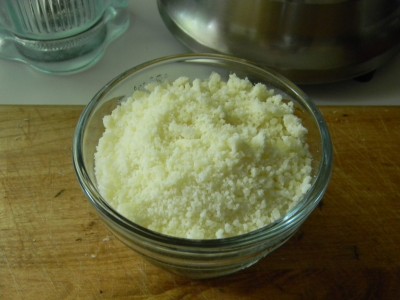
I LOVE parmigiano reggiano cheese.  It has a rich nutty flavor.  I buy it in a chunk and cut it into 1/2″ pieces, then into the blender for perfectly grated cheese.

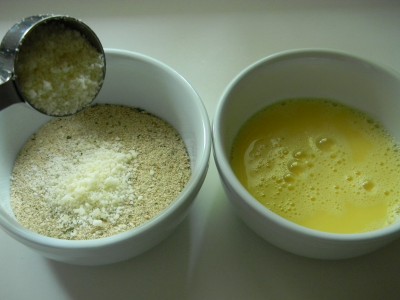
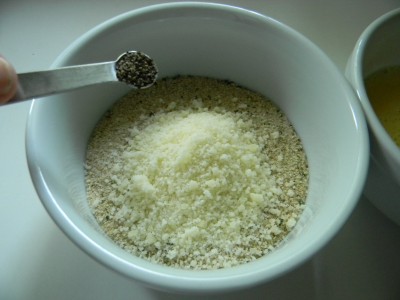
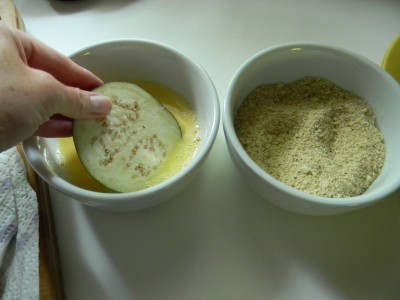
Beat a couple of eggs in a bowl with a little water into one bowl, and Italian bread crumbs and parmigiano reggiano into the other.

 Add 1/4 teaspoon of black pepper and mix well.

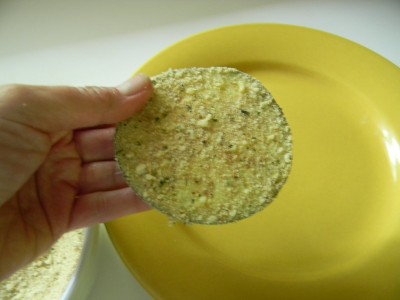
Dip the eggplant into the egg first, then into the bread crumb mixture, coat well.

Heat skillet over medium heat until very hot and add a couple of tablespoons of olive oil, swirel around the pan and add the eggplant, cook until nicely browned.

The eggplant is equally delicious plain!  Enjoy!

Eggplant Parmesan With Fresh Mozzarella and Marinara Sauce

2 medium size eggplant, sliced into 1/4″ rounds
salt
1 1/4 cup Italian bread crumbs
1/4 cup parmesano reggiano
1/4 teaspoon black pepper
2 eggs, beaten well
2 tablespoons water
Olive oil
8 ounces fresh mozzarella
2 cups Marinara sauce or your favorite bottled sauce

1)  Slice the eggplant in 1/4″ slices, lightly coat both sides of the eggplant with table salt and place on a layer of paper towel.  Allow to stand for about 30 minutes.  Blot the eggplant with paper towel to remove excess moisture.
2)  Combine the bread crumbs, parmigiano cheese, and black pepper in another dipping bowl.
3)  Beat the eggs and water in a dipping bowl.
4)  Dip the eggplant into the egg, then into the bread crumb mixture, coat well. 
5)  Heat a heavy skillet over medium heat until very hot.  Add enough olive oil to coat the pan.  Fry each piece of eggplant in olive oil until nicely browned.  You will have to add more olive oil to the pan with each batch.
6)  Layer thin slices of mozzarella cheese between the cooked eggplant.  Top with warm marinara sauce.  Garnish with a fresh sprig of basil. (optional)  Serve immediately.  Makes 8 servings.

Enjoy!

Angie

Archived Recipe Fav’s…..

One of my favorite events of  this summer was reconnecting with my cousins at the Henderson family reunion.  I’m pictured here with my cousin Diane.  LOVE HER!!  Anyway, we talked at length about the past and she brought up “The Green Bean Incident.”  I am posting this link for Diane:-)   I love our reunion picnics as everyone brings their best “go to” dish to share.  The food was amazing!  This got me thinking that since I haven’t posted recipes in awhile, I thought I might repost a few of my fav’s.  Comfort foods come to mind when the days start getting shorter and it is getting pleasantly cooler.

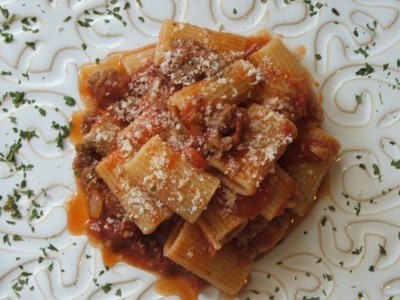
I serve pasta at least once a week.  My kids LOVE it!  So easy to prepare and when I make the sauce, I always make extra for the freezer.  It is awesome to have a sauce stashed away in the freezer to use when you’re pinched for time.  Try changing up the shapes of the noodles too.  It all tastes the same but to a kid, new and interesting shapes make for a more enjoyable dinner.  Pictured here,
Rigatoni with Meat Sauce.

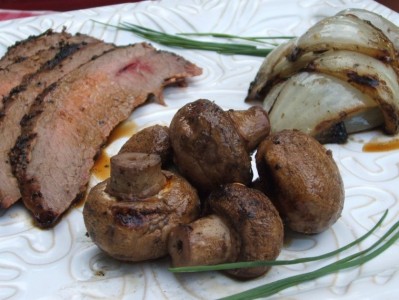
There is still plenty of time left for grilling.  I do this so simply.  I toss whole mushrooms and quartered onions into a bowl and drizzle with a small amount of olive oil.  Season with salt and pepper.  Skewer them each on their own skewers. (onions take much longer to grill, cook them first then the mushrooms)  Personally, I do not think a good steak needs much more seasoning than good ole kosher salt and fresh ground pepper.  Flank steak doesn’t need to be marinated to oblivion.  Cooked to medium (a 1″ thick steak should be grilled about 6 minutes per side and turned only once) and thinly sliced on the diagonal is all you need for a flavorful and simple supper.  If you’re ever in doubt as to whether your steak is done the way you want, use an instant read thermometer and follow the guidelines below.

*Internal temperatures for different degrees of doneness:
Rare-120′ to 130′
Medium rare- 130′ to 140′
Medium- 140′ to 150′
Medium well- 150′ to 160′
Well- 160+

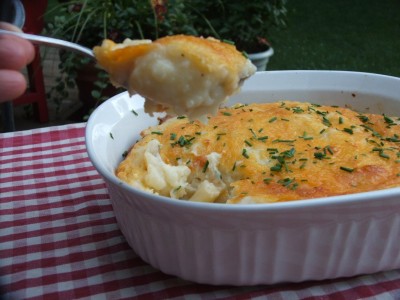
Oh…and potato.  Noting like a killer potato with a great piece of steak, right?  If you love twice baked potatoes, you must try my
Twice Baked Potato Casserole.  Perfectly sized or shaped potatoes are not needed for this recipe.  

I hope you had a restful weekend!

Angie
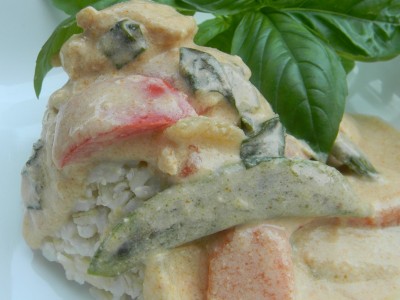
Simple Thai Red Chicken Curry With Steamed Rice….

I love grilling and all but I can’t stand over a hot grill in 95′ heat, come on!!  When it’s like this I want a quick and delicious dinner that goes together in a snap. 

This is a favorite dish that fits the bill.  Prep the vegetables  first.  Actually cooking time is only about 30 minutes.   Serve over brown or white rice.  Brown rice will take more time, so start it before you begin preparing the curry.

Use whatever vegetables you like.  I used carrots, red bell pepper, onions, sugar snap peas, and fresh basil.  Add edamame, broccoli or even sliced jalepeno peppers if you’d like more heat.  Feel free to substitute peeled and deveined shrimp for the chicken.   Cook until the shrimp turn bright pink.

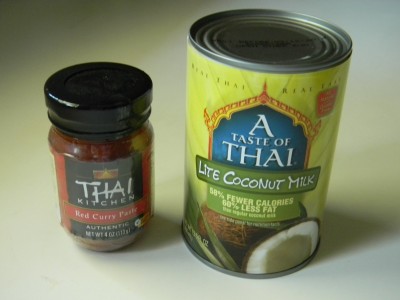
The key ingredients in this dish would be the coconut milk and Red Thai Curry Paste.

This curry paste is slightly spicy, it will not over power the dish with heat.  It is incredibly flavorful and delicious.  My recipe calls for enough to make the coconut milk slightly pink.  Feel free to add more to your taste.  Coconut milk lends a rich and deep flavor to the dish.

Thai Red Chicken Curry

1 large red pepper, seeded and cut into bite size pieces
2 large carrots, peeled and cut into 1/4″ slices
1 medium sweet onion, cut into bite size pieces
8 ounces sugar snap peas or pea pods
1 tablespoon canola oil
1 tablespoon red curry paste
2 cans unsweetened coconut milk (you can use light or regular)
2 tablespoons brown sugar
1 lb boneless skinless chicken breasts, cut into 1″ chunks
1 large bunch of basil, thinly sliced
3 cups cooked brown or white rice

1)  Heat a large heavy skillet over medium high heat.  Add the prepared red pepper, carrots, and onions.  Cook, stirring often, for about 4 minutes.  Add the snap peas and cook another minute.  Dump into a large bowl and cover loosely with foil.
2)  Add the curry paste to the pan.  Using a wooden spoon, mix into the oil.  Add the coconut milk and whisk to combine.  Add the brown sugar and whisk.  Bring to a simmer.  Add the raw chicken and simmer another 15 minutes.   Add the sliced basil just before serving.
3)  Add the basil and serve over steamed rice.  Makes 5-6 servings.

Fresh Grilled Corn Salad With Chili Lime Dressing….

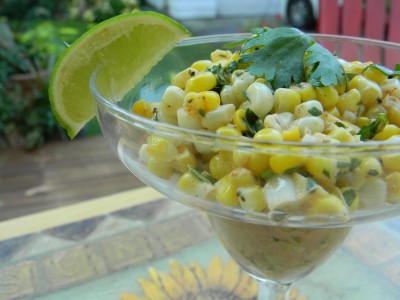
This salad reminds me of corn on the cob served by street vendors in Mexico.   The combination of the sweet corn, lime and cilantro makes for a very light and refreshing summer salad.  I cook the shucked corn directly on the grill, no fuss with the husks or soaking and all that jazz.  Most often when I make corn on the cob, I end up with an ear or two left over.  Oil and season them up the same way and toss on the grill for some color.  Add the grilled corn to most any salad you’re serving for an unexpected treat.

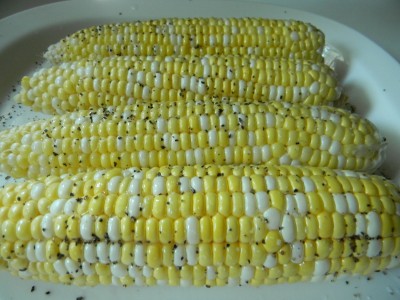
The easiest way to grill corn is to shuck it and coat evenly with canola oil.  Season with a couple of pinches of salt and pepper and right onto the grill for 10-12 minutes.

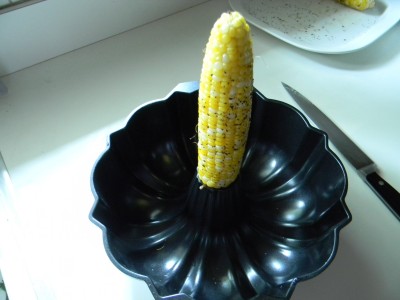
The best way to remove the corn from the cob without making a mess of the kitchen is to stick the cob into the top of a bundt pan.  It will hold the cob in place while you hold the top.  Use a sharp knife and carefully remove the corn from the cob.

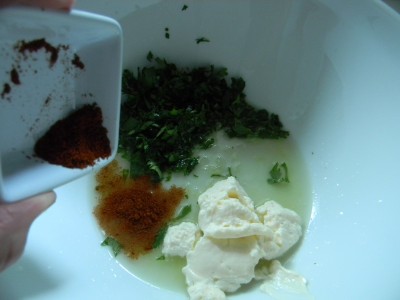
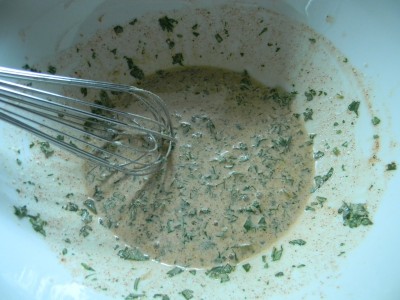
 Now for the dressing.  Squeeze the juice of two limes into a medium size mixing bowl.  Add 2 tablespoons of light mayonnaise, 1/2 cup fresh chopped cilantro(or more), and 1 teaspoon of chili powder.

Whisk until combined.

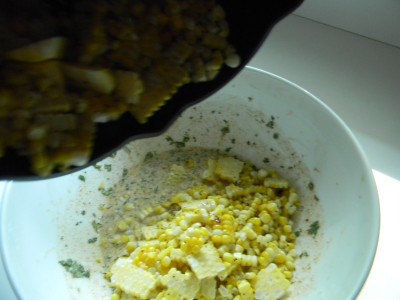
Add the corn and mix gently to combine. Give the salad a taste.  Add additional salt and pepper to taste.   Makes four 1/2 cup servings.

Fresh Grilled Corn Salad With Chili Lime Dressing

4 ears of sweet corn
2 teaspoons canola oil
salt and pepper

For the dressing:

2 limes, juiced
2 tablespoons light mayonnaise
1/2 cup chopped cilantro
1 teaspoon chili powder
2 pinches salt
1 pinch black pepper

1)  Preheat the grill to medium high.
2)  Shuck and rinse the corn cobs.  Rub the two teaspoons of oil over the corn cobs.  Season each piece with a little salt and pepper.  Place corn directly on the grill.  Grill for about 12 minutes, turning every few minutes.  Remove from grill and allow to cool until you can easily handle them.
3)  While the corn is cooling, add all dressing ingredients to a medium size bowl and whisk to blend. 
4)  Remove the corn from the cobs and add directly to the bowl with the dressing.  Mix to blend.  Add more salt and pepper to taste.  Makes four 1/2 cup servings.

*add black beans and diced red pepper and serve with grilled fish or chicken.
**Corn on the cob out of season? Try it with white frozen corn.  Cook in a skillet with a tablespoon of olive oil.  Saute until the sugar in the corn caramelizes.  Cool completely and continue with the rest of the salad.


Caesar Salad With Garlicky Croutons…..

It’s been so hot I haven’t had the energy to muster up much more than cool salads!  We’ve hardly spent time outside for the past week, huge bummer.  It’s absolutely beautiful looking outside but of course, it’s like an oven. 

That being said, I’d like to share one of my favorite salads with you.  Caesar salad dressing is very simple to make.  I use the blender to completely pulverize all of the yummy ingredients.  I use light mayonnaise in lieu of a raw egg yolk, and of course, a Caesar salad just wouldn’t be without anchovies.  Before you wrinkle up your nose, I will tell you that when you blend these flavorful little fillets, you will not be able to detect them in the dressing.  Just this amazingly deep and rich flavor.

Another very important component of an authentic Caesar salad is croutons.  I simply cannot use a store bought crouton in my salad.   Use leftover bread ends or baguette.  If you simply cannot turn the oven on at this point, I understand! 

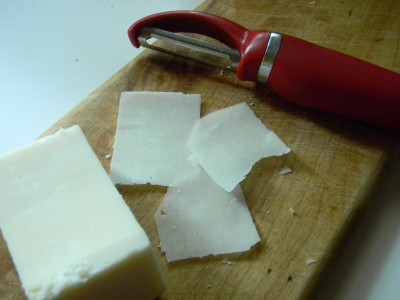
Lastly,  olive oil, (first cold pressed) and nice parmigiano cheese.  If you buy a chunk of it you can grate it or put 1/2″ chunks into the blender to make perfectly crumbled cheese.  For a lovely garnish use a basic vegetable peeler to make shavings. 

This recipe is pretty straight forward.  Feel free to double or triple it as it keeps well in the refrigerator for 3 weeks.  Check out my recipe for croutons below.

Authentic Caesar Salad

2 large cloves fresh garlic, coarsely chopped
2 teaspoons dijon mustard
2 anchovy fillets
2 teaspoons worchestershire sauce
2 tablespoons red wine vinegar
2 tablespoons light or regular mayonnaise
6 tablespoons olive oil, first cold pressed is best
6 tablespoons grated parmigiano
1/2 cup garlicky croutons (recipe below)
2  heads romaine lettuce, chopped

1)  If you’ve got a chunk of cheese, cut about a two inch piece into 1/2″ pieces and put into the blender.  Process until you have an evenly grated cheese.  Add the garlic through the olive oil and give it a whirl on high until you have a nice smooth consistency.
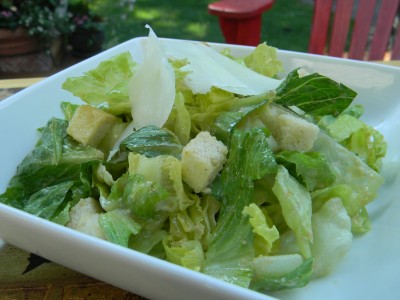
2)  Place the lettuce into a large mixing bowl.  Add the croutons and spoon about 4 tablespoons over the lettuce and toss.  Add additional dressing to thoroughly coat the lettuce.  Reserve the rest for another time.  Toss to evenly coat.  Plate the salad and top with a couple of parmigiano shavings.  Makes four servings.