Cutest Dog Birthday Cake!

2016-03-06 12.58.27

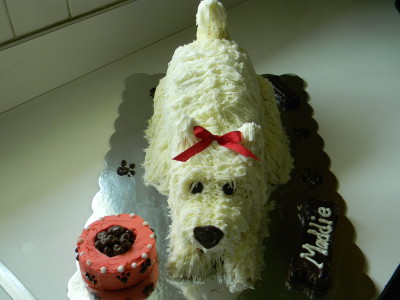
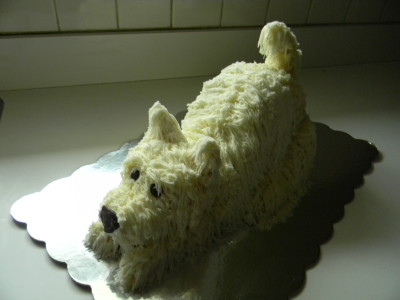
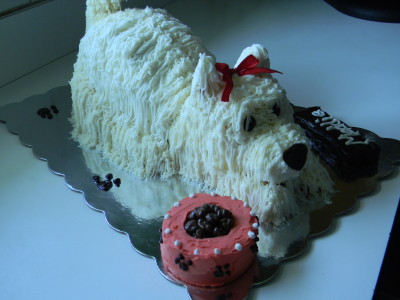
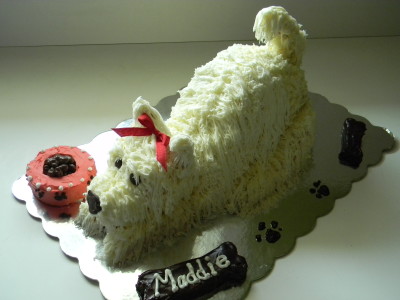
Yes, this is a cake.  Isn’t she sweet?  I made it for my dear friend’s daughter Maddie as you can see.  I used a special tip, it’s got tiny holes in it and was actually quite hard to squeeze the frosting out.  It was called a fur and grass tip, I found it on Etsy quite easily.  As always, I ONLY make real butter cream so I had to add a little more milk to make it come out of the tip more easily.  Unlike frosting made with shortening, butter cream frosting gets very soft by the warmth of your hands on the piping bag.  I piped the cake in sections, putting it into the refrigerator to allow the butter cream to set up.  I left the piping bag on the counter, if you were to refrigerate it, it would be impossible to squeeze the frosting out.  Best to use a heavy duty piping bag, the heat transfer is far less than using a plastic or disposable one.

2016-03-06 12.57.55

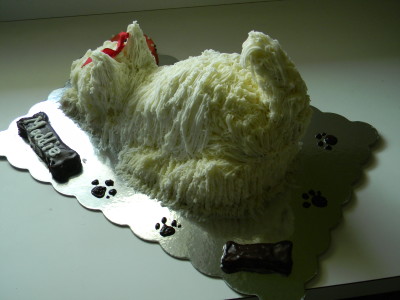
I added an edible dog bowl filled with raisinettes, chocolate dog foot prints and a couple of gnash covered pieces of cake cut into dog bones.  If I were to make another cake like this I would trace around the bones with white icing to better define them.  Next time.  The eyes and nose are melted semi sweet chocolate chips.  I piped them onto a piece of wax paper and refrigerated them until they were set.  You can’t really handle them until you’re 100% sure you’re ready to set them into the face.

2016-03-06 12.59.14

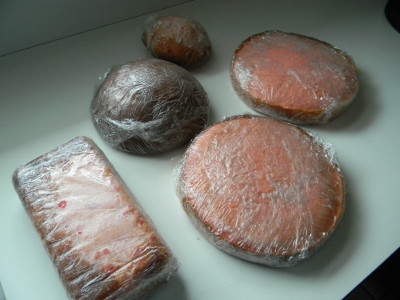
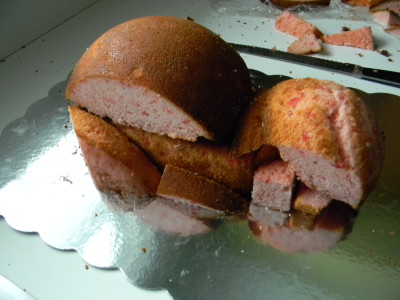
I wanted you to see all angles…I absolutely LOVED making this cake!  I’m going to now show you what I did to create her.  I baked a double recipe of yellow cake.  The guest of honor wanted a cherry cake so  I added rinsed, drained and minced maraschino cherries.  You can use your favorite recipe or even a box recipe.  Bake plenty of cake, you’ll need it.  Most importantly, make your cake ahead of time, wrap with Saran wrap well and freeze. Working with partially frozen cake is a total must!   Fresh room temperature cake is too soft and crumbly and would be way too hard to work with.

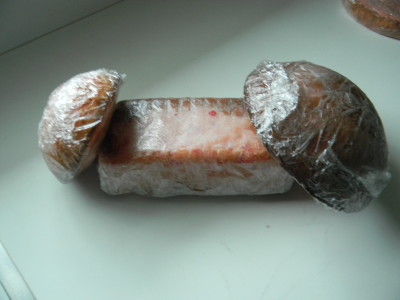
I used a couple of dome-shaped pans, one for the head and one for the little bottom that sticks up in the back.  I used a regular loaf pan for the body and thought I could use two 9″ cakes for the legs, tail and ears.  There was a good amount of one cake left, I put it back in the freezer to make a dessert trifle later.  Or there may be family members available to help with those pesky left over delicious pieces of cake!

2016-03-05 10.01.36

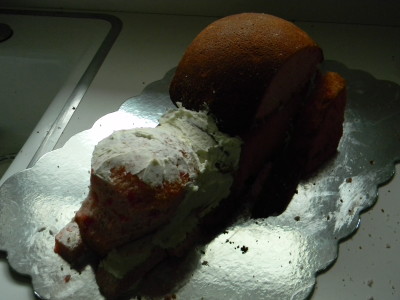
It is time to make a big batch of butter cream frosting or, the glue you will need to sculpt your cake.  You’ll also want to apply a “crumb” layer of frosting to the entire cake once you’ve got it into the shape you like.

2016-03-05 10.02.50

I started playing with the pieces, like a puzzle.  Time to unwrap the cakes and start sculpting.  The cool thing here is you can add or cut away pieces as you to shape the cake.

2016-03-05 10.41.29

At first I thought to place the cake on another cake base, no way!  Would’ve been way too hard to keep the bottom layer clean.  I thought to assemble the cake on another pan but the transfer would’ve been disastrous!  This was the best bet.  I could easily rid the board of crumbs or unwanted frosting.  You can get nice cake boards at Michael’s Craft Store.

2016-03-05 10.55.30

Here I began the gluing process.  You want all cake components to be solid.  Might be a bit messy at this point, it’s fine!  Plenty of time to clean up the board using a moist paper towel.

2016-03-05 11.17.26

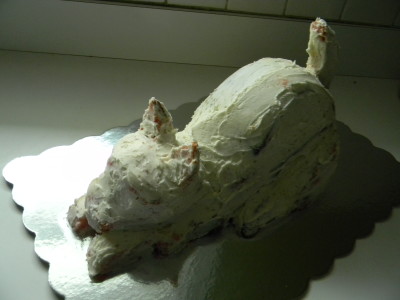
I added the tail with a 6″ skewer and the ears with a couple of toothpicks.  At this point it is looking very cat-like. Ryan quickly pointed this out to me and he was right.  I cut away a little more of the face below the eyes and added a bit more frosting to square off the face.  The cake is now coated with the “crumb” layer of frosting.  It’s time to start piping.

2016-03-05 13.12.24

Begin at the very bottom of the cake and work your way up.  I got too involved to take pictures as I went!  I started with the front paws and piped around the perimeter of the whole cake.  I did the face, head and ears all at once.  I did the back up through the tail then I had to put him into the refrigerator to set up a bit.  I took her out after about 30 minutes and finished piping.

2016-03-06 12.56.53

I kept the cake refrigerated overnight and in the morning added the finishing touches.  The dog bowl with kibble, the dog bones, the bow and the paw prints.

At this point, the cake can set out at room temperature until serving.  Room temperature cake is always better than cold cake.

Happy  Birthday Maddie!  I am quite sure this is a cake that she will never forget!

Enjoy creating!

Angie
Luscious Red Velvet Cake…..


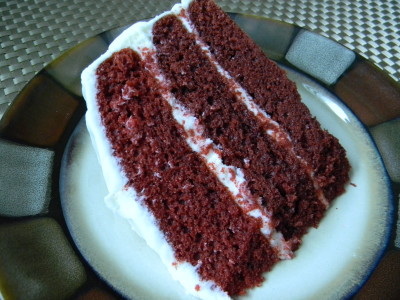
orng chx slm patDSCN3016_2696Red velvet cakes seem to be all the rage these days.  I am particularly fond of one bowl recipes.  This one is very, very simple and really moist and delicious.  Most recipes have only a teaspoon or two of cocoa.  I like to taste more chocolate so I’ve made adjustments to my recipe.

Being that this cake is so moist, I highly recommend lining the pans with parchment paper.  It is awful to have a beautifully baked cake that won’t come out of the pan!!

Red Velvet Cake

2 eggs
1 1/2 cups sugar
2 cups oil
1 teaspoon vanilla
2 1/2 cups all purpose flour
1 teaspoon baking soda
1 teaspoon salt
1 teaspoon vinegar
1 tablespoon liquid red food coloring+ water to equal 2 ounces (or 1 teaspoon gel food coloring)
2 heaping tablespoons Hershey’s cocoa
1 cup buttermilk (or mix 1 teaspoon vinegar + milk to equal 1 cup)

1)  Preheat the oven to 350′.  It is always a good idea to line the bottom with parchment paper.  With a pencil trace around the outside of the pan and cut it out.  Place in the bottom of the pan and coat well with cooking spray.
2)  In a large mixing bowl using  an electric mixer, beat the eggs, sugar, oil and vanilla until well blended.
3)  Sift the flour, soda and salt together in a small mixing bowl, set aside.
4)  In a 1 cup liquid measuring cup, add 1 teaspoon red food coloring and enough water to equal 2 ounces.  Add 1 teaspoon vinegar and the cocoa.  Whisk to thoroughly blend.  Add to the beaten egg mixture and mix well.
5)  Add the flour and the buttermilk alternately to the egg mixture.  Beat until all ingredients are incorporated.  Do not over beat.  Pour into prepared pans.  Bake for 32-35 minutes.  (check at 32)  The top should be firm to the touch and toothpick should come out clean.
6)  Cool completely before icing.

Cream Cheese Frosting

1 8 ounce softened cream cheese
4 ounces softened butter (one stick)
1 teaspoon vanilla
3 cups powdered sugar
milk as needed

1)  With an electric mixer, beat the cream cheese and butter until creamy.  Add the vanilla and the powdered sugar.  Mix on the lowest speed of the mixer and add milk 1 teaspoon at a time to get a smooth spreading consistency.
2)  Ice the cake generously with the frosting.  Refrigerate cake.  Allow to stand at room temperature for 30 minutes before serving.

So delicious and simple to make.  Enjoy!

Angie

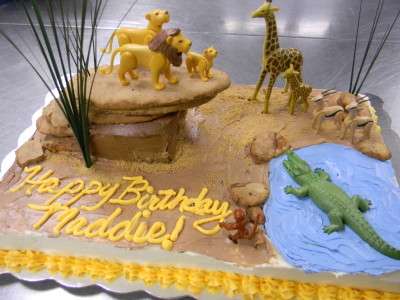
The Lion King Cake…..

maddie w cake

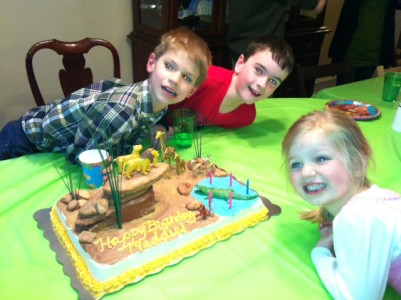
I made this cake for my favorite four year old, Maddie.  This was so fun!

lion k cake

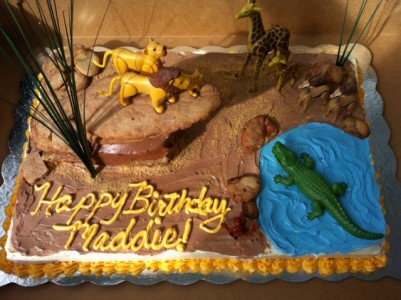
The base is a basic chiffon cake.  It’s a lovely one bowl recipe, the only difference is after you mix all ingredients you fold in beaten egg whites.    The result is a light and airy cake that is not too sweet.  My right hand gal Nancy baked the cake and made a delicious real butter cream frosting.   I also needed a small rectangular cake for the base of my large rock formation.   I am no ready, I have the perfect canvas for a Lion King cake.

orng chx slm patDSCN3058_2738

First I mixed a basic butter cookie recipe and kneaded some cocoa into enough dough to form the large and small rocks.  I baked them and set them aside.

I cut the rectangular cake on the diagonal and put the two identical pieces together.  I added cocoa to some of the butter cream and I iced the wedge or base for the rocks.  With a toothpick I traced into the icing where I’d put the water.  I iced the top of the cake brown.  I added blue food coloring to some of the butter cream to form water and iced in the water.  I sprinkled graham cracker crumbs around the brown base to make it look like sand.    I placed cookie rocks around the cake with some grasses coming out of them.  I bought the grasses at Michael’s for .59 each.

Now I’ve got to start thinking about what I’ll be making for Ryan’s next cake!

I feel good about making a delicious birthday cake with real ingredients.

Have a wonderful week!

Angie

Red Velvet Cake With Cream Cheese Frosting…..

orng chx slm patDSCN3016_2696

This recipe is a one bowl recipe, my favorite.  It is very, very moist and especially delicious with the cream cheese frosting.  Refrigerate after you frost it and pull it out of the refrigerator 30 minutes before serving.  Cover and refrigerate any leftover cake.

I’ve changed the recipe a little bit.  The original recipe called for only 1 teaspoon of cocoa…what?!  I wanted the cake to have a little more “chocolate” taste.   Use three 9″ pans and you’ll have a nice high cake.  Baking times may vary according to your oven.  See my post on baking and frosting tips.

There is a great deal of food coloring in this recipe.  I strongly suggest you use what’s required.  I tried it with less and it didn’t have the same dramatic affect.

Red Velvet Cake

3 3/4 cups all-purpose flour
2 1/4 cups sugar
1 1/2 teaspoons baking soda
1 1/2 teaspoons fine or table salt
4 tablespoons cocoa (it’s a good idea to sift the cocoa if you don’t plan on sifting the rest of the ingredients)
2 1/4 cups vegetable oil
3 large eggs
1 1/2 cups buttermilk at room temperature
3 tablespoons red food coloring (use the liquid or gel not the paste)
1 1/2 teaspoons white or cider vinegar
1 1/2 teaspoons vanilla extract
Cream cheese frosting, recipe below

1) Preheat the oven to 350′.  Generously coat 3 9″ pans with cooking spray and dust evenly with flour.

2)  In a large mixing bowl, sift the flour, sugar, baking soda, salt and cocoa powder.  In another large bowl, whisk together the oil, buttermilk, eggs, food coloring, vinegar and vanilla.

3)  Using a stand mixer or hand mixer, mix the dry ingredients into the wet ingredients until just combined and a smooth batter is formed.

4)  Divide the cake batter evenly among the prepared cake pans.  Place the pans in the oven evenly spaced apart.  Bake 25-30 minutes.  Set the timer for 25 and check the cake.  (see my cake tips post below this one)

5)  When done, remove the cakes from the oven and run aknife around the edges to loosen them from the sides of the pans.  Cool 10 minutes then invert onto a plate, then reinvert onto a cooling rack.  (Now the bottom of the cake is resting on the rack, rounded sides up)  Cool completely.

Cream Cheese Frosting

1 lb. cream cheese, softened
2 sticks softened butter (1 cup)
6 cups sifted confectioners’ sugar
1 teaspoon vanilla extract
milk as needed

1)  In a stand mixer with a paddle attachment or an electric mixer in a large bowl, beat the butter and cream cheese until well blended and creamy.  Add the sugar 2 cups at a time and mix on low speed.  Scrape down the sides of the bowl occasionally.  When you add the last 2 cups of sugar, you may need to add milk to get the perfect consistency.  Add one teaspoon at a time.  Once all of the powdered sugar is incorporated, add the vanilla and beat briefly until fluffy.  You’re ready to frost the cake.

2)  When assembling a two or three layer cake, you’ll want the cakes to be relatively flat.  If your cake has a dome like top, use a long serrated knife to level it off.  (It  is critical here to go ahead and taste the cake.  You know, for quality control purposes)  Place the cut side down either on the plate or on the top of the bottom layer.  It is far easier to frost the bottom part of the cake (the part that was in the pan as opposed to the cut side)  Hope that makes sense!

3)  Use lots of frosting.  Joking aside, it’s quite nice to not worry about crumbs on your finished cake.  You first do a “crumb” layer.  Refrigerate the cake for at least 30 minutes before proceeding to the final layer.

4)  Put a splotch of frosting on the plate to hold the cake in place.  Put your first cake, cut side down if necessary and ice the top of it.  Proceed to layer two and layer three.  Using lots of frosting, ice the sides filling in any gaps between the layers.  Finally, frost the top.

5)  Frost the chilled cake with the final layer of room temperature frosting.  If you prefer a very smooth surface on your cake, you can dip your spatula into water and smooth out the seams on your cake.

Enjoy!

Angie

German Chocolate Cupcakes…..

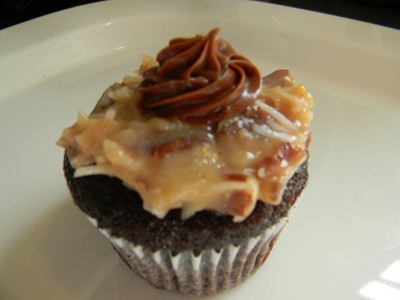
Four (possibly 2) bites of deliciousness!  Personally I don’t think that the traditional German chocolate cake portion of this dessert is chocolaty enough so I’ve improvised a bit.  If you know me you know that my favorite chocolate cake recipe in the whole wide world is the Hershey’s Perfect Chocolate Cake recipe on the back of the cocoa box.  It’s a simple one bowl recipe and makes about 30 cupcakes.  Baking tip for the cocoa cake.  Be sure to put the cocoa through a sifter with the rest of the dry ingredients.  Often there are clumps of cocoa and you don’t want them in your cake.

I made the traditional coconut/pecan frosting which is spectacular and thought I’d pipe my own touch onto the top.  Chocolate Cream Cheese Frosting.  Can more chocolate ever be wrong?  I think not.

German Chocolate Cupcakes

1 batch Hershey’s Perfect Chocolate Cupcakes, cooled completely

Coconut Pecan Frosting

1 cup evaporated milk
1 cup sugar
2 teaspoons cornstarch
3 beaten egg yolks (Freeze the egg whites and add to your next meatloaf)
1/2 cup unsalted butter
1 teaspoon vanilla
1 1/3 cups sweetened shredded coconut
1 cup chopped & toasted pecans (to toast, spread chopped pecans over a cookie sheet and toast in 325′ oven for 7-9 minutes.  Cool completely)

Whisk the first four ingredients together in a heavy medium size saucepan until well blended.  Add the butter and vanilla and stir over medium heat for 10-12 minutes or until it thickens.  Do not over cook. It doesn’t need to boil or bubble.  Add the coconut and toasted pecans.  Allow to cool completely before frosting the cupcakes.

Chocolate Cream Cheese Frosting

4 ounces softened cream cheese
2 tablespoons softened butter
1 1/2 cups powdered sugar, sifted with the cocoa
3 tablespoons cocoa
1 teaspoon vanilla
2-4 teaspoons of milk

Beat the cream cheese and butter until well blended with an electric mixer.  Add the powdered sugar/cocoa and vanilla.  Mix on low-speed until most of the dry ingredient is incorporated.  Add milk 1 teaspoon at a time until you get a nice thick frosting that you can pipe onto the cupcake.

Frost the cupcakes with the pecan frosting.  Pipe the top with the chocolate frosting.  Refrigerate.  Remove from refrigeration for 20 minutes before serving,

Enjoy!

Angie


Space Age Birthday Cake….

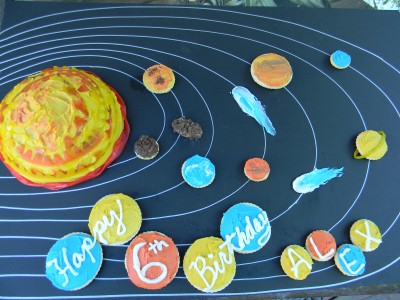
When Ryan received the invitation to Alex’s birthday party, I thought gee, the design on this invitation would make a really cool birthday cake.  Here it is!   I bought a large black foam board at the grocery store and a silver sharpe.  I had to carefully map out the planets as Alex’s parents and grandparents all have major science backgrounds!

For the cake, I used my good ole Betty Crocker Bake n’ Fill pan that’s shaped like a half-moon.  I simply iced the cake with yellow frosting and I used tie dyed fruit roll ups to resemble flames on the burning sun.  I went on-line and found images of the planets and duplicated them on round butter cookies with icing, more fruit roll ups and chocolate.  Mercury has the Hershey’s Air Delight crumbled on the top as it looks like moon rock, only brown.  (and quite tasty) Saturn was my fav.  Using my warm hands, I squished yellow fruit roll up into a strip and trimmed it into an even long strip with my pizza cutter.  To keep everything in place I used a dollop of frosting as glue.

I had to throw in a couple of comets and asteroids….  You can see that there wasn’t much cake so I made a couple dozen chocolate cupcakes with the assorted planet colors.  Then, how to write happy birthday??  I stood in the kitchen staring at my creation for a bit and thought I’d ice more cookies and write on the cookies.  Cute huh?

Most importantly, the birthday boy was happy!  Happy Birthday Alex!!

Have a wonderful day!

Angie

Best Carrot Cake With Cream Cheese Frosting…..

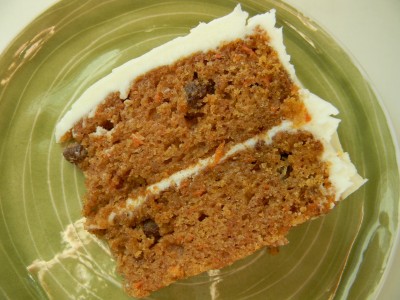
This is the most moist and delicious carrot cake you’ll ever taste!  This has just the right amount of texture.  It’s very moist and slightly dense and is amazing with cream cheese frosting!  I do not enjoy carrot cake that is loaded with thick, grated carrots and too many nuts and raisins.   Too chewy for my taste.  This recipe called for carrot baby food and crushed pineapple.  I’ve made a couple of revisions.  I pureed a 14 oz. can of sliced carrots and omitted crushed pineapple.  I added finely shredded carrots and a small amount of raisins.    Feel free to add finely chopped nuts and more raisins if you wish.   Simply irresistible!
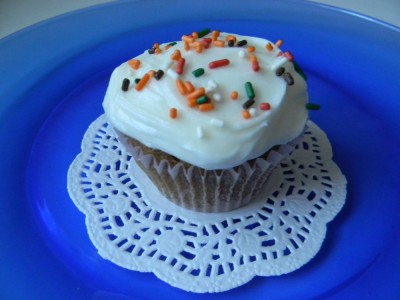
 As with any other cake recipe, you can make cupcakes.  The recipe will make approximately 2 1/2 dozen.  The upside to cupcakes is they take less than half the time to bake and much less time to cool.  They’re easy to serve, and they’re the perfect portion.  Top with sprinkles, who doesn’t love sprinkles???

Best Carrot Cake With Cream Cheese Frosting

2 1/4 cup all purpose flour
1 3/4 cup sugar
2 teaspoons cinnamon
1 teaspoon salt
1 teaspoon baking powder
1 teaspoon baking soda
1/4 cup raisins (optional)
1/4 cup finely chopped walnuts (optional)
1-14 ounce can pureed carrots or 14 ounces carrot baby food
1 cup oil
4 eggs
1 large carrot, peeled and finely grated (3/4 to 1 cup)

1)  Preheat the oven to 35o’.  Coat 2-9″ round baking pans with Pam cooking spray for baking or 9 x 13″ baking pan.  In medium size bowl combine all dry ingredients, raisins and nuts if you’re using.
2)  In large mixing bowl  add the pureed carrots through the grated carrot, mix to blend.
3)  Make a well in the center of the dry ingredients and add the wet all at once.  Mix until all dry ingredients are incorporated, do not over mix.
4)  Pour into baking pans.  For the two 9″ round pans bake 30-35 minutes.  For the 9 x 13″ bake for 45 minutes.  For cupcakes, spray the paper liners with cooking spray and bake for 18-20 minutes.  Test for doneness with a toothpick.   Cool completely.

Cream Cheese Frosting

1 8 ounce softened cream cheese
4 ounces softened butter (one stick)
1 teaspoon vanilla
3 cups powdered sugar
milk as needed

1)  With an electric mixer, beat the cream cheese and butter until creamy.  Add the vanilla and the powdered sugar.  Mix on the lowest speed of the mixer and add milk 1 teaspoon at a time to get a smooth spreading consistency.
2)  Ice the cake generously with the frosting.  Refrigerate until ready to serve and refrigerate leftovers (if any!)

Enjoy!

Angie


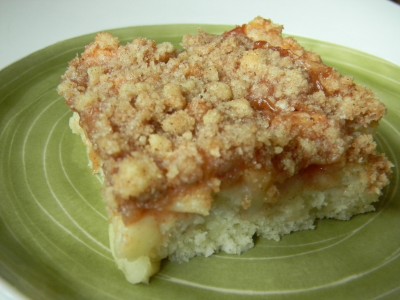
Apple Cinnamon Streusel Coffee Cake…..

One of my fondest childhood memories is walking home from school and smelling apples and cinnamon in the air.  It was then that we broke out into a full sprint for home.  The smells were always coming from our house!  My Mom made some of the most delicious goodies!    I always wanted to be like my Mom.

I think it’s interesting how popular cinnamon scented candles are these days.  I found it funny that when I first met my husband he had many of these candles in his house.  I remember thinking how much he’d enjoy my homemade apple pie or cinnamon rolls.    To this day anything I make that has cinnamon in it drives my people crazy!

Try this amazing apple cinnamon delight.  There are a few steps involved.  Make the apples and the streusel a day in advance if you like.

Apple Cinnamon Streusel Coffee Cake

For the apples:
3-4 small tart apples such as Johnathon or Granny Smith, peeled and cut into 1/4″ pieces
1/2 cup sugar
1 tablespoon flour
1/2 teaspoon cinnamon
3 tablespoons lemon juice
1/2 cup water

For the streusel:
3/4 cup sugar
1/2 cup flour
a pinch of salt
1 teaspoon cinnamon
5 tablespoons room temperature butter

For the cake:
2 cups all purpose flour
1/2 cup sugar
1 tablespoon baking powder
1 teaspoons salt
4 tablespoons melted unsalted butter
1 egg, slightly beaten
1 1/3 cup milk

1)  For the apples.  Place the prepared apples into a medium size sauce pan and add the sugar, flour, cinnamon.  Mix to evenly coat the apples.  Add the lemon juice and water.  Cook over medium-low heat for 8-10 minutes, stirring often to prevent sticking.  Add a little more water if it’s too thick.  Remove from heat and set aside or refrigerate if using the next day.
2)  For the streusel.  Add all ingredients into a small mixing bowl and blend together using your fingers until you get a nice crumbly mixture.  Refrigerate in an air tight container if using the next day.  Otherwise, set aside.
3)  For the cake.  Preheat the oven to 350′.  Generously coat a 9×13″ baking pan with cooking spray and set aside.  Add the flour, sugar, baking powder and salt to a large mixing bowl.  Stir to blend.  Make a well in the center of the ingredients.
4)  Add all of the wet ingredients into the well.  Mix until the dry ingredients are incorporated, do not over mix.
5)  Pour the batter into the prepared baking pan.  Evenly top with the cooked apple mixture.  Top evenly with the streusel topping.  Bake for 30-35 minutes.  A toothpick should come out clean.  Allow to cool for at least 15 minutes before serving.  Cover and refrigerate leftovers.  Makes 12 servings.

Enjoy!

Angie

Fresh Pumpkin…..

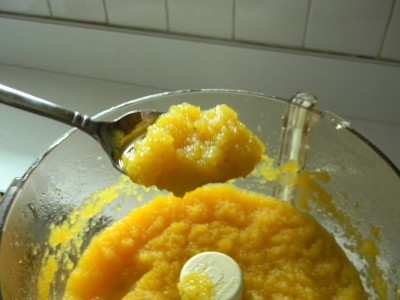
My Mom used to cook regular old pumpkins to make pies and baked goods so I decided to do the same.  You do not need “pie pumpkins” specifically.  I cooked one large 12 lb. (approximately) and got roughly 24 cups of pureed pumpkin.  That’s equivalent to about 12 cans of store bought Libby’s pumpkin at $2.99/can.  So I’ve saved $35.88 simply by cooking one of our uncarved Halloween decorations,  I LOVE that!

The process is quite simple.  You will need a food processor.  My Mom tried using a blender but it was too thick to completely puree.

1)  Cut the pumpkin in half.  Scoop out all of the seeds and connective stuff.
2)  Place cut side down on a large cookie sheet with sides.  I added water to the bottom of the pan as when I originally started roasting the pumpkin I could hear sizzling.  I did not want the edges to become browned or caramelized so I added just enough water to cover the bottom of the pan.
3)  Roast in a 350′ oven.  I cannot tell you exactly how long to bake as it depends on the size of the pumpkin.  You must bake it until the flesh is very soft.  This took a good amount of time for the huge pumpkin I roasted.   It took a little over an hour and a half.
4)  Remove the pumpkin from the oven and carefully flip it over to release the steam/heat.
5)  Scoop out the flesh and put it right into the food processor.  Reserve some of that cooking liquid from the bottom of the pan.
6)  Puree in the food processor, add a small amount of water if it’s too thick.
7)  To freeze, first label and date quart size freezer bags.  Remove as much air as possible from each bag.  Freeze and use in recipes like Whole Wheat Pumpkin Spice Bread, Traditional Pumpkin Pie, or one of my absolute favorites Pumpkin Squares with Cream Cheese Frosting.  As good as these recipes are with canned store bought pumpkin, they’re even better with freshly made pumpkin.

Have a great week!

Angie


Pumpkin Cupcakes Anyone?

What’s not to love about a cupcake????  They’re the perfect size, ok, maybe you’ll have to have two!  Perfect for casual parties, no serving plates or forks necessary.  There is something to be said about “mini” anything.  So cute and appetizing.  Make these from my recipe for Pumpkin Squares with Cream Cheese Frosting and simply bake in cupcake pans.  This one bowl cake recipe goes together in minutes.  The recipe will make 2 1/2 dozen cupcakes.  Bake at 350′ for 17 minutes.  Be sure to spray the inside of the cupcake liners with cooking spray and fill each liner to 2/3 full.  Cupcakes cool much faster than a large bar pan so they can be enjoyed much quicker!  So easy and so much better than any store bought cupcake.

Moist and tender cinnamon pumpkin cake with cream cheese frosting…..that’s what I’m talkin’ about! 

Angie