Roasted Delicata Squash/Great Thanksgiving Side Dish!

012

Recently I discovered that I’m in love with delicata squash.  My friend and excellent cook Barbara Westerman suggested I try it.  WOW,  she was right!   While in the squash family, it has a taste entirely of its own.  In addition to the taste, there are several reasons why I absolutely love it.  First, there is no peeling involved, the skin edible, it’s tender and delicious.  Secondly, it’s easy to cut in half, no power tools needed to break into it.  Thirdly,  preparation is incredibly simple.  Lastly, it’s beautiful on the plate, it would be a lovely side dish to serve with roasted turkey,  roasted pork, chicken or fish.

The squash I bought was about 7-9″ in length and 3″ across.  Like other squash, the larger and older it gets,  flavor is lost and it’s less tender, so buy this size or smaller.
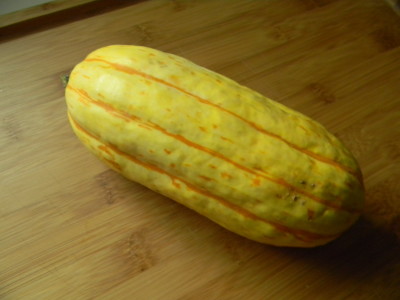
006Look for firm skin with no blemishes.  The first step is the most critical.  Wash it thoroughly, rubbing the skin with your hands or with a vegetable brush under running water.  It grows on the ground and a little sand will ruin your whole experience.

007

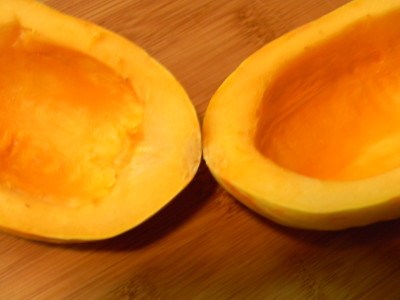
Preheat the oven to 350′.  Cut the ends off, slice in half and remove the seeds.  Slice into 1/4″ slices.010Drizzle with olive oil and season with salt and pepper.  For a twist, you could season with chili powder or smoked paprika.
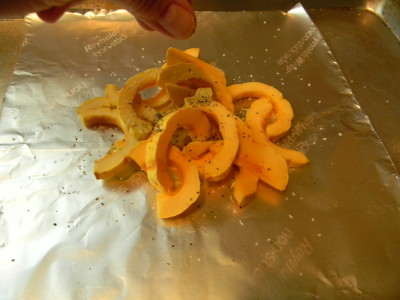
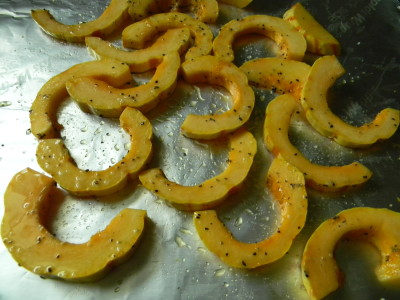
011Toss to coat evenly and spread over a foil lined cookie sheet.  I like Reynold’s non stick foil.  Roast for 15-20 minutes.
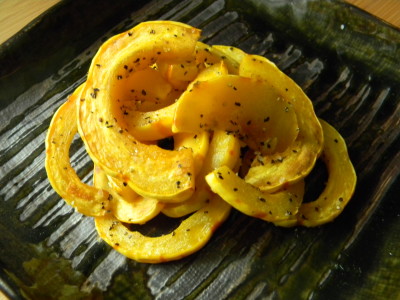
012Simple.  Delicious. Healthy.  Beautiful.

Enjoy!

Angie

PS-Can be made ahead and re-warmed.  Enjoy cold as a healthy and delicious snack!
Frozen Artichoke Tip and Artichoke and Fennel Salad…..

I’ve fallen in love with Trader Joe’s frozen artichokes.  I love that you only pay for artichokes and not the packing liquid as you do with the canned.

The first time I used them I tossed them with olive oil, lemon juice, garlic and salt & pepper.  I roasted them (when my oven was working!) at 375′ for about 20 minutes.  Delish!  The key ingredient here in terms of the brightness of the artichoke was the addition of the lemon (or acid.)   You do not have this issue with the canned artichokes because they add citric acid to the canning liquid. 

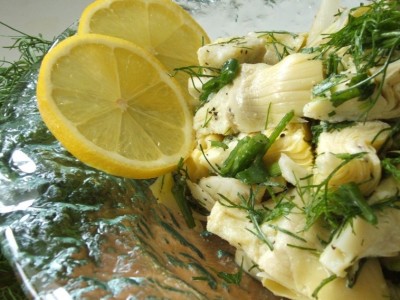
This spring like artichoke and fennel salad is really good alongside any fish or chicken dish.   Of course, I used the frozen artichokes in my salad.  When I steamed them in water and a little salt, they came out very gray.  Interestingly, I tossed them with the lemon dressing and poof, they returned to a more appetizing state.   Clearly acid is required in the cooking process which I found interesting that directions on the package did not mention this.

Steamed Frozen Artichokes

Rinse and drain a 12 ounce package of frozen artichokes.  Put into a pot with 1 tablespoon lemon juice and 3 tablespoons of water.  Steam covered over low heat until most of the water has evaporated, about 6-8 minutes.  Drain well and cool if you’re using in the above salad.   Great in any salad or pasta.  Roast with chicken or add to soups.   The possiblities are endless!

Artichoke and Fennel Salad with Lemon Dressing

2 fresh fennel bulbs with fronds
2 cans quartered artichokes, drained or two packages frozen, steamed, rinsed and cooled
3 tablespoons parsley, washed and chopped
3 green onions, rinsed and thinly sliced
3 tablespoons olive oil
2 tablespoons fresh or bottled lemon juice
2 cloves fresh garlic, crushed
½ teaspoon salt
¼ teaspoon pepper

1) Rinse thoroughly.  Trim off the bottom of the bulb and leave about 1″ of the fronds, slice thinly, place in a large bowl. Remove the tender frawns, the deep green portion, and chop coarsely. (Do not use the celery looking stalks, they are very tough, they would be great in soup.) Add parsley and green onions.
2) In a small bowl, whisk the olive oil through the pepper. Pour over vegetables and toss gently. Taste, add additional salt and pepper if necessary.

Have a great day!

Angie

Homemade Challah, Step by Step Instruction….

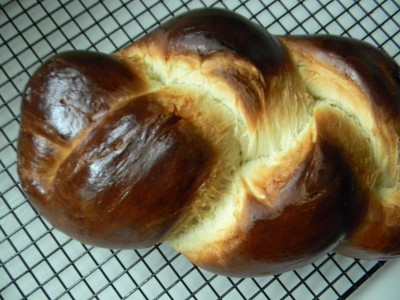
I loved everything about making this bread.  Loved the simple ingredients, the hand feel, and the smell in my house.  Next time I will double or triple the recipe.  Imagine french toast or homemade bread pudding made out of this bread…OH MY!

The dough did take quite some time for the first rising, about 2 hours.  I used regular yeast but you could use the rapid rise variety of yeast and you might be able to trim off 30-60 minutes here.  The dough itself is very dense, very lovely.  I found that when I kneaded the bread I virtually used no extra flour as I have in the past with other kinds of bread.

My friend gave me the ingredient list for this bread and she makes hers in a bread machine. I decided to make it the way I make most other yeast breads only I kneaded the dough a bit longer.  I got the same exact result.  The key here, I believe, is using bread flour as opposed to all purpose.  Bread flour has more gluten than all purpose flour.  This makes for a really nice, chewy yet tender texture.  So, so good.

Let’s get started….

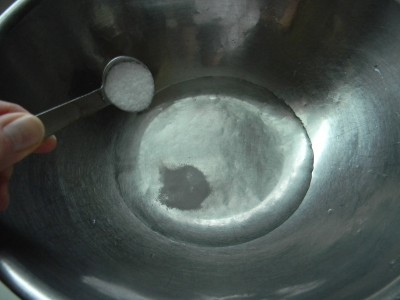
We begin with 3/4 cup of warm water.  (About the same temperature you’d make a bottle for a baby.)  Add  1 1/2 teaspoons of salt.  In a separate microwaveable bowl, melt 3 tablespoons of butter, set aside to cool.
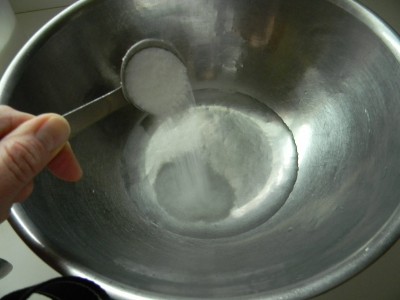
Add 4 tablespoons of sugar.
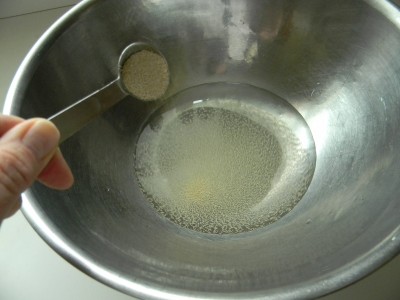
Add 2 teaspoons of dry yeast.
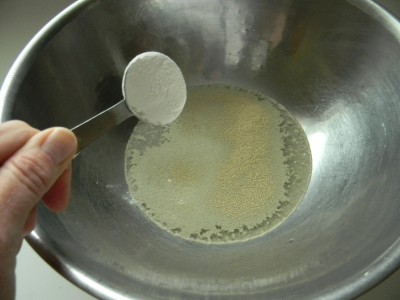
Measure out 3 cups of flour into a small bowl.  Take out one tablespoon and add it here.
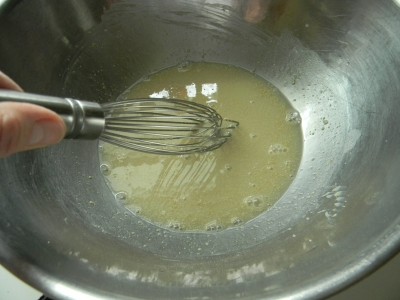
Whisk well to blend.  Allow it to sit for 10 minutes.
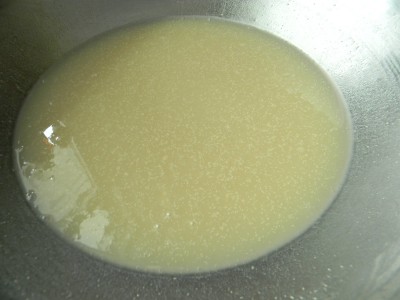
The yeast mixture should look like this.  If you look  closely, you can see bubbles.  This is the yeast coming to life.
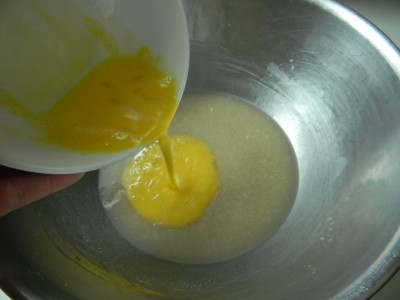
Add 2 large beaten eggs.
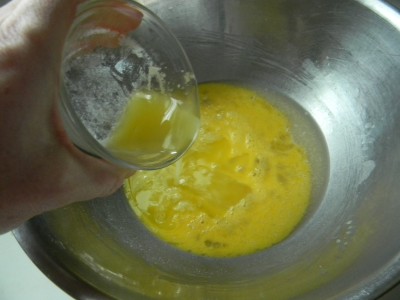
Add the cooled melted butter.  Whisk to blend.
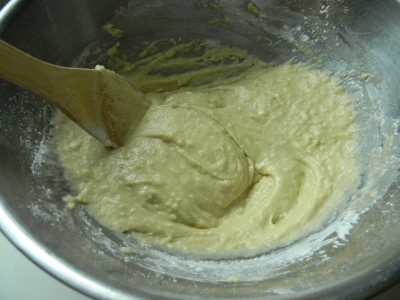
Next add half of the bread flour, beat well until smooth.
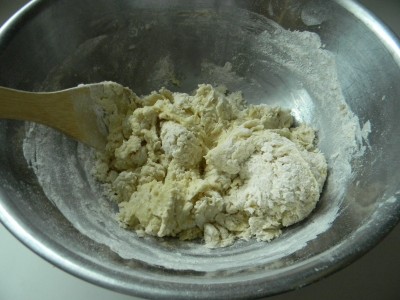
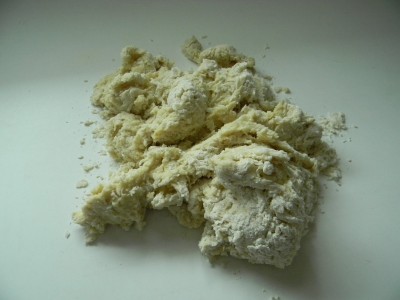
Add the rest of the flour and mix until it looks like this.
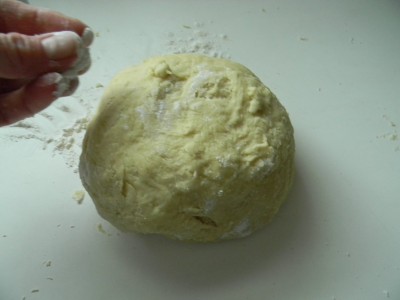
Dump the dough onto the counter and bring together with your hands to form a ball.
It should look like this.  I added the smallest amount of flour because it was sticking to the counter slightly.  Be careful not to add too much extra flour.  I found that I did not need any additional flour after this.  Knead the dough for 5-7 minutes.
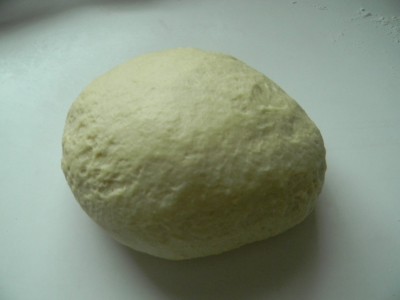
It should look like this when you’re done kneading.  The dough should be smooth and elastic.
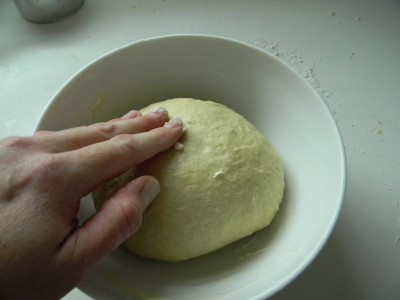
Grease the inside of a small bowl with butter, plop the dough in and coat the dough with a thin layer of butter as well.
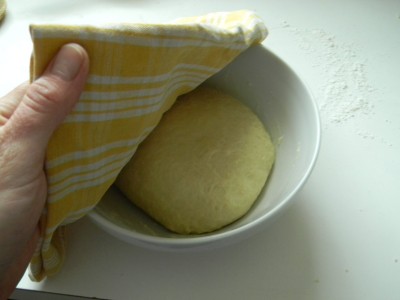
Now cover your little ball of dough with a clean cloth or kitchen towel.  Time to put it to rest in a nice warm place free of drafts.  If you have a gas stove, simply turn on the light in the oven and place the bowl on the center rack.  The pilot light and the light will provide the dough with a nice warm place to rise.  Allow it to rise until double in  bulk.   It took my dough about 2 hours on the first rise.  (If you have an electric oven, turn the heat on 300′ for one minute.  Turn off the heat and turn on the oven light.  It is now perfect for proofing the dough)
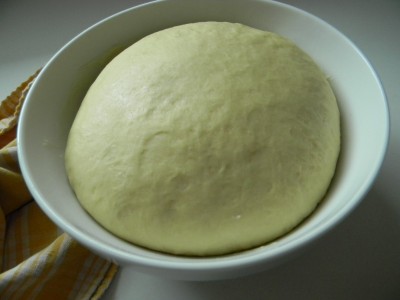
The dough has doubled in bulk, it’s ready to be shaped.
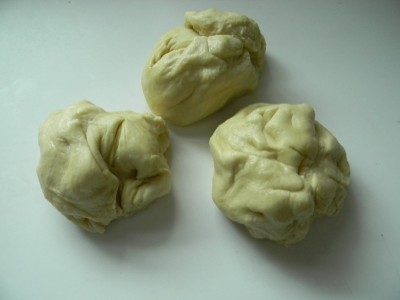
Punch the dough down and divide into 3 equal balls.
Roll each ball into 12″ sticks as shown above.  Pinch them together at the top.
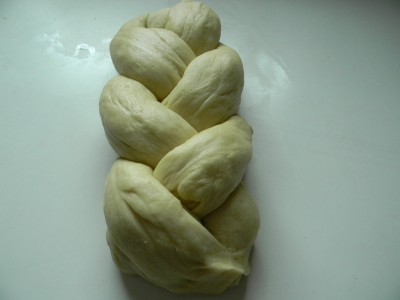
Now braid and pinch the bottom together.
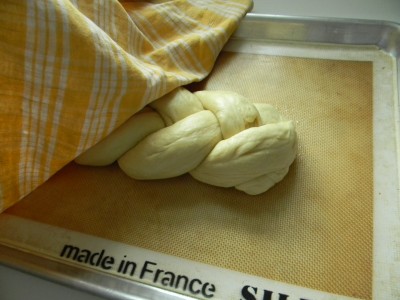
Place the shaped bread on a baking mat or parchment paper.  Cover the shaped bread with the clean towel.   The bread should just about double in size, it should take about 40 minutes.   Preheat the oven to 375′.
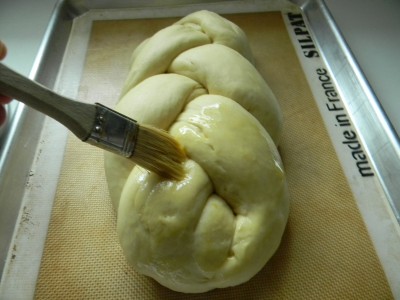
Beat an egg with a tablespoon of water and brush the oven ready bread well with the egg wash.   Bake for 25-27 minutes.  when you flick it with your finger and it has a hollow sound, it’s done.  Remove from the oven onto a cooling rack.  Enjoy it warm by tearing off chunks and slather with softened butter.   Delish!

Homemade Challah Bread

3 cups bread flour
3/4 cup water
1 1/4 teaspoon salt
2 teaspoons yeast
4 tablespoons sugar
2 large eggs
3 Tbsp butter, cut up

1 egg, 1 tablespoon of water

1)  Measure out 3 cups of bread flour in a small bowl.  In a large mixing bowl, add water, salt, sugar, yeast, and 1 tablespoon of flour out of the 3 cups of measured flour.  Whisk well to blend.  Allow to sit for 10 minutes.
2)  Melt the butter in a small microwaveable dish, set aside to cool.  Beat two eggs in a small bowl.
3)  Add the eggs and the cooled melted butter to the yeast mixture, whisk to blend.
4)   Add half of the bread flour and mix well until there are no lumps.
5)  Add the rest of the flour and mix.  Dump onto the counter and bring together into a ball.  Add a small amount of flour to the counter if the dough ball is a little sticky.  Knead for 5-7 minutes.  The dough should be elastic and smooth.
6)  Grease a medium size bowl with butter, add the dough, lightly grease the top of the dough.  Cover with a clean towel and allow to rise in a warm, draft free place.
7)  When the dough has risen to double it’s size, punch down the dough and divide into 3 equal pieces.  Shape into three 12″ logs and pinch together at the top.  Braid and pinch together at the bottom.   Cover with a clean towel and allow to rise for about 40 minutes.  Preheat the oven to 375″.
8)  Beat the egg with water.  Using a pastry brush, apply the egg wash liberally to the shaped and oven ready loaf.
9)  Bake for 25-27 minutes.  Enjoy warm by tearing off pieces with room temperature butter.  Store leftovers, if any, in a sealed plastic zip bag.  Makes one large loaf.

Thank you for sharing your recipe Genevieve!

Angie


How To Defrost A Frozen Turkey Safely…..

We’re down to the wire.  Thanksgiving is only one day away.   It takes several days to defrost a large turkey in the refrigerator.  Never defrost a turkey at room temperature.  If your turkey is frozen, this is the safest and quickest way to defrost.    With this method, there are two things you MUST have. 

1)  An accurate instant read thermometer.

2)  A large enough pot to completely submerge the turkey in water.

To defrost a frozen turkey completely submerge it in water.  Allow 30 minutes per pound.  So if you’ve got a 10 lb. turkey at 30 minutes per pound comes out to about 5 hours of defrosting.  If you’re not cooking it right away, put it right back into the refrigerator.  Cook within a day of defrosting.  Optimum water temperature should be 41′ or below.  Check the temperature of the water with an instant read thermometer every hour making sure not to touch the side of the bowl or the turkey.  If the temperature reads above 41′ simply change the water and replace with cold tap water. 

Email me if you have questions.

Happy cooking!

Angie

How To Make Simple Thanksgiving Gravy…..

Ok, the clock is ticking!  The bird is out of the oven and you’ve got your sides are now in the oven to warm…. One last and extremely important detail, the gravy.  The best thickener to use when making turkey gravy is cornstarch.   You get a smooth and luscious  gravy without lumps.  Before we get to making the gravy, let’s discuss the very first step.  The drippings.

The best way to extract those lovely pan juices from the pan is with a turkey baster.  Remove as much liquid as possible, I’d say to go for 4+ cups if you can.  If you’ve made a large bird you will need lots of gravy.  If you come up short you can always make up the difference with chicken stock.  You’re in a bit of a hurry but try not to skip this step.  There are three good ways to do this.  (if you do not remove the fat the gravy will still thicken fine but there will be an unappetizing layer of fat over the top)

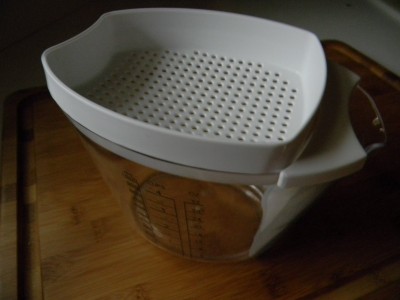
1)  A fat separator.  This is the simplest way of doing it.  Simply pour all of the liquid into the cup and let it sit for a minute or two.  You will see that all of the fat rises to the top.  When you pour the de-fatted liquid out through the spout, liquid comes out from the bottom where there is no fat.  You stop pouring when you get close to the fat layer.  This is the best one I’ve seen out there.  It’s by Pampered Chef and it has a four cup capacity.  You can see that there is a strainer on the top if you wish to remove any bits of food debris.  It’s awesome!  If you don’t have this type of gadget, read on.

2)  Believe it or not a heavy duty zip bag would work fine too.  Carefully pour the liquid into the bag, wait a minute or so until the fat rises to the top.  Carefully snip off a SMALL corner of the bag and drain the broth part of the liquid into a medium size sauce pan.  You must be quick as you don’t want the fat portion of the liquid to run through.

3)  A turkey baster.  I’ve done this on many occasions where I have way more than 4 cups of liquid I need to de-fat.  Pour all of the liquid into a large clear bowl, let it sit for a minute or so.  Using your turkey baster, extract liquid from the very bottom of the bowl.   Of course, you’ll want to stop when you get to the fat layer.  I found this to be very effective as well.

Now we’re ready to make gravy.

Simple Thanksgiving Gravy

4 cups turkey broth minus the fat (add chicken stock to make up the difference if necessary)
1/2 cup cold water
4 tablespoons cornstarch
salt to taste

1)  Pour the turkey broth into a medium size sauce pan.
2)  Add the cornstarch to 1/2 cup of water.  Mix well until the cornstarch is completely dissolved.  Pour it right into the turkey liquid.  Cook over medium heat and stir constantly until it comes to a boil. ( Enlist a guest to do this!) Once you see bubbles, it’s done, remove from heat immediately.  Taste it to see if you need to add salt.  Perfect, luscious gravy.

So the rule of thumb basically is this:

2 cups liquid (broth) + 1/4 cup cold water + 2 tablespoons cornstarch

*if you mix the cold water with the cornstarch ahead of time, you’ll need to give it another stir before adding to the turkey liquid as the cornstarch will settle to the bottom.

YOU CAN DO IT!!!!

Email me if you have any questions!

Angie

Fresh Pumpkin…..

My Mom used to cook regular old pumpkins to make pies and baked goods so I decided to do the same.  You do not need “pie pumpkins” specifically.  I cooked one large 12 lb. (approximately) and got roughly 24 cups of pureed pumpkin.  That’s equivalent to about 12 cans of store bought Libby’s pumpkin at $2.99/can.  So I’ve saved $35.88 simply by cooking one of our uncarved Halloween decorations,  I LOVE that!

The process is quite simple.  You will need a food processor.  My Mom tried using a blender but it was too thick to completely puree.

1)  Cut the pumpkin in half.  Scoop out all of the seeds and connective stuff.
2)  Place cut side down on a large cookie sheet with sides.  I added water to the bottom of the pan as when I originally started roasting the pumpkin I could hear sizzling.  I did not want the edges to become browned or caramelized so I added just enough water to cover the bottom of the pan.
3)  Roast in a 350′ oven.  I cannot tell you exactly how long to bake as it depends on the size of the pumpkin.  You must bake it until the flesh is very soft.  This took a good amount of time for the huge pumpkin I roasted.   It took a little over an hour and a half.
4)  Remove the pumpkin from the oven and carefully flip it over to release the steam/heat.
5)  Scoop out the flesh and put it right into the food processor.  Reserve some of that cooking liquid from the bottom of the pan.
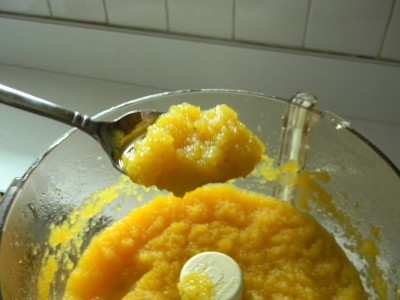
6)  Puree in the food processor, add a small amount of water if it’s too thick.
7)  To freeze, first label and date quart size freezer bags.  Remove as much air as possible from each bag.  Freeze and use in recipes like Whole Wheat Pumpkin Spice Bread, Traditional Pumpkin Pie, or one of my absolute favorites Pumpkin Squares with Cream Cheese Frosting.  As good as these recipes are with canned store bought pumpkin, they’re even better with freshly made pumpkin.

Have a great week!

Angie


Eggplant Parmesan With Fresh Mozzarella And Marinara Sauce…..

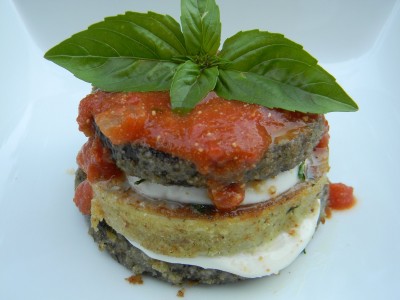
I’m crazy about eggplant.  This is my version of eggplant parmesan, only a little prettier.  I’ve coated white and purple eggplant with Italian bread crumbs and fresh grated parmesan, fried it in olive oil, and layered it with fresh mozzarella and topped it with fresh marinara sauce

Let’s begin…

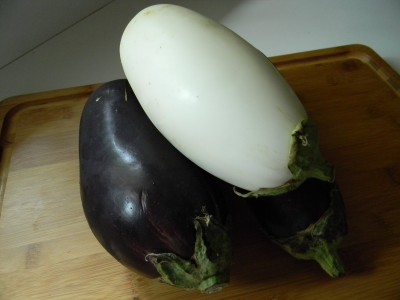
I came across white eggplant and was very intrigued, I had to buy it!  I did not notice a difference in taste between the white and the purple.  When buying eggplant, you’ll want to pick out eggplant that is firm and is free of bruises. 

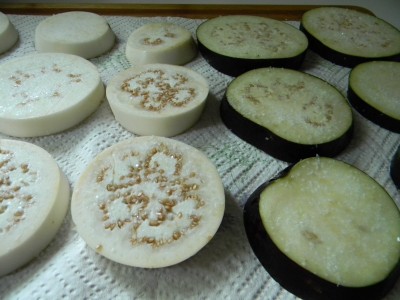
A must in the preparation of eggplant is to remove the bitterness and excess moisture by lightly salting it and allowing it to sit on paper towels for 20-30 minutes.  Blot off the liquid that accumulates with paper towel.  This will keep the eggplant from absorbing too much oil when cooking.

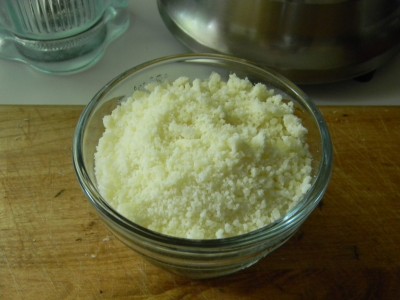
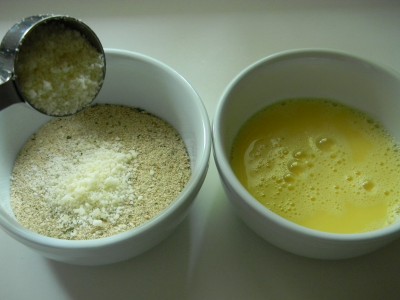
I LOVE parmigiano reggiano cheese.  It has a rich nutty flavor.  I buy it in a chunk and cut it into 1/2″ pieces, then into the blender for perfectly grated cheese.

Beat a couple of eggs in a bowl with a little water into one bowl, and Italian bread crumbs and parmigiano reggiano into the other.

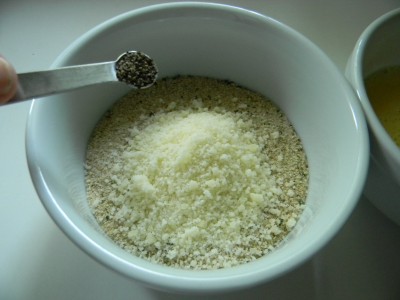
 Add 1/4 teaspoon of black pepper and mix well.

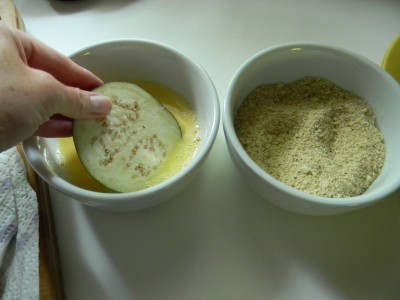
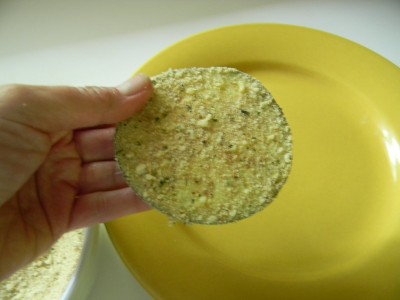
Dip the eggplant into the egg first, then into the bread crumb mixture, coat well.

Heat skillet over medium heat until very hot and add a couple of tablespoons of olive oil, swirel around the pan and add the eggplant, cook until nicely browned.

The eggplant is equally delicious plain!  Enjoy!

Eggplant Parmesan With Fresh Mozzarella and Marinara Sauce

2 medium size eggplant, sliced into 1/4″ rounds
salt
1 1/4 cup Italian bread crumbs
1/4 cup parmesano reggiano
1/4 teaspoon black pepper
2 eggs, beaten well
2 tablespoons water
Olive oil
8 ounces fresh mozzarella
2 cups Marinara sauce or your favorite bottled sauce

1)  Slice the eggplant in 1/4″ slices, lightly coat both sides of the eggplant with table salt and place on a layer of paper towel.  Allow to stand for about 30 minutes.  Blot the eggplant with paper towel to remove excess moisture.
2)  Combine the bread crumbs, parmigiano cheese, and black pepper in another dipping bowl.
3)  Beat the eggs and water in a dipping bowl.
4)  Dip the eggplant into the egg, then into the bread crumb mixture, coat well. 
5)  Heat a heavy skillet over medium heat until very hot.  Add enough olive oil to coat the pan.  Fry each piece of eggplant in olive oil until nicely browned.  You will have to add more olive oil to the pan with each batch.
6)  Layer thin slices of mozzarella cheese between the cooked eggplant.  Top with warm marinara sauce.  Garnish with a fresh sprig of basil. (optional)  Serve immediately.  Makes 8 servings.

Enjoy!

Angie

Perfect Boiled Eggs….

Hard boiled eggs.  Simple right?  Not necessarily.  Ever had them come out greenish?  Not very appetizing!  My mother-in-law Patricia told me how to make them and I’ve done it her way ever since.  It’s very simple and easy to remember.

Place your eggs in a medium size pan that has a tight fitting lid.  Cover the eggs with cold water.  (do not cover the pan with the lid just yet)  Bring to a full boil.  Remove from heat and immediately cover with the lid.  Set the timer for 11 minutes.  When timer goes off pour water into sink and run cold water over the eggs.  Break shells and remove.  Wha-la!

Perfect eggs.

Stay warm!
Angie

How to Re-Warm Mashed Potatoes…..

Hello everyone-

Mashed potatoes ARE one of those things you can make ahead for your holiday dinner.  Prepare them as you always do and refrigerate, preferably in a glass microwaveable dish.

I’ve tried many ways of doing this.  First, on the stove top.  It is difficult to warm potatoes in a pot over a flame without scorching the bottom.  Oven warming makes the potatoes a very strange consistency, not creamy like mashed potatoes should be.  While microwaving is not always the best warming option for many foods, I found it to be the best for mashed potatoes.

Twenty minutes before you want to serve, begin microwaving (on high) your potatoes, covered with a paper plate or paper towel for 2 minute increments.  Stir between.  You may need to add a little milk if they’re too thick.  Continue microwaving until they’re pipping hot.  If you have a huge amount of potatoes, divide them among smaller bowls.

I found this to be the best way to warm cold mashed potatoes.  Anything you can make ahead of time makes for a much less stressful holiday dinner.

Santa will soon be on his way! 

Angie

Step by Step Sunday Onion Braised Pot Roast…..

This is a family favorite.  Tender, succulent onion braised beef served with sour cream mashed potatoes and gravy.  Are you hungry yet?  Let’s begin…..for the pot roast you will need:

2 1/2-3 lbs. beef pot roast
salt & pepper
2 large onions
5 large cloves garlic
1 1/2  cups water
1 cup wine

Generously season what appears to be half a cow!  Cripes!  Anyway, this is a 3 lb. roast.  It makes for wonderful leftovers, so I recommend making more than you need.  Don’t worry about over seasoning, especially with this amount….

Next, heat a large dutch oven or pan that can go into the oven with a lid over medium high heat.  When hot, add 2 tablespoons of olive oil and put the seasoned meat into the pan.  Cook about 7-10 minutes per side to caramelize the beef.

While the meat is browning, thinly slice a couple of large sweet onions…..

When the meat is nicely browned, remove the meat from the pan onto a platter.  Set aside.  Add onions to the pan, stir often.  Add a couple of tablespoons of water to the pan to prevent scorching.  Cook for about 10 minutes, or until soft.   Can you imagine how my house is smelling right about now?????
Of course, we must have plenty of garlic.  Slice 5 large cloves and add to the onions….
Cook for about 2 minutes.  Oh yes, time to preheat the oven to 325’…..

Push the onions off to the side and add the meat with the juices on the plate back to the pan.  Cover the roast with the onions and garlic.  Time for my favorite braising liquid…..

Add 1 1/2 cups of water and 1 cup of wine.  Oh look, a glass for me…how convenient! 
Cover with the lid and place into the oven….oh wait, the meat takes 3 hours, we’re eating at 6:30…better wait a bit!
Cook for 3 hours.  This would be a good time to prep your potatoes.  Peel your potatoes and put them into a large pot, add salt and cover with water.  I like to turn the heat on about 1 1/2 hours before the meat is done.  That way I can mash them and have them ready to go when the meat comes out of the oven.  My house smells unbelievable! 
The meat is done….it is so tender that it’s falling apart…..the epitome of comfort!
For the gravy…..
It is best to remove as much of the fat as possible from the drippings.  Put the roast onto a serving platter.  Remove as many of the onions as you can and put on top of the roast.  Cover with foil to keep warm.  If you have one of those fat separators, use it.  If you don’t put all of the liquid into a 2 cup clear measure.  Using your turkey baster, put it into the bottom of the cup with the juices and suck out just the liquid from the bottom, leaving the fat layer on top.  Put this liquid into a medium sauce pan.  You’ll want about 1 1/2 cups of broth, if you don’t have that much, just add water to get it to 1 1/2 cups.  In a liquid measuring cup, measure 1/2 cup of water and add 2 tablespoons of cornstarch.  Mix well and add to the broth mixture.  Turn on the heat to medium.  Heat until nicely thickened and give it a taste.  Season with salt and pepper if necessary.
I love this savory rich meal with a lovely cabbage salad.  Try my Red Cabbage and Avocado Salad with Peas.  The tart of the cider vinegar is fabulous with the roast.  Enjoy!